
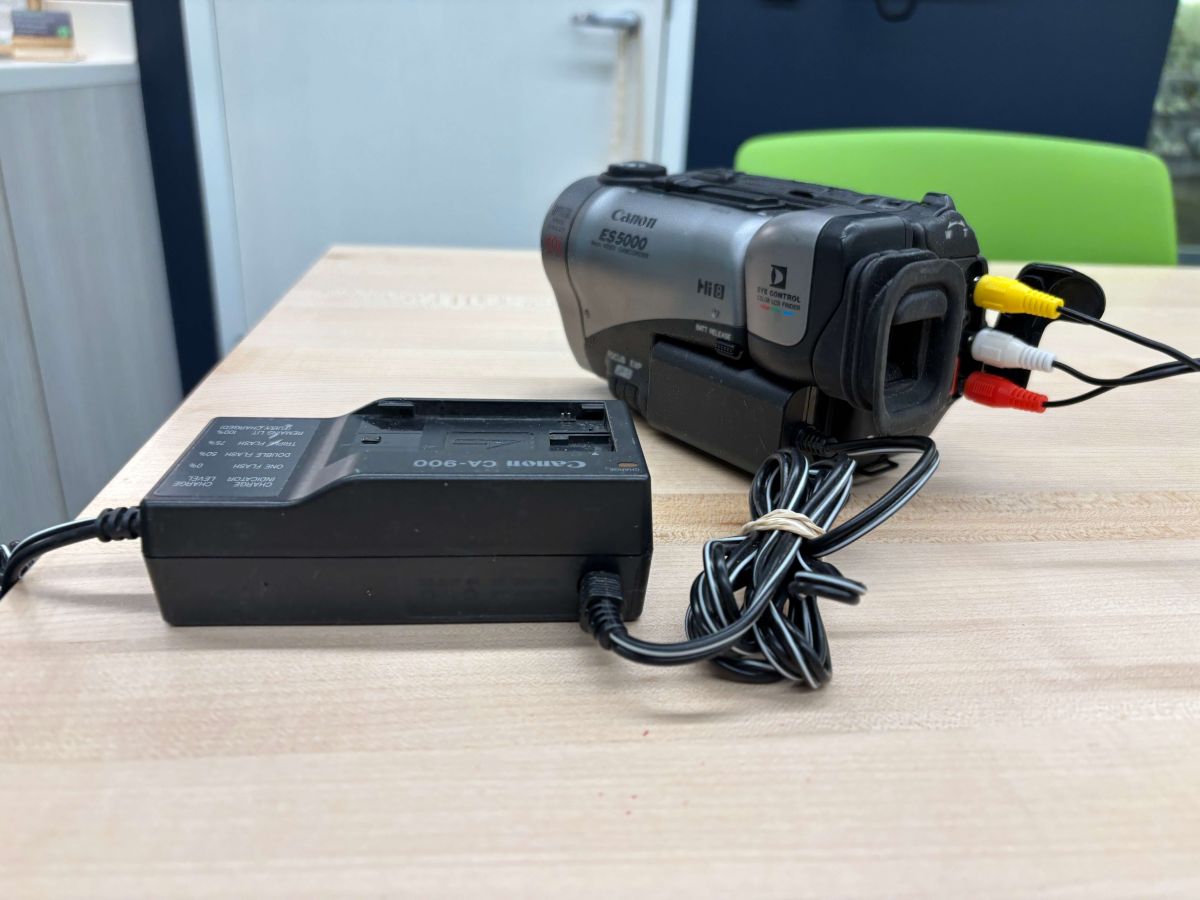
Contents
- Hi8 camcorder
- DC battery attachment (plugs into the camcorder)
- DC battery adapter (plugs into the outlet)
- Wolverine recorder
- Wolverine power supply
- 3-color RCA cables
What You Need
In order to save your digital copy, you'll need one of the following:
- USB Drive
- SD Card
- Blank, writeable DVD
Instructions
Set up the Camcorder
- Slide the battery attachment into the battery slot on the left side of the camera.
- Plug the battery attachment cord into the “DC coupler” port on the adapter.
- Plug the adapter into an outlet.
NOTE: When you’re done recording, make sure to turn the camcorder OFF before you unplug the camcorder from a power source. The camcorder must be connected to power the entire time it is in use.
Set up the Wolverine
- Plug the power cord into the yellow Wolverine and then plug it into an outlet.
- Press and hold the Power button on the bottom left of the Wolverine to turn it on.
- Select where you want to save your recording:
- To save on a flash drive: select “Video > USB/Card”
- Insert the flash drive on the left side
- To save on an SD card: select “Video > USB/Card”
- Insert the SD card on the right side
- To burn directly onto a DVD: select “Video/USB/Card > DVD”
- To load DVD, press the “Eject” button at the bottom right of the Wolverine device
- To save on a flash drive: select “Video > USB/Card”
Record
- Match the three colors of the RCA cable with the colorful ports on the Wolverine and plug them in.
- Open the back panel of the camcorder (above the red Standby button on the back) to reveal the back ports of the camcorder.
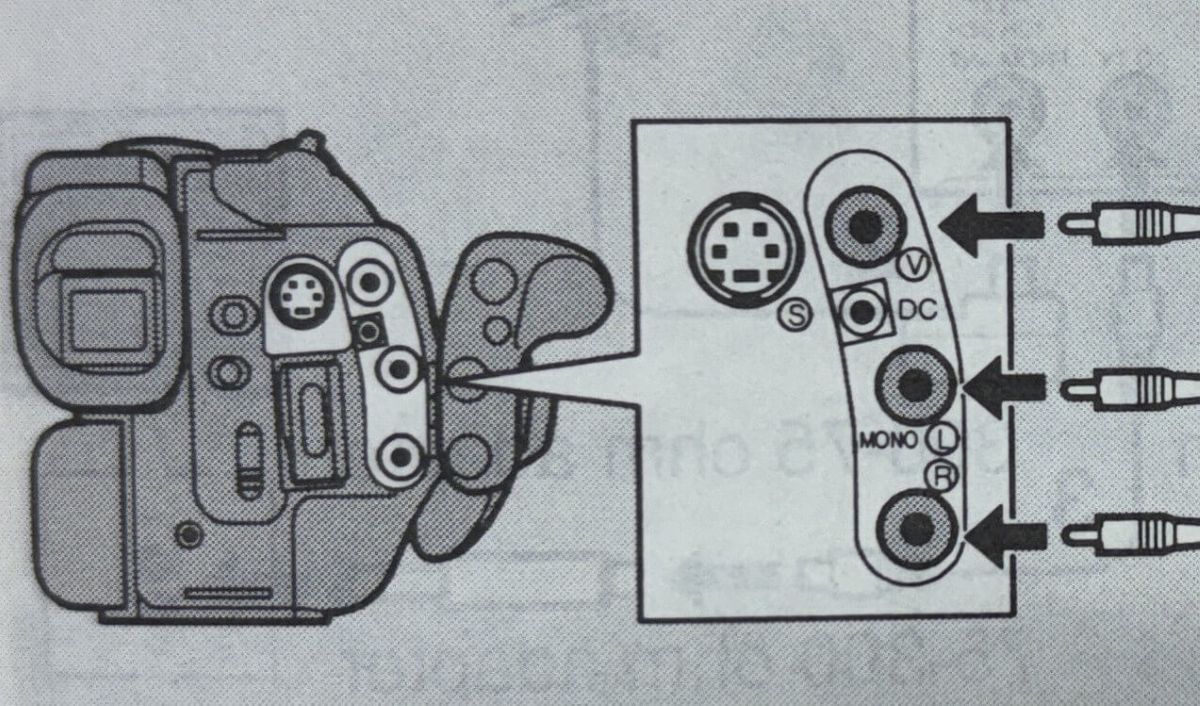
- Match and plug in the three colors of the RCA cables in the back ports.
- On the top of the camcorder, change the dial from “OFF” to “VCR” by pushing in the middle button and turning the dial. A red light should turn on next to it.
- To insert a tape, slide the OPEN switch.
- Push the small green Eject button inside and wait for the tape compartment to open.
- Insert the cassette gently with the window facing out.
- Press the PUSH mark to the left until it clicks in and wait for the compartment to close.
- Click the cover back into place, and then pop open the top to reveal the playback buttons.
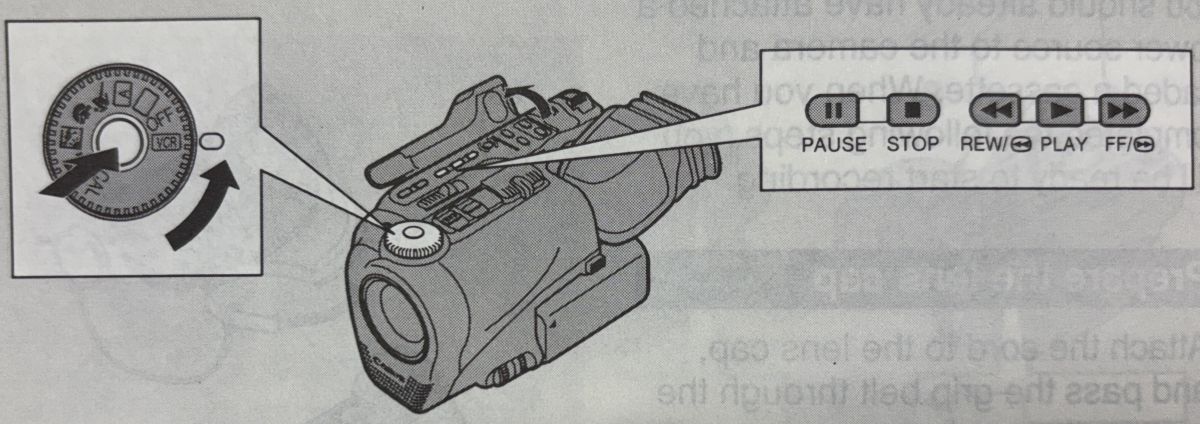
- Rewind the tape, if necessary.
- Press “Record” on the Wolverine and press “Play” on the camcorder at the same time.
- When the recording is complete, push the “Stop” button on both the Wolverine and on the camcorder.
Finish or Start Over
- Rewind your tape(s), if you would like.
- To eject the tape, slide the OPEN switch.
- Push the small green Eject button inside and wait for the tape compartment to open.
- Gently pull the tape straight up.
- Press the PUSH mark to the left until the compartment clicks closed and the compartment will retract into the machine.
- Close the camcorder.
- If you have more Hi8 tapes to digitize, press the Return button repeatedly on the Wolverine to start over.
- Follow the previous steps to open and close the Hi8 camcorder’s cassette compartment and digitize them.
- Turn the dial on the top from VCR to OFF.
- Above the battery attachment, press and hold the BATT RELEASE button to slide it out and unplug from the adapter.
- Remove your SD card/USB/DVD from the Wolverine, then press and hold the Power button to turn it off.
If you have any questions, you can email Digital Services at DigitalServices@balibrary.org, or you can reach us by phone at 847-382-1300 ext. 2200.