
Bring home a fun new project! Sign up from our Library Calendar and pick up a kit through our Parking Lot Pickup service between January 11-22.
Toddler & PreK: DIY Activity Dice
Color and create your own movement dice game, then have fun rolling it again and again! Register for the January Toddler & PreK Take-and-Make Kit here.
Your kit contains:
- 1 cube-shaped box
- Velcro dots in two envelopes - keep them separated!
- Labels for the dice
- Con-Tact film
- Crayons
Instructions:
1. Assemble the cube box as your dice.
2. Have your child color the 6 Animal Action labels, 6 Song labels, and 6 blank labels. Decide together what the blank set will be. It could be types of dances, colors to seek and find, sounds to make - it's up to you!
3. Peel the backing off the Con-Tact film, then cover the front of the decorated labels to laminate them.
4. Place the 72 Velcro dots on the four corners of the back of each label. Place them as close to the corners as you can to ensure that the labels will line up. Take care to use only the Velcro from the envelope marked for the labels. The colored sticker on the envelope does not matter.
5. Place the 24 Velcro dots for the dice on the four corners of each side. Take care to use only the Velcro from the envelope marked for the dice. The colored sticker on the envelope does not matter. Some of the box's sides will be a little longer than the square labels, so it's okay if the Velcro are not precisely lined up with the corners.
6. Stick one set of labels to all sides of the dice, roll, play, switch, and repeat!
Show us what you created! Send us pictures at youthservices@balibrary.org.
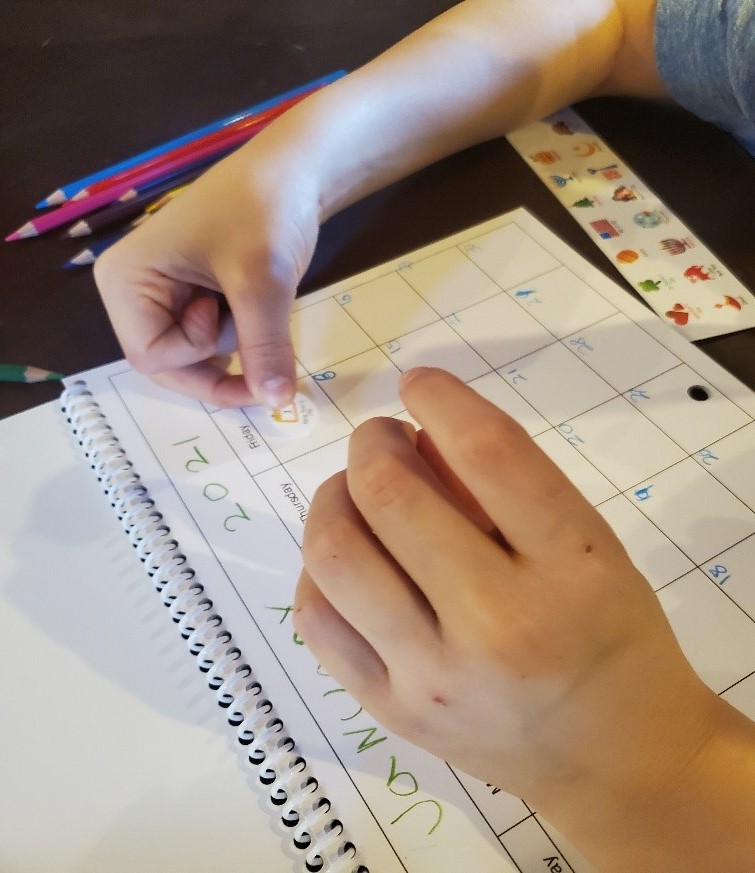
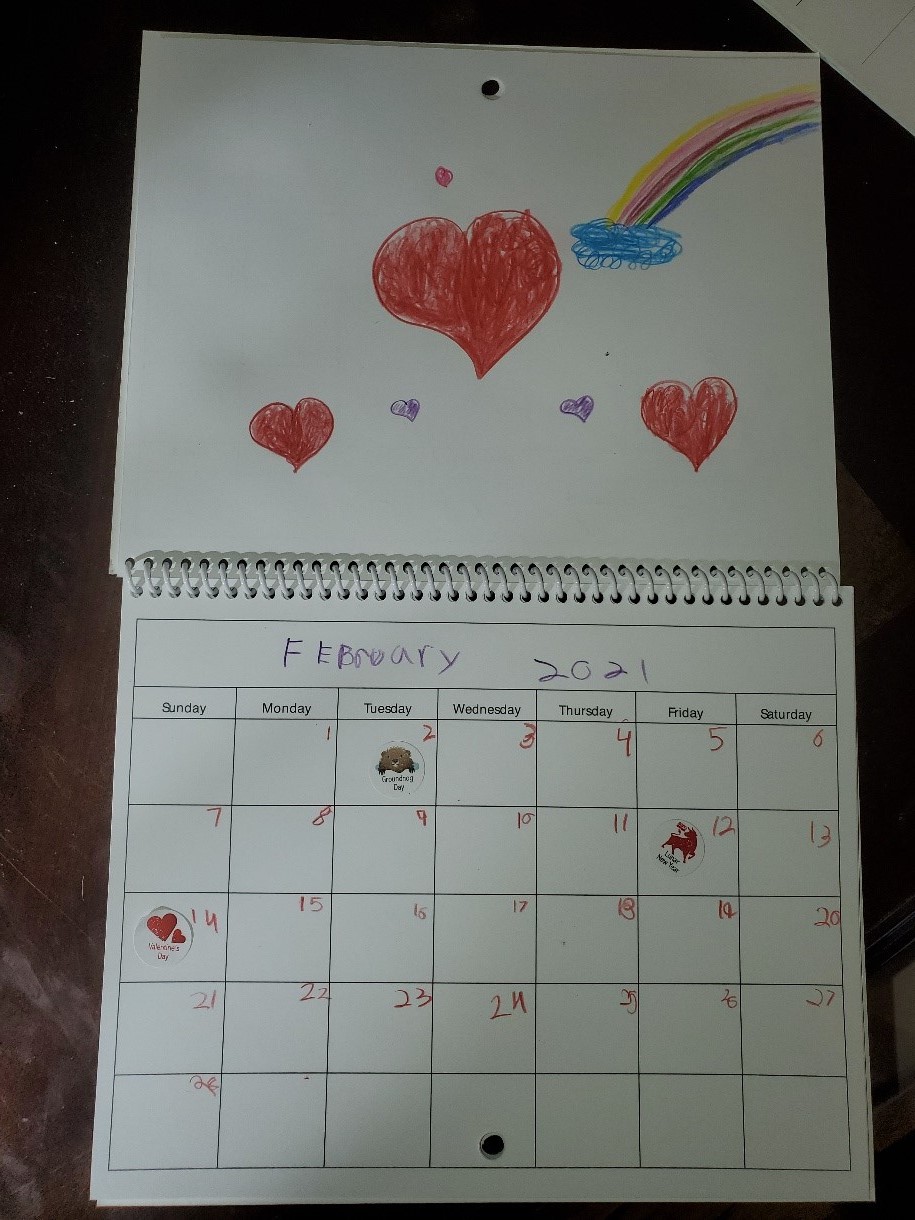
Grades K-2: Design a Calendar
Personalize and decorate a calendar you can use the whole year. Register for the January Grades K-2 Take-and-Make Kit here.
Your kit contains:
- 9 colored pencils
- 1 sheet of stickers
- 1 blank calendar
- list of holiday dates
It might seems a little obvious, but the first piece to teaching kids about the calendar is to make sure they understand what a calendar is. A calendar is a series of pages that shows the days, weeks, and months of a particular year. It is a tool we use to help us keep track of the days, and it allows us to see when different events will happen.
1. Flip open the calendar, in the long rectangle on the top of each calendar page, have your child label the months.
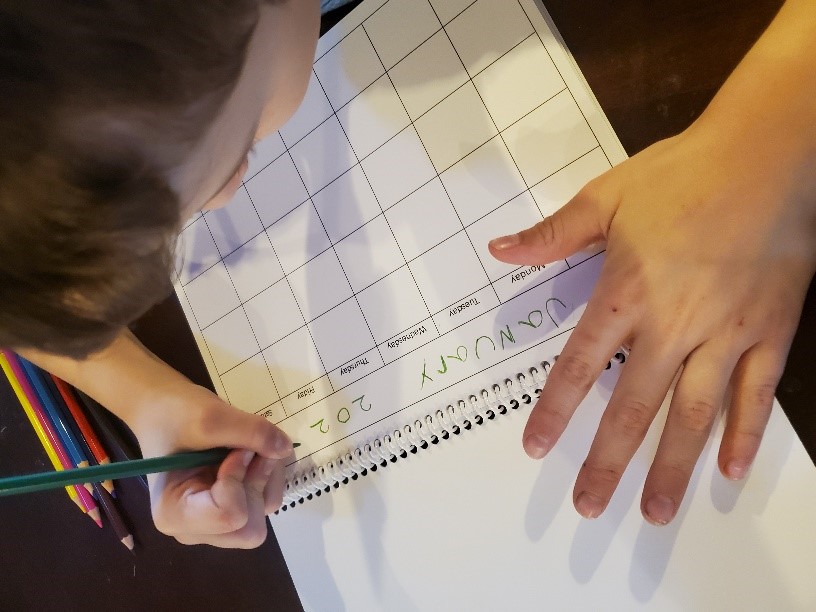
2. Have your child number the days of the month in the corresponding boxes.
3. The holiday stickers correspond with the dates on the provided half sheet. Help your child locate the dates and add the correct sticker.
4. Allow your child to add dates that important to you and your family: birthdays, play dates, lessons, beginning of a new season, appointments, special plans, etc…
5. Use the provided colored pencils and have your child decorate the calendar however they choose. Feel free to use any material you have at home to add to the calendar design. Consider having your child cutting out images in unused magazines and make a collage.
More ideas to consider:
Research and discuss holidays that you do not celebrate.
Talk about how:
- Each square represents one day,
- A group of 7 days in a row is called a week,
- One week is equal to 7 days, and
- Each day of the week has a name.
- Show where the names of the days of the week are shown on a calendar.
- “If we are this day” (point to a square), “1 week later would be...” (point to square underneath).
- Ask them which square would be 2 weeks later, or 3 weeks later.
- Explain that a square above shows 1 week ago (in the past).
- Ask them which square would be 2 weeks ago or another number of weeks ago.
Show us what you created! Send us pictures at youthservices@balibrary.org.
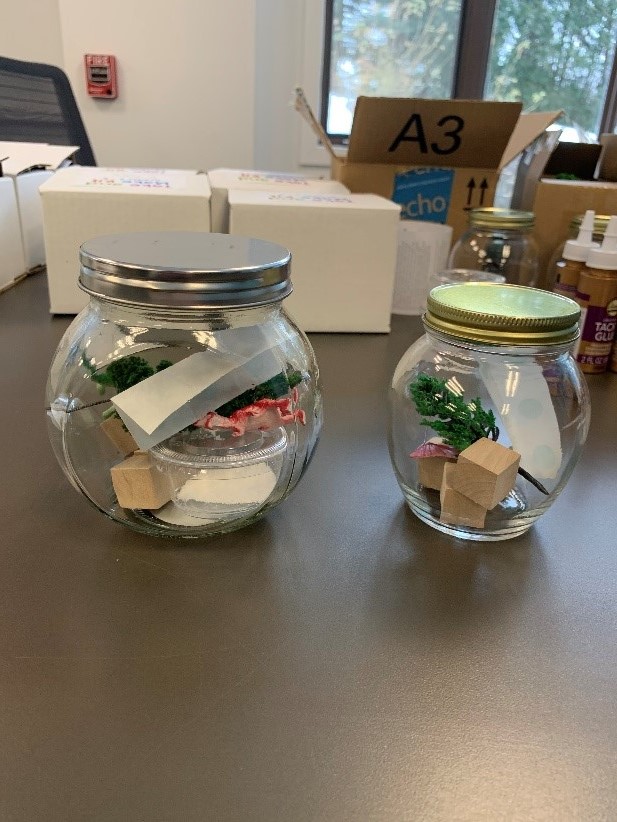
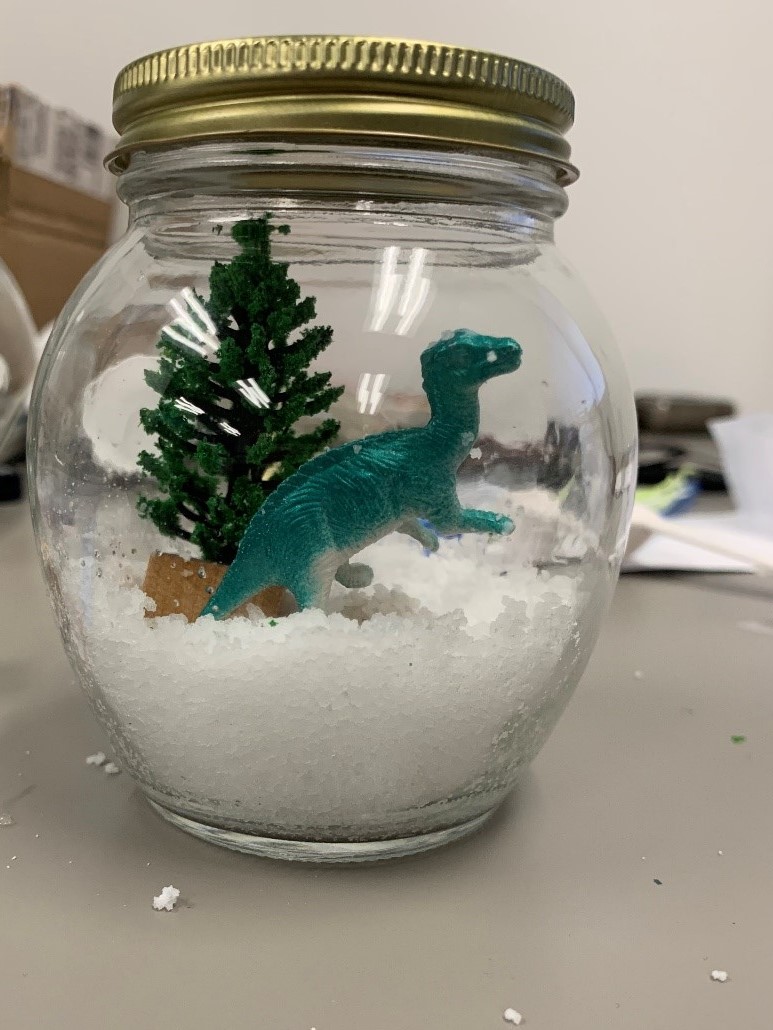
Grades 3-8: Quirky Winter Terrarium
Create your own tiny winter scene, complete with snow and a miniature dinosaur! Register for the January Grades 3-8 Take-and-Make Kit here.
Your kit contains:
- Glass jar or cookie jar
- Container with instant snow
- 4 wooden blocks
- Glue dots
- Tacky glue
- 2 animal figurines
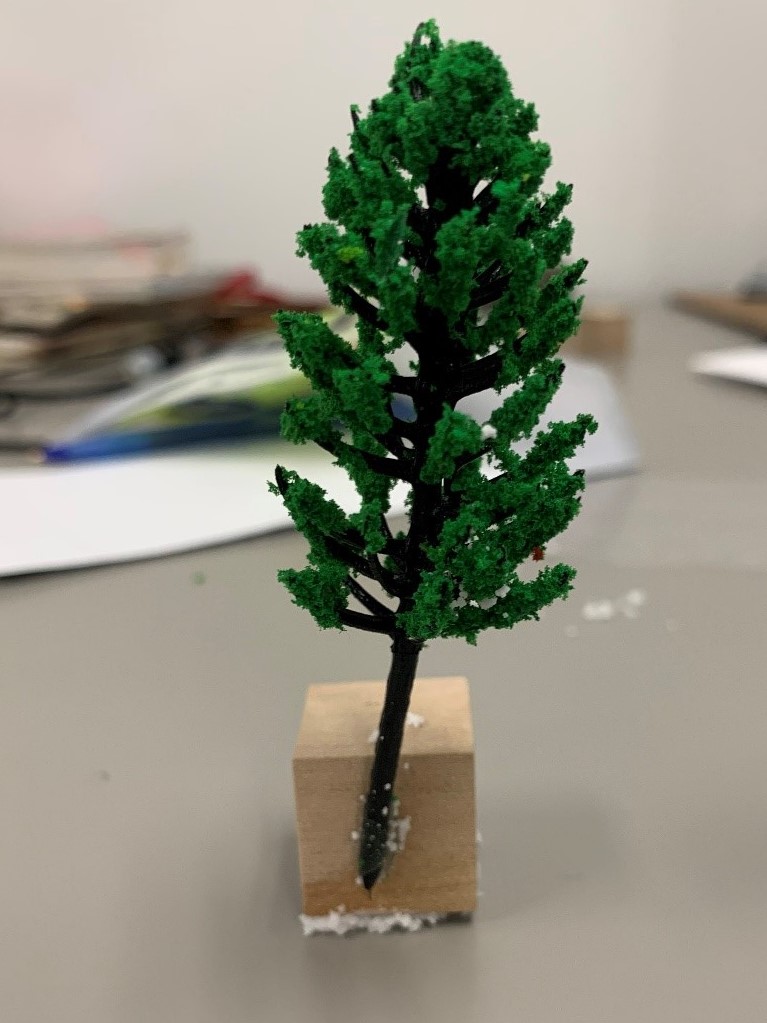
- 1 piece of greenery
1. Remove all of the items from the glass jar or cookie jar. Your kit will contain either a small glass jar with a gold lid or a cookie jar with a silver lid.
2. Attach your animal figurines to the wooden blocks with a glue dot. 1 or 2 glue dots should be enough to attach your dinosaur.

3. Attach your piece of greenery to one of the wooden blocks with a glue dot. You may need to secure the greenery to one of the sides of the block, instead of the top.
4. Have an adult cut the tip off the tacky glue bottle.
5. Using the tacky glue, glue your wooden blocks with the figurines and greenery to the bottom of the jar. If you have any remaining glue dots, you can also secure the blocks to the jar with a glue dot.
6. Let the glue dry completely.
Once you are done creating your scene, and the glue has dried completely, it is time to add your snow! Pay close attention to what type of jar you have. Depending on which jar you have, that will determine how much water you add to the instant snow.
7. Pour the instant snow into your jar.
8. If you have a cookie jar with a silver lid, add 1/3 cup of water to the jar.
If you have a glass jar with a gold lid, add 6 teaspoons of water to the jar.
Your snow will expand, and you will have finished your quirky terrarium! The instant snow will last about 2 weeks, after which it will start to shrink and gather moisture.
Show us what you created! Send us pictures at youthservices@balibrary.org.
 Youth Services Assistant Librarian Alyssa