-
Summer Mindfulness Activities
Mindfulness is an activity you can practice year-round, but here are some summer inspired activities to encourage mindful moments for your little ones.

- Gardening
Whether it is at home or participating in a gardening program at the BALibrary, gardening is a great way to connect to nature! What colors do you see? How does the dirt feel between your fingers? Notice how the flowers smell. - Cloud watching
Gaze up at the clouds and see what shapes you can see! Better yet, lay in the grass and notice how it feels beneath your body. - Blowing bubbles
Get out your bubbles and wand! Pay attention your breath as you inhale and exhale to make the bubbles. - Draw with sidewalk chalk
Get creative and draw something you love! What colors do you use? What shapes are within your drawings? What texture does the chalk have? - Nature walk
Put on those walking shoes and explore nature! What do you see? What colors do you notice? What does the ground feel like beneath your feet? Do you feel the sun on your face or the wind in your hair? What do you hear or smell? Name anything else you notice!
Interested in programs related to mindfulness? Check out Morning Garden Story Time, Loose Parts Nature Play, Nature Art, Nature I Spy, Meditation Story Time, and Little Kids, Big Feelings.
 Youth Services Assistant Librarian Jessica
 - Gardening
-
Expressing Gratitude - Scavenger Hunt Edition
Gratitude can have a big impact on our lives. It has been proven to be effective in improving mood, increasing ability to cope with emotions, decreasing stress, and so many other positive benefits. Let’s practice showing our gratitude in a creative way - with a scavenger hunt! Use the list below to find what sparks your joy and makes you smile.
- Something you enjoy looking at
- Something that is useful to you
- Something that is your favorite color
- Something that makes you smile when you see it
- Something that smells good
- Something that makes you laugh
- Something you enjoy in the morning
- Something you enjoy at night
- Something that means a lot to you
- Something you love to spend time with
- Something that reminds you of the people you love
- Something you created
- Something you like to share with others
- Something that makes you feel calm
- Something you love
Looking for more fun activities?
Gratitude for Kids - 9 Ways to Practice Gratitude with Kids ⋆ Journal for Kids
Learn more about why gratitude is so important:
Why gratitude is important for kids? | WOW Parenting
8 Reasons Why Gratitude is Important for Kids — Peake Academy
The Positive Impact of Gratitude on Mental Health | Psychology Today
We’d love to hear about your experience with the scavenger hunt! Chat with us at the Youth Services Reference Desk, or email us at youthservices@balibrary.org.
Youth Services Assistant Librarian Jessica -
Scary Journal Prompts
Fall is in full swing! It’s time for some slightly scary vibes. Take a break from scary books or movies and take a crack at writing your own! Here are some journal prompts to spark your creativity and get you into an eerie, creepy crawly state of mind.
There is no right or wrong way to use the prompts. Use one or all of them and write as little or as much as you’d like. All that matters is that you have fun!
- As the clock struck midnight, the witch said…
- The black cat was very…
- I was carrying my hot chocolate back inside when…
- The house was so quiet you could only hear…
- My favorite October night is when…
- I couldn’t believe it; everywhere I looked I saw…
- They got a tingle down their spine when they heard…
- Once the potion begun to brew it looked….
- The crunch of fall leaves beneath my feet was not the only sound I heard…
- I entered the corn maze with my friends, and we decided to….
- Fall time reminds me of….
- All of a sudden there was a big, scary looking…
- The mysterious object started floating and…
- There was a creak in the steps as I climbed the staircase to…
- As we sat around the bonfire, we thought it would be fun to…
- There was a loud snap! We turned around and saw…
- The night was drawing near, bringing a full moon…
- They said there was nothing to be afraid of but…
- He could not remember how he had gotten here. The last thing he remembers is…
- She faced the monster head-on and said…
Looking for other activities to do with your little one? See a list of the library’s upcoming events for young children.
Youth Services Assistant Librarian Jessica -
July Take-and-Make Kits
Bring home a fun new project! Sign up from our Library Calendar and pick up a kit at the Youth Services desk or through our Parking Lot Pickup service between July 11, 2022 - July 22, 2022
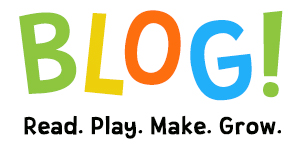
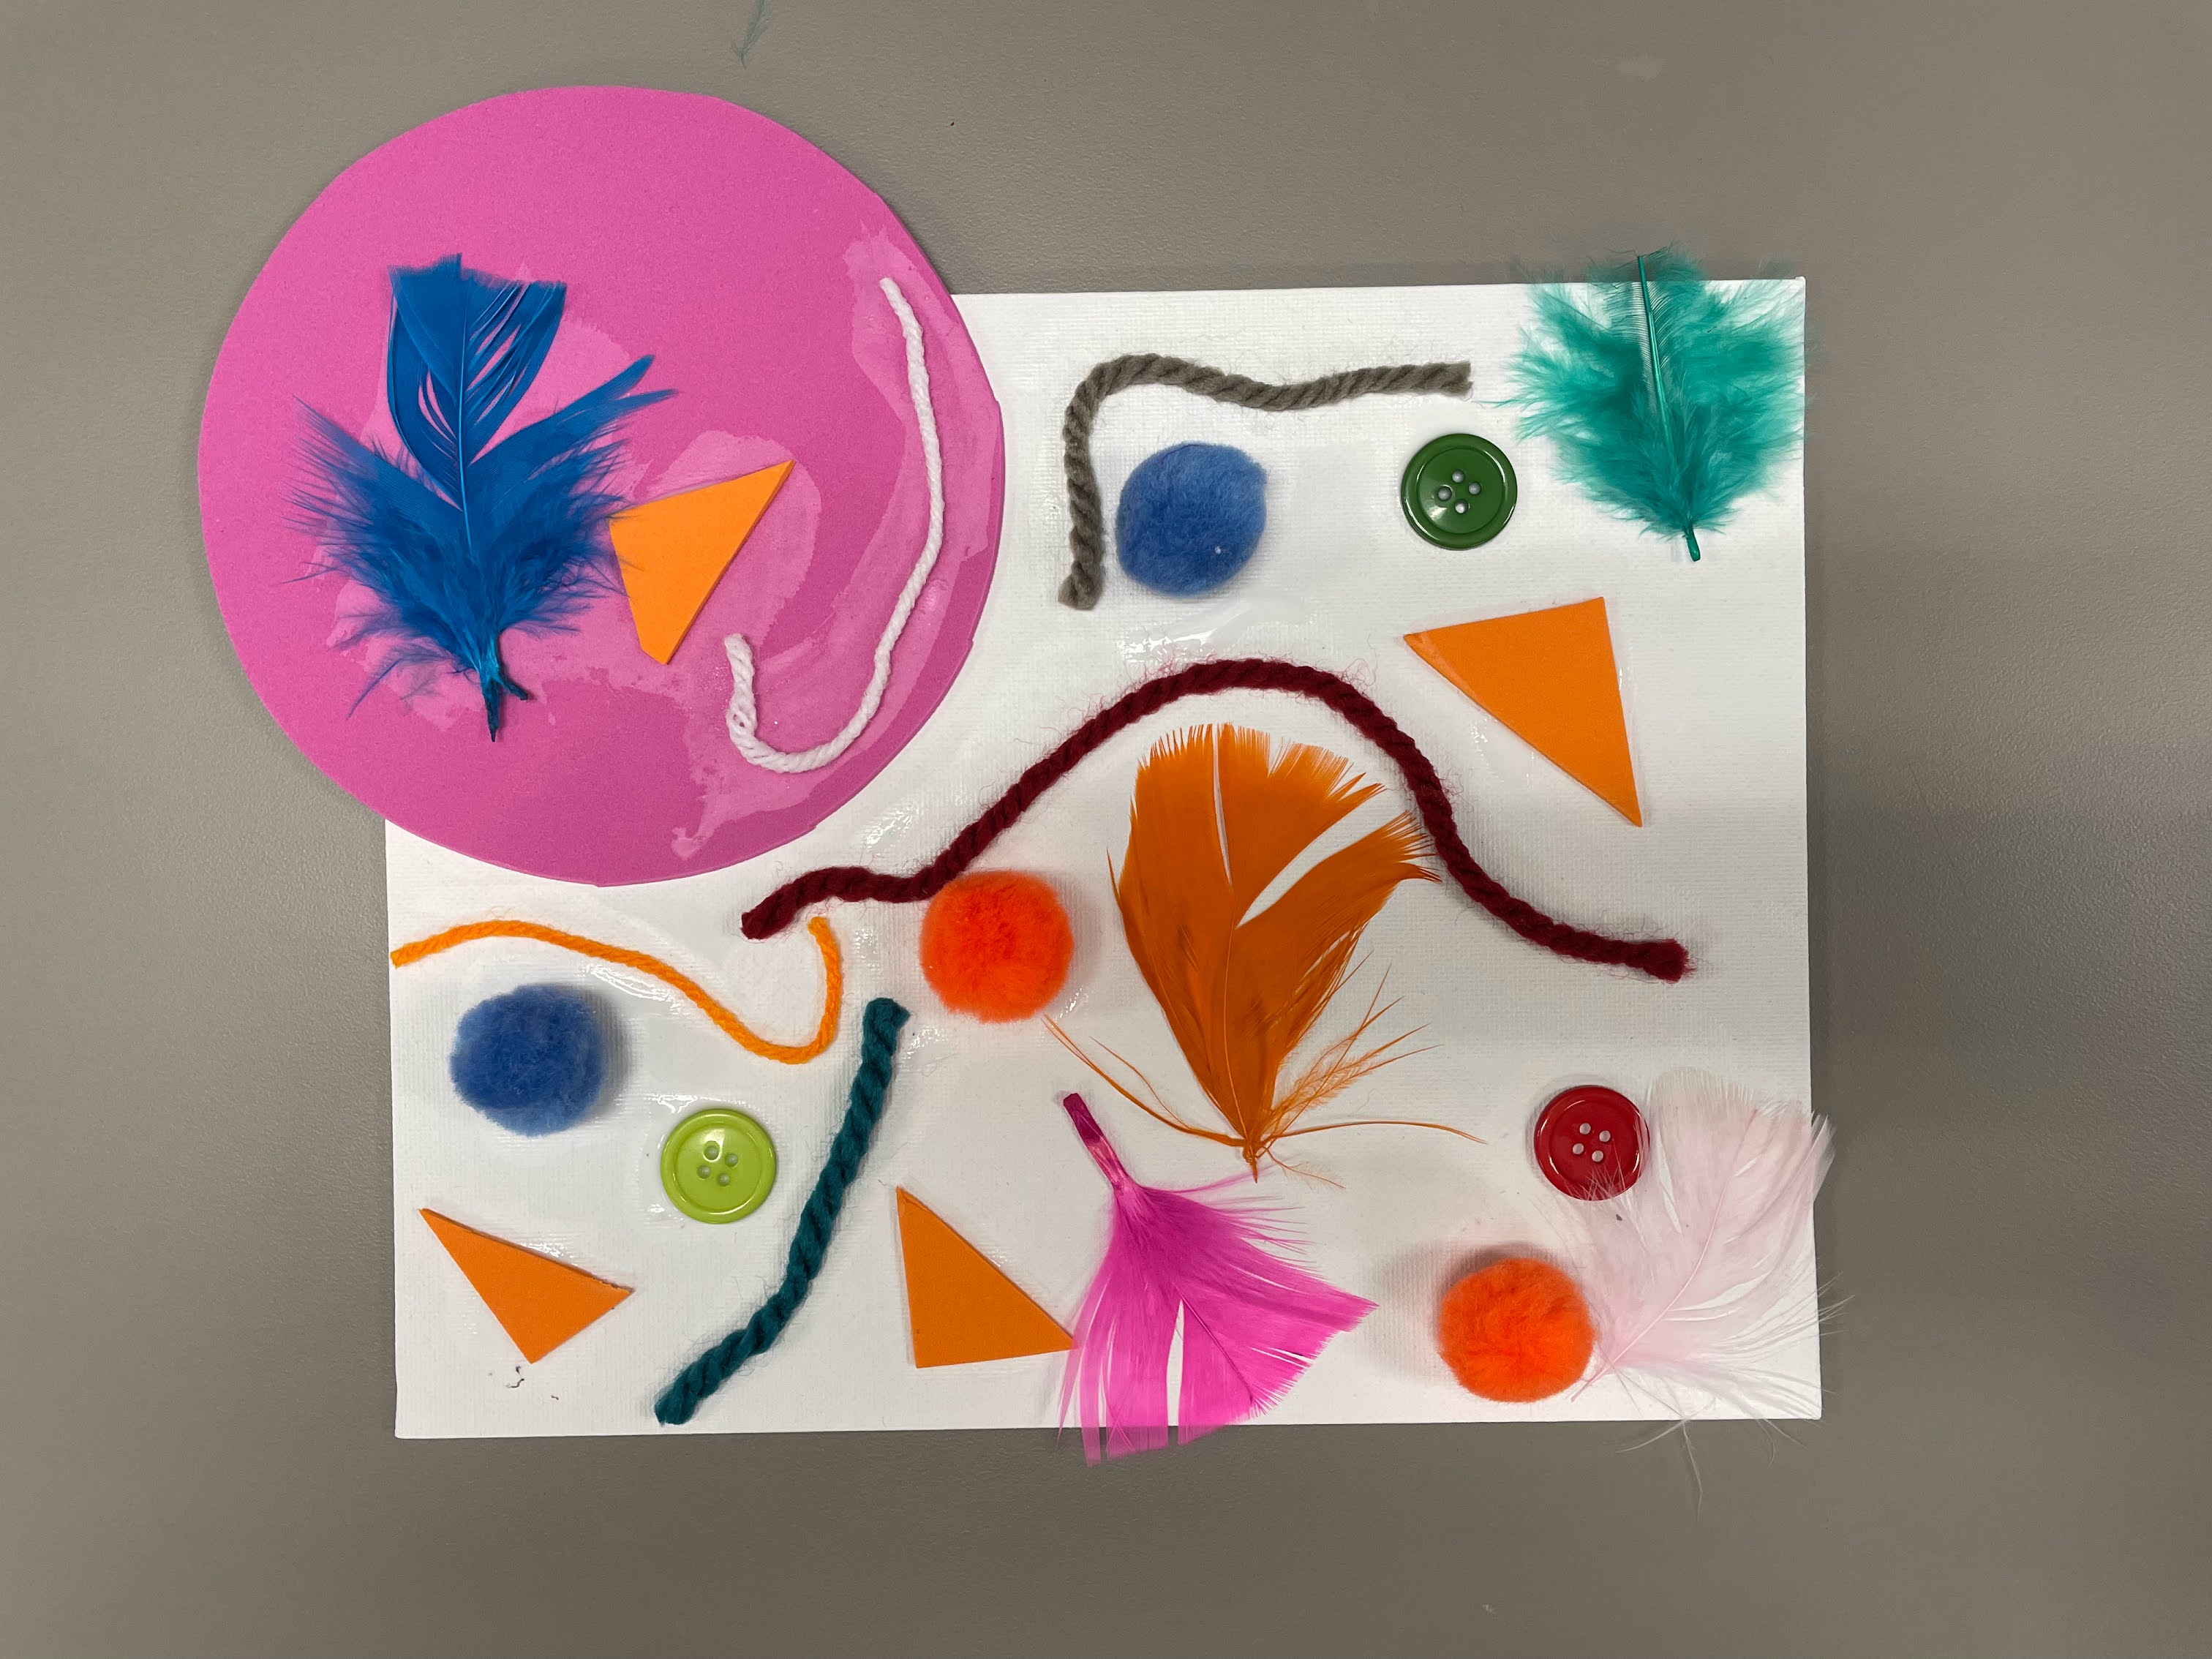
Toddler & PreK: Texture Collage
Use a variety of different materials to create a unique collage. Register for the July Toddler & PreK Take-and-Make Kit here.
Your Kit Contains:
- 1 canvas
- 1 cup of glue
- 1 foam brush
- 3 buttons
- 5 feathers
- 4 pompoms
- 5 pieces of yarn
- 2 foam pieces
You may also want scissors if you would like to cut the foam smaller.
Instructions:
1. Take all supplies out of bag.
2. Gather any other supplies you may need, such as scissors or extra items to add to your collage! Examples of extra materials could be bits of paper towel, aluminum foil, or anything else that adds dimension to your artwork.
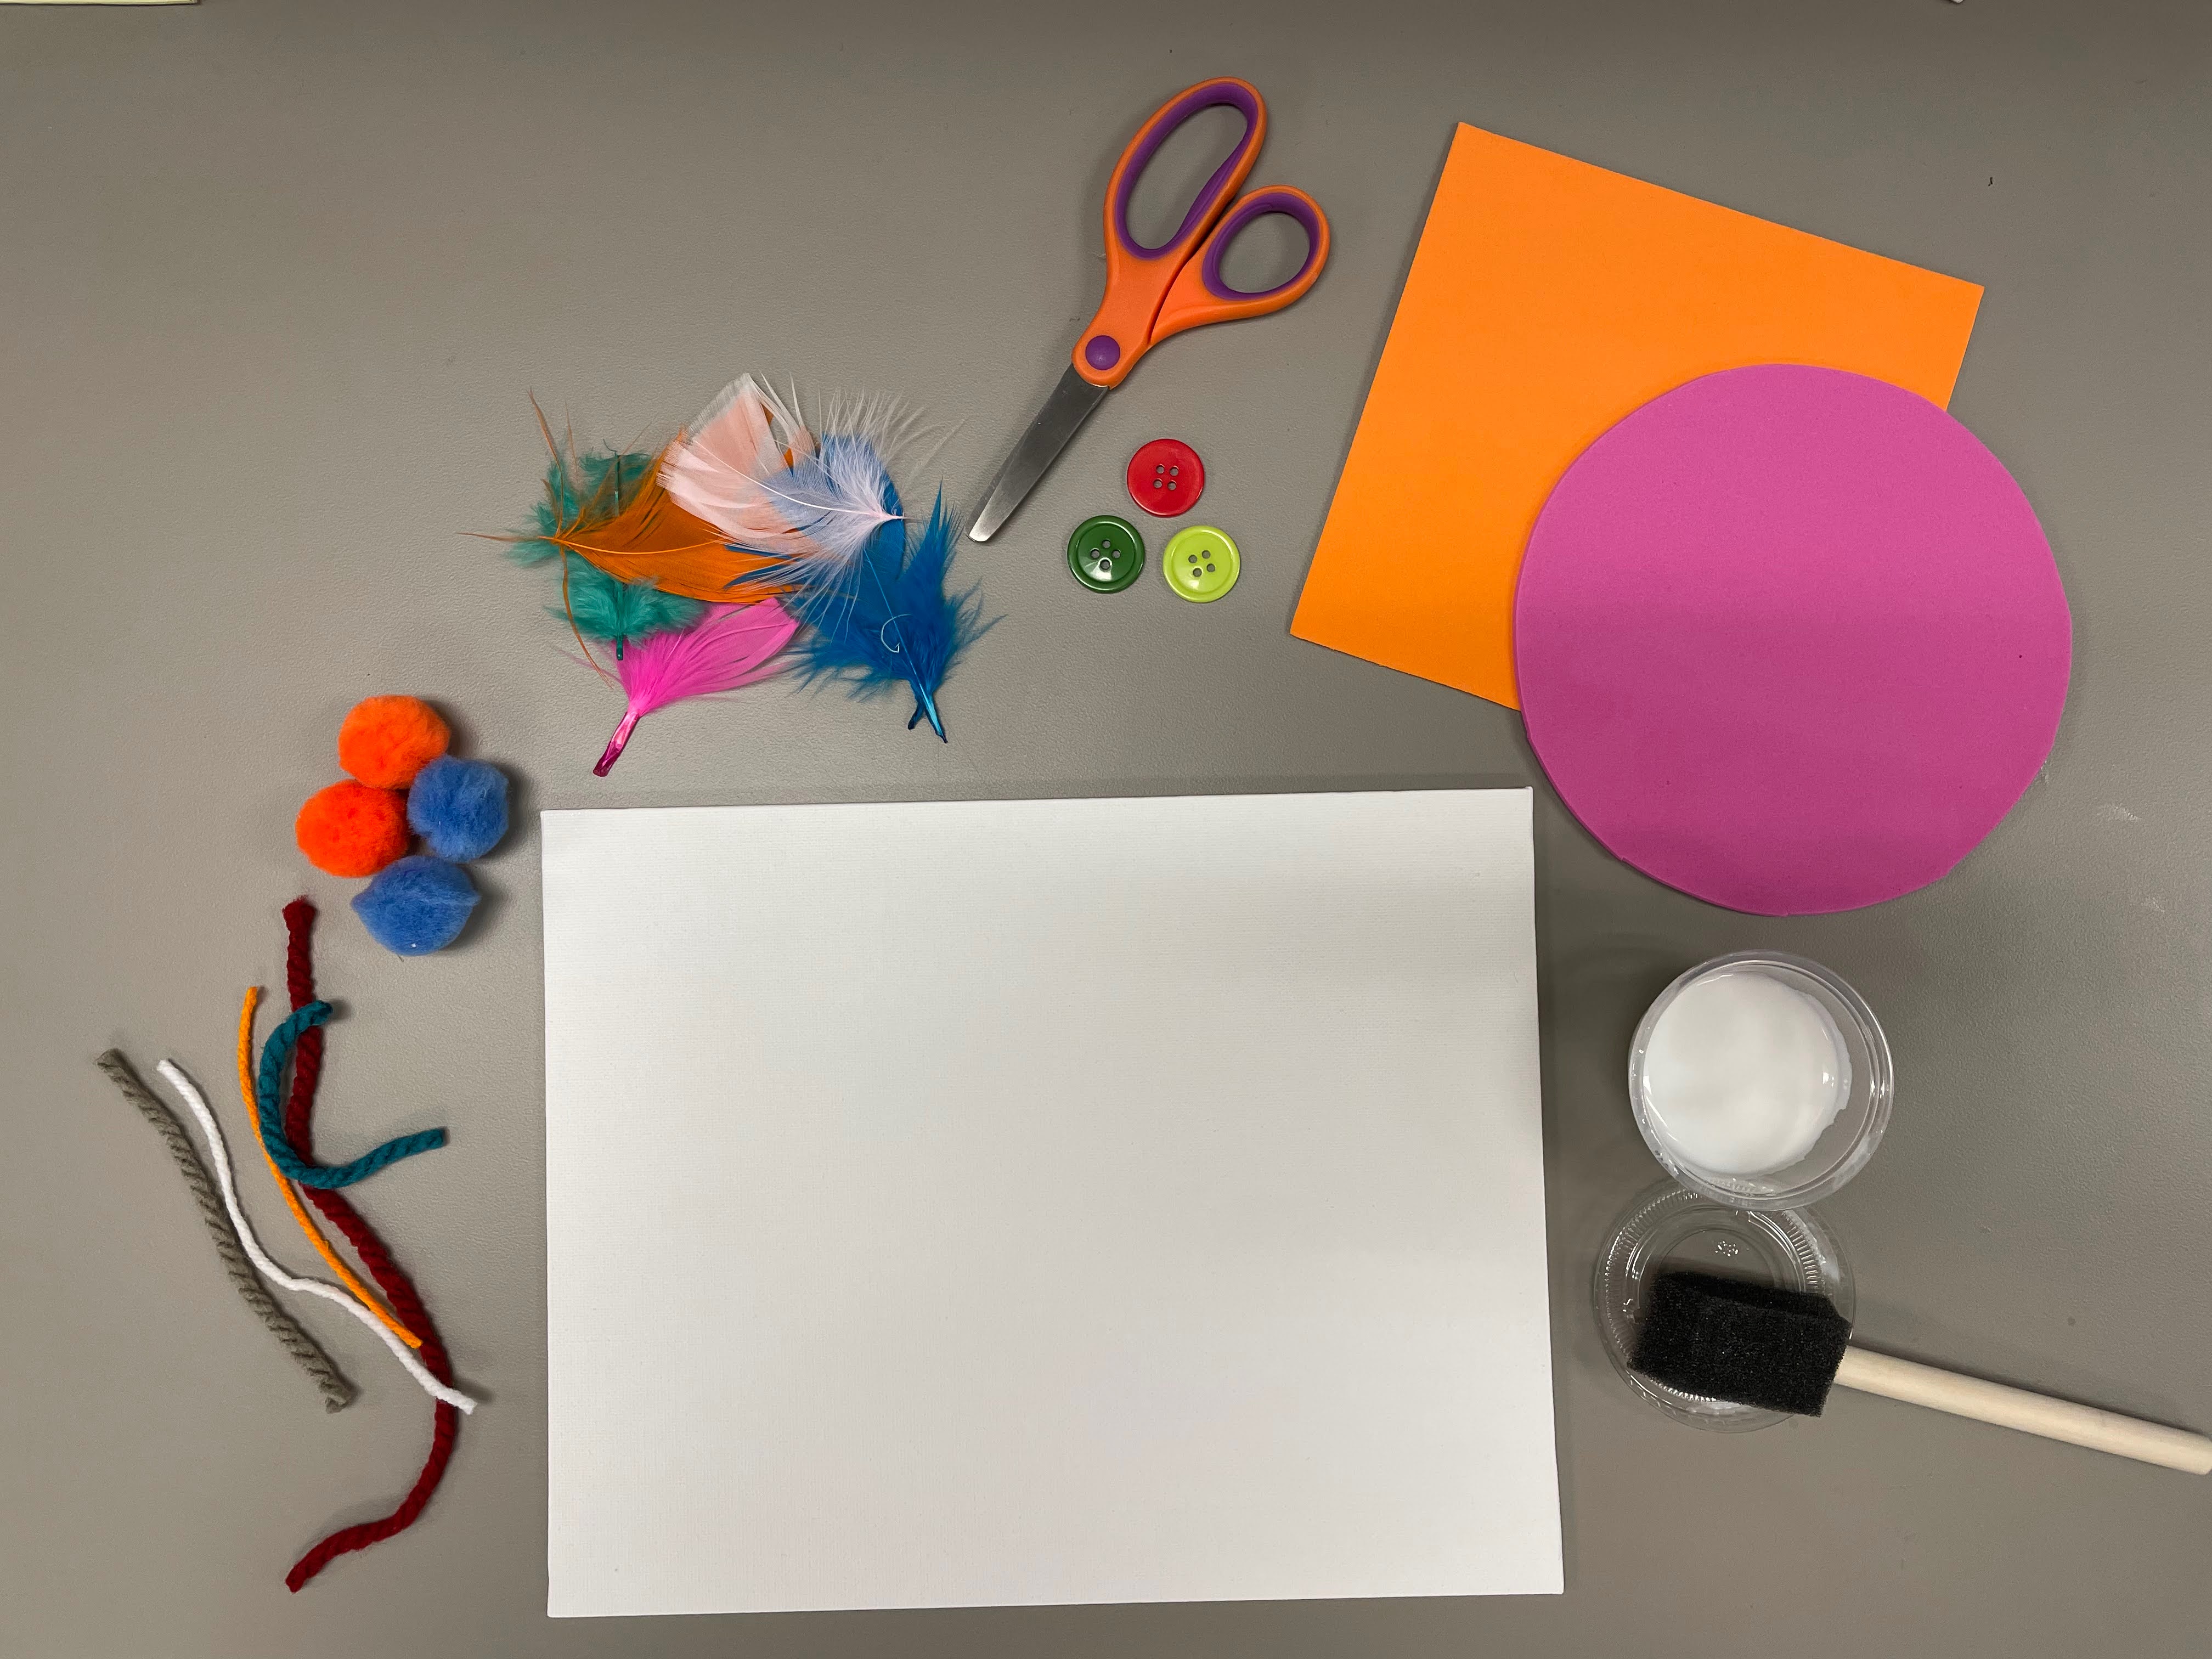
3. Apply glue with foam brush to canvas.
4. Arrange items on canvas, adding more glue as necessary.
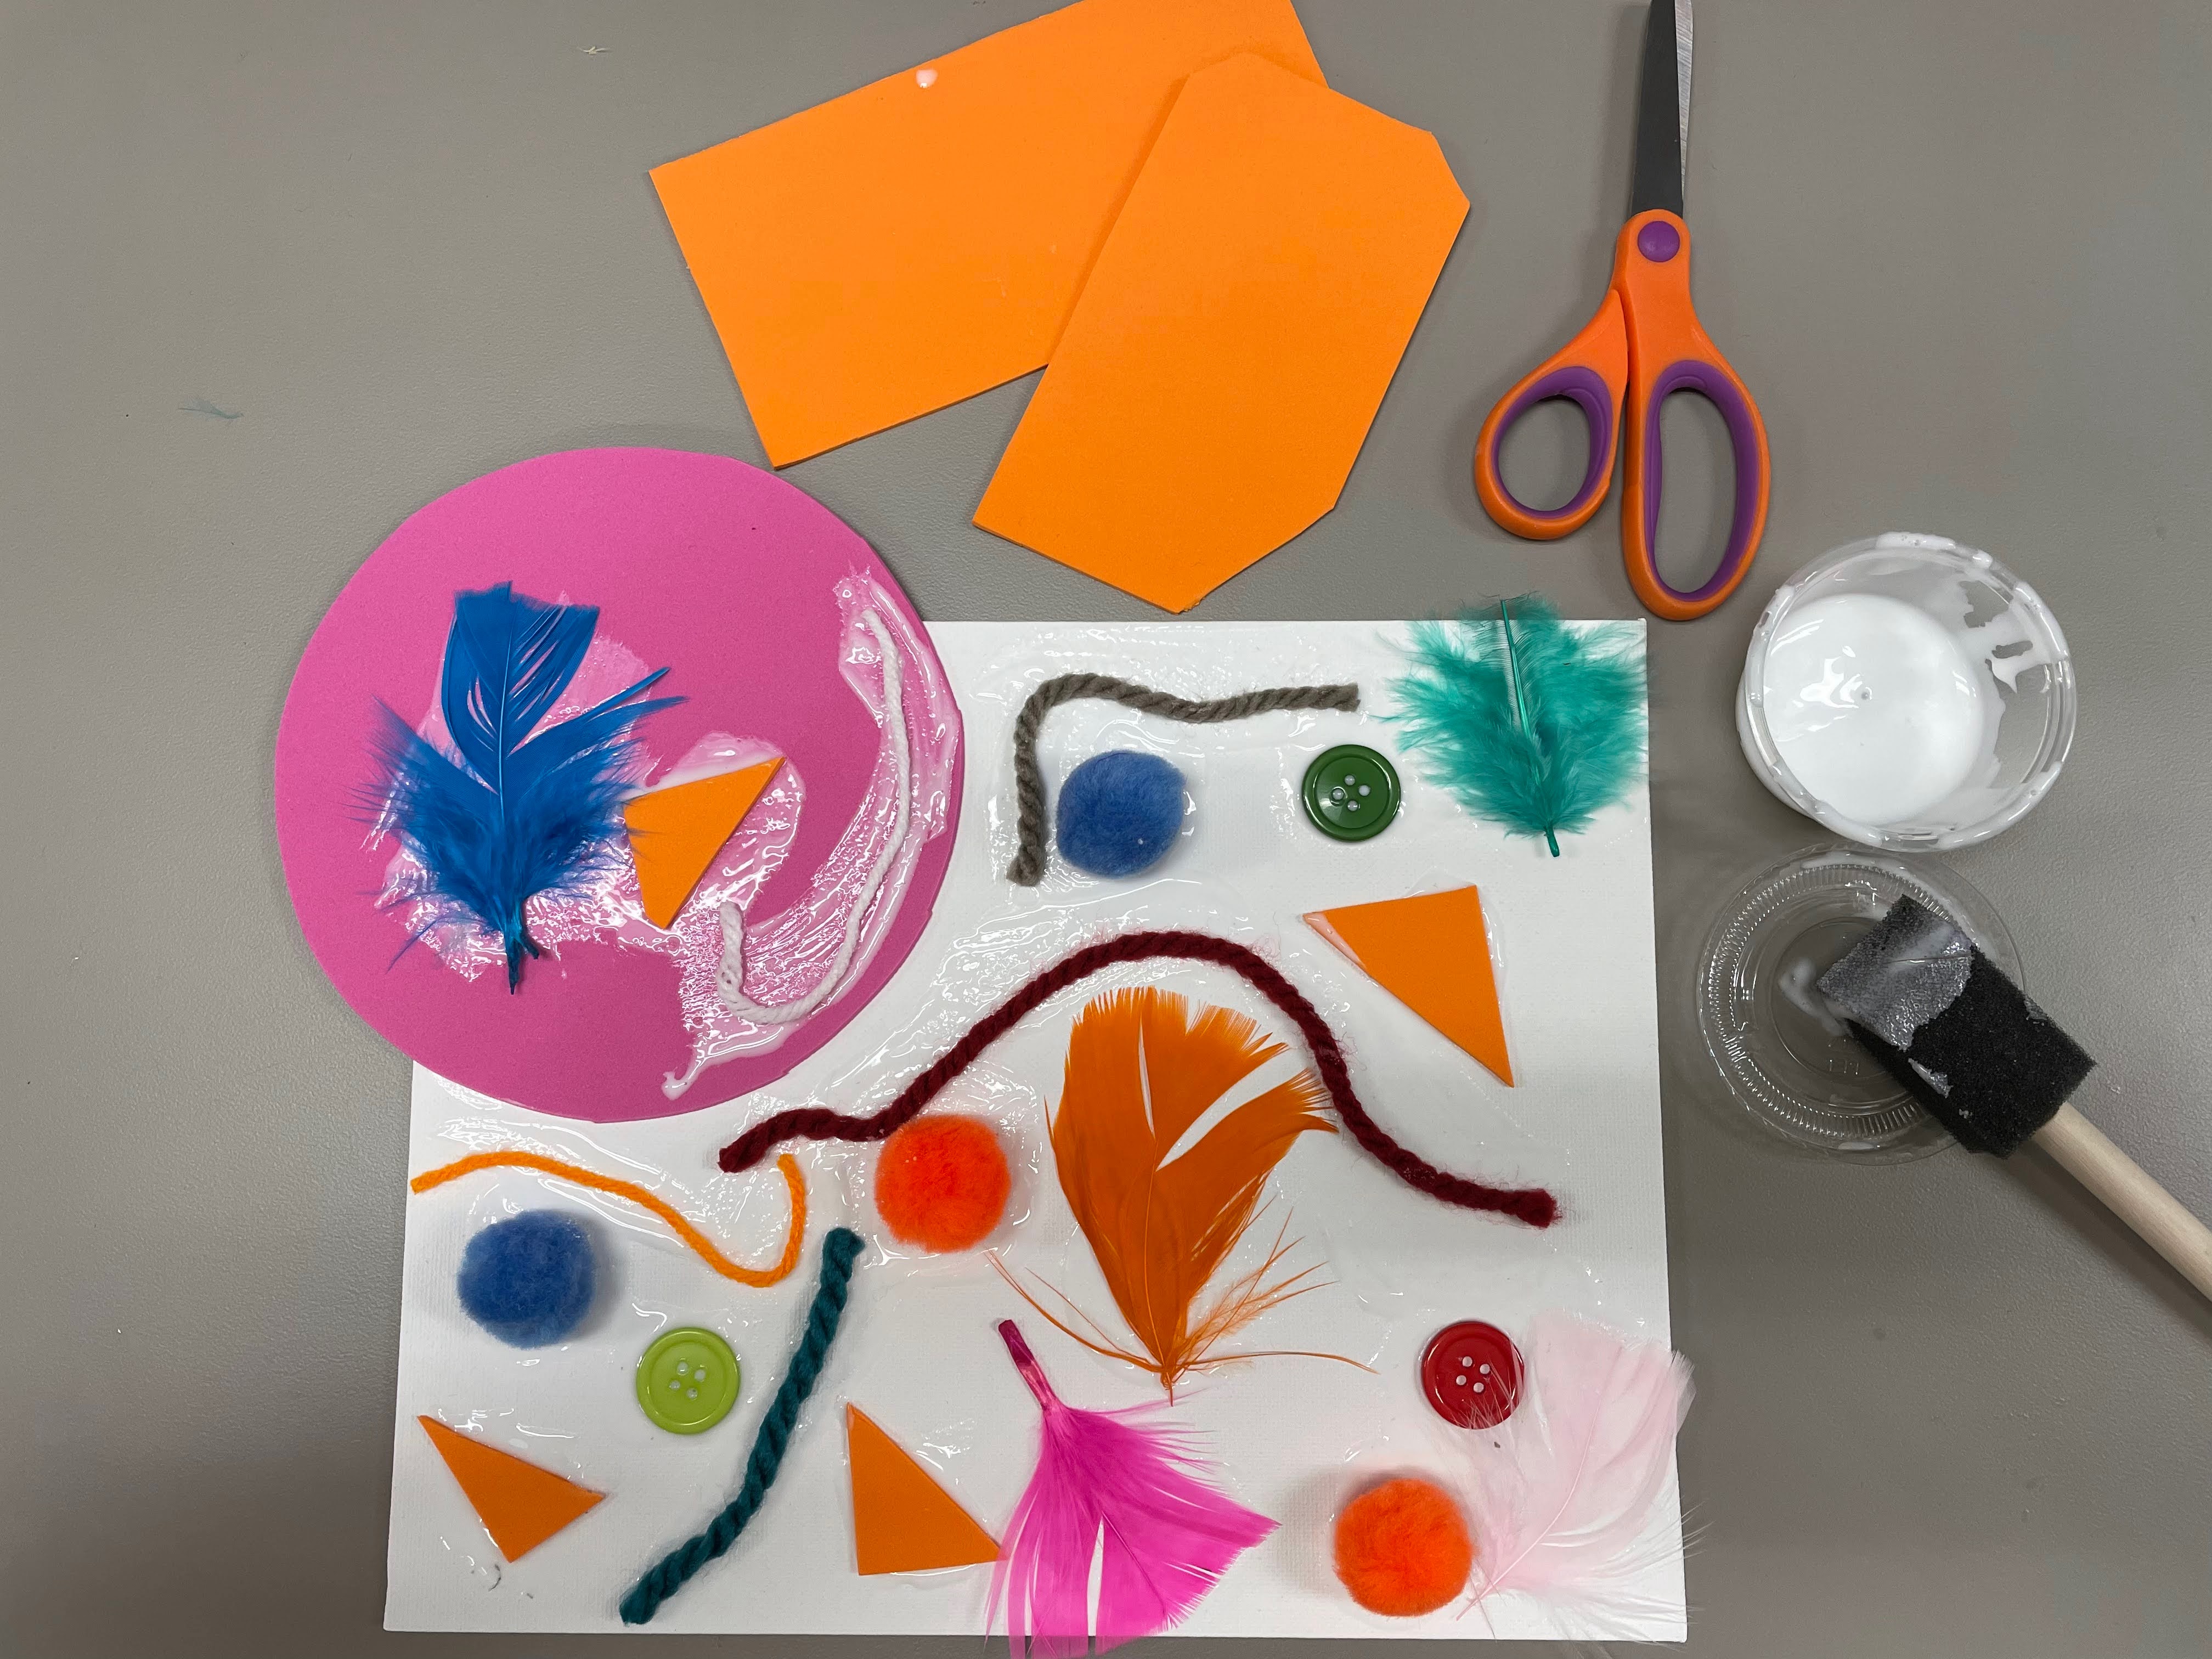
5. Let dry.
6. Enjoy your texture collage!
Extension Discussion Prompts
- What does each of the items feel like? Can you describe how they are alike or different?
- What else would you like to add to your collage?
- What color is each of the items? Are some of them the same?
- What shapes do you see?
- Can you tell me about your finished project? Did you have a plan?
Grade K - 8: Calligraphy Set
Use a real calligraphy brush and ink to try your hand at the artistry of Chinese characters. Inspired by our Book of the Summer, Where the Mountain Meets the Moon.
Register for the July Gr K-8 Take-and-Make Kit here.
Your kit contains:
- 1 calligraphy brush
- 1 small container of ink
- pieces of rice paper
- instruction sheet from Where the Mountain Meets the Moon
You can try writing Chinese characters, or create your own artwork with the supplies. Check out this video (created by VIPKid) to learn a little bit about the art of Chinese calligraphy and characters:
Show us what you created! Send a picture of your work to youthservices@balibrary.org.
 Youth Services Librarian Demitra
 -
June Take-and-Make Kits
Bring home a fun new project! Sign up from our Library Calendar and pick up a kit at the Youth Services desk or through our Parking Lot Pickup service between June 13-24.
Toddler & PreK: Rainbow Rice Sensory Bin
Dye rice to use for a fun sensory experience. Register for the June Toddler & PreK Take-and-Make Kit here.
Your kit includes:
- 3 bags of rice in ziploc bags
- 3 bottles of food coloring
- 1 container containing 3 teaspoons of vinegar
- 1 spoon
- 1 cup
- 3 dinosaur fossil figurines
- 1 rubber ducky
1. Take 1 ziploc bag of rice and pour into a container with lid.
2. Measure 1 teaspoon of vinegar from the condiment container and pour into the container with rice.
3. Add drops of food coloring to the container. Pick one color.
4. Place lid on container and shake rice until rice is completely covered in food coloring.
5. Spread the rice out on a tray or paper towel to dry.
6. Repeat steps 1-6, with remaining 2 bags of rice and different colors.
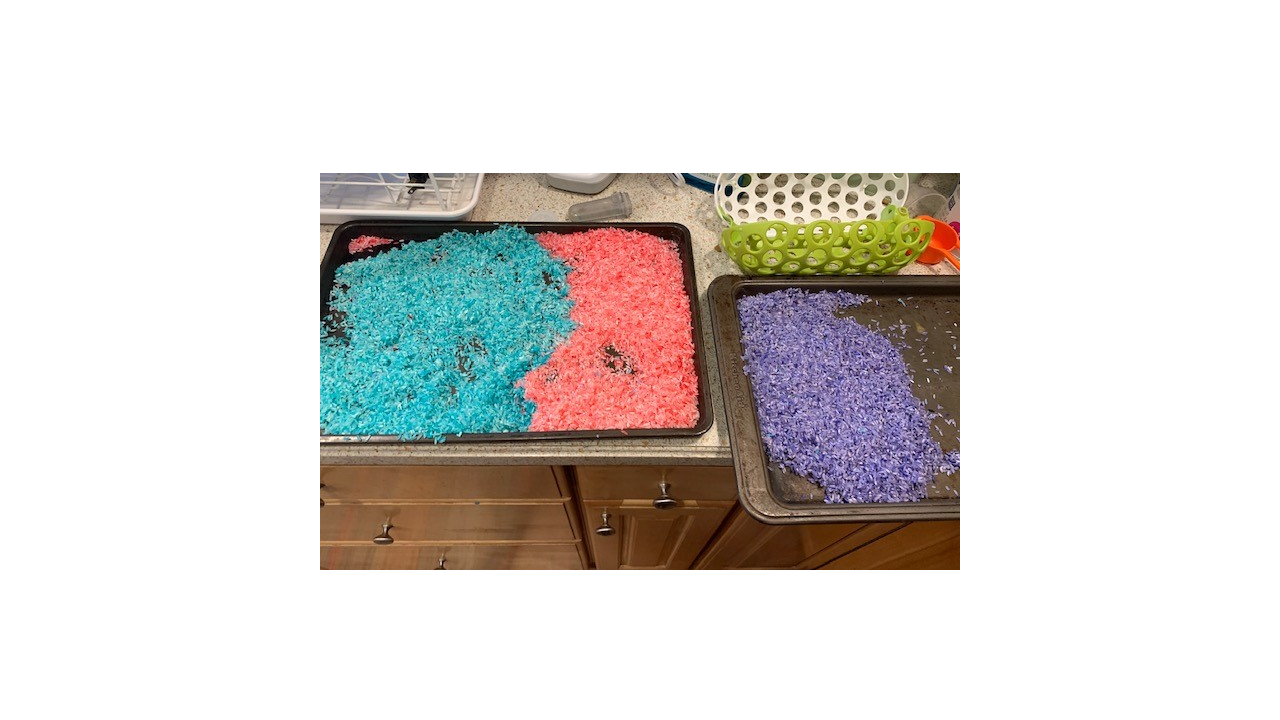
7. Once rice is dry, pour into a bin.
8. Add the rubber ducky, dinosaurs, spoon, and cup to the bin.
9. Play! Please note: RICE IS NOT FOR CONSUMPTION
10. Try adding other items to your sensory bin, such as bowls, different sized cups, funnels, and other small toys.
Show us what you created! Send us pictures at youthservices@balibrary.org.
Grades K-8: Red Thread Connection
Use foam board and thread to map the many connections among your family and friends. Inspired by our Book of the Summer, Where the Mountain Meets the Moonby Grace Lin. Register for the June Grades K-8 Take-and-Make Kit here.
Kit contains:
- 1 foam board
- small portrait papers
- set of colored pencils
- push pins
- red thread
You will also need:
- Scissors
- Glue (optional)
- Scrap cardboard (optional)
Instructions:
- Decorate the small pieces of paper with people you care about: family members, friends, and/or pets. Use the colored pencils or your own art supplies. You could also print and cut photos. Make sure to make one that represents yourself!
- Optionally, glue a piece of cardboard to the back of the foam board. This will help keep the pins secure, and protect your table top from the pins.
- Arrange the portraits on the foam board. Use the pins to fix the portraits in place.
- Tie the end of the red thread to your portrait’s pin. (It may be easiest to tie a knot in the thread, and then pierce the pin through the knot and board.)
- Connect your portrait with everyone else’s, wrapping the thread around each pin.
- You can connect other people to represent their bonds with each other.
For more information about the Book of the Summer, visit: balibrary.org/bookofthesummer
Show us what you created! Send us pictures at youthservices@balibrary.org.
 Youth Services Assistant Librarian Alyssa
 -
April/May Take-and-Make Kits
Bring home a fun new project! Sign up from our Library Calendar and pick up a kit at the Youth Services desk or through our Parking Lot Pickup service between April 18-May 1.
Toddler & PreK: Bubble Wrap Stomp Painting
Be ready to get messy with this active art technique. Register for the April/May Toddler & PreK Take-and-Make Kit here.
This activity would be best done outdoors, it can be messy! Use caution when stomping on the paper, it can get slippery. Alternatively, you can use your hands to press the bubble wrap, instead of stomping.
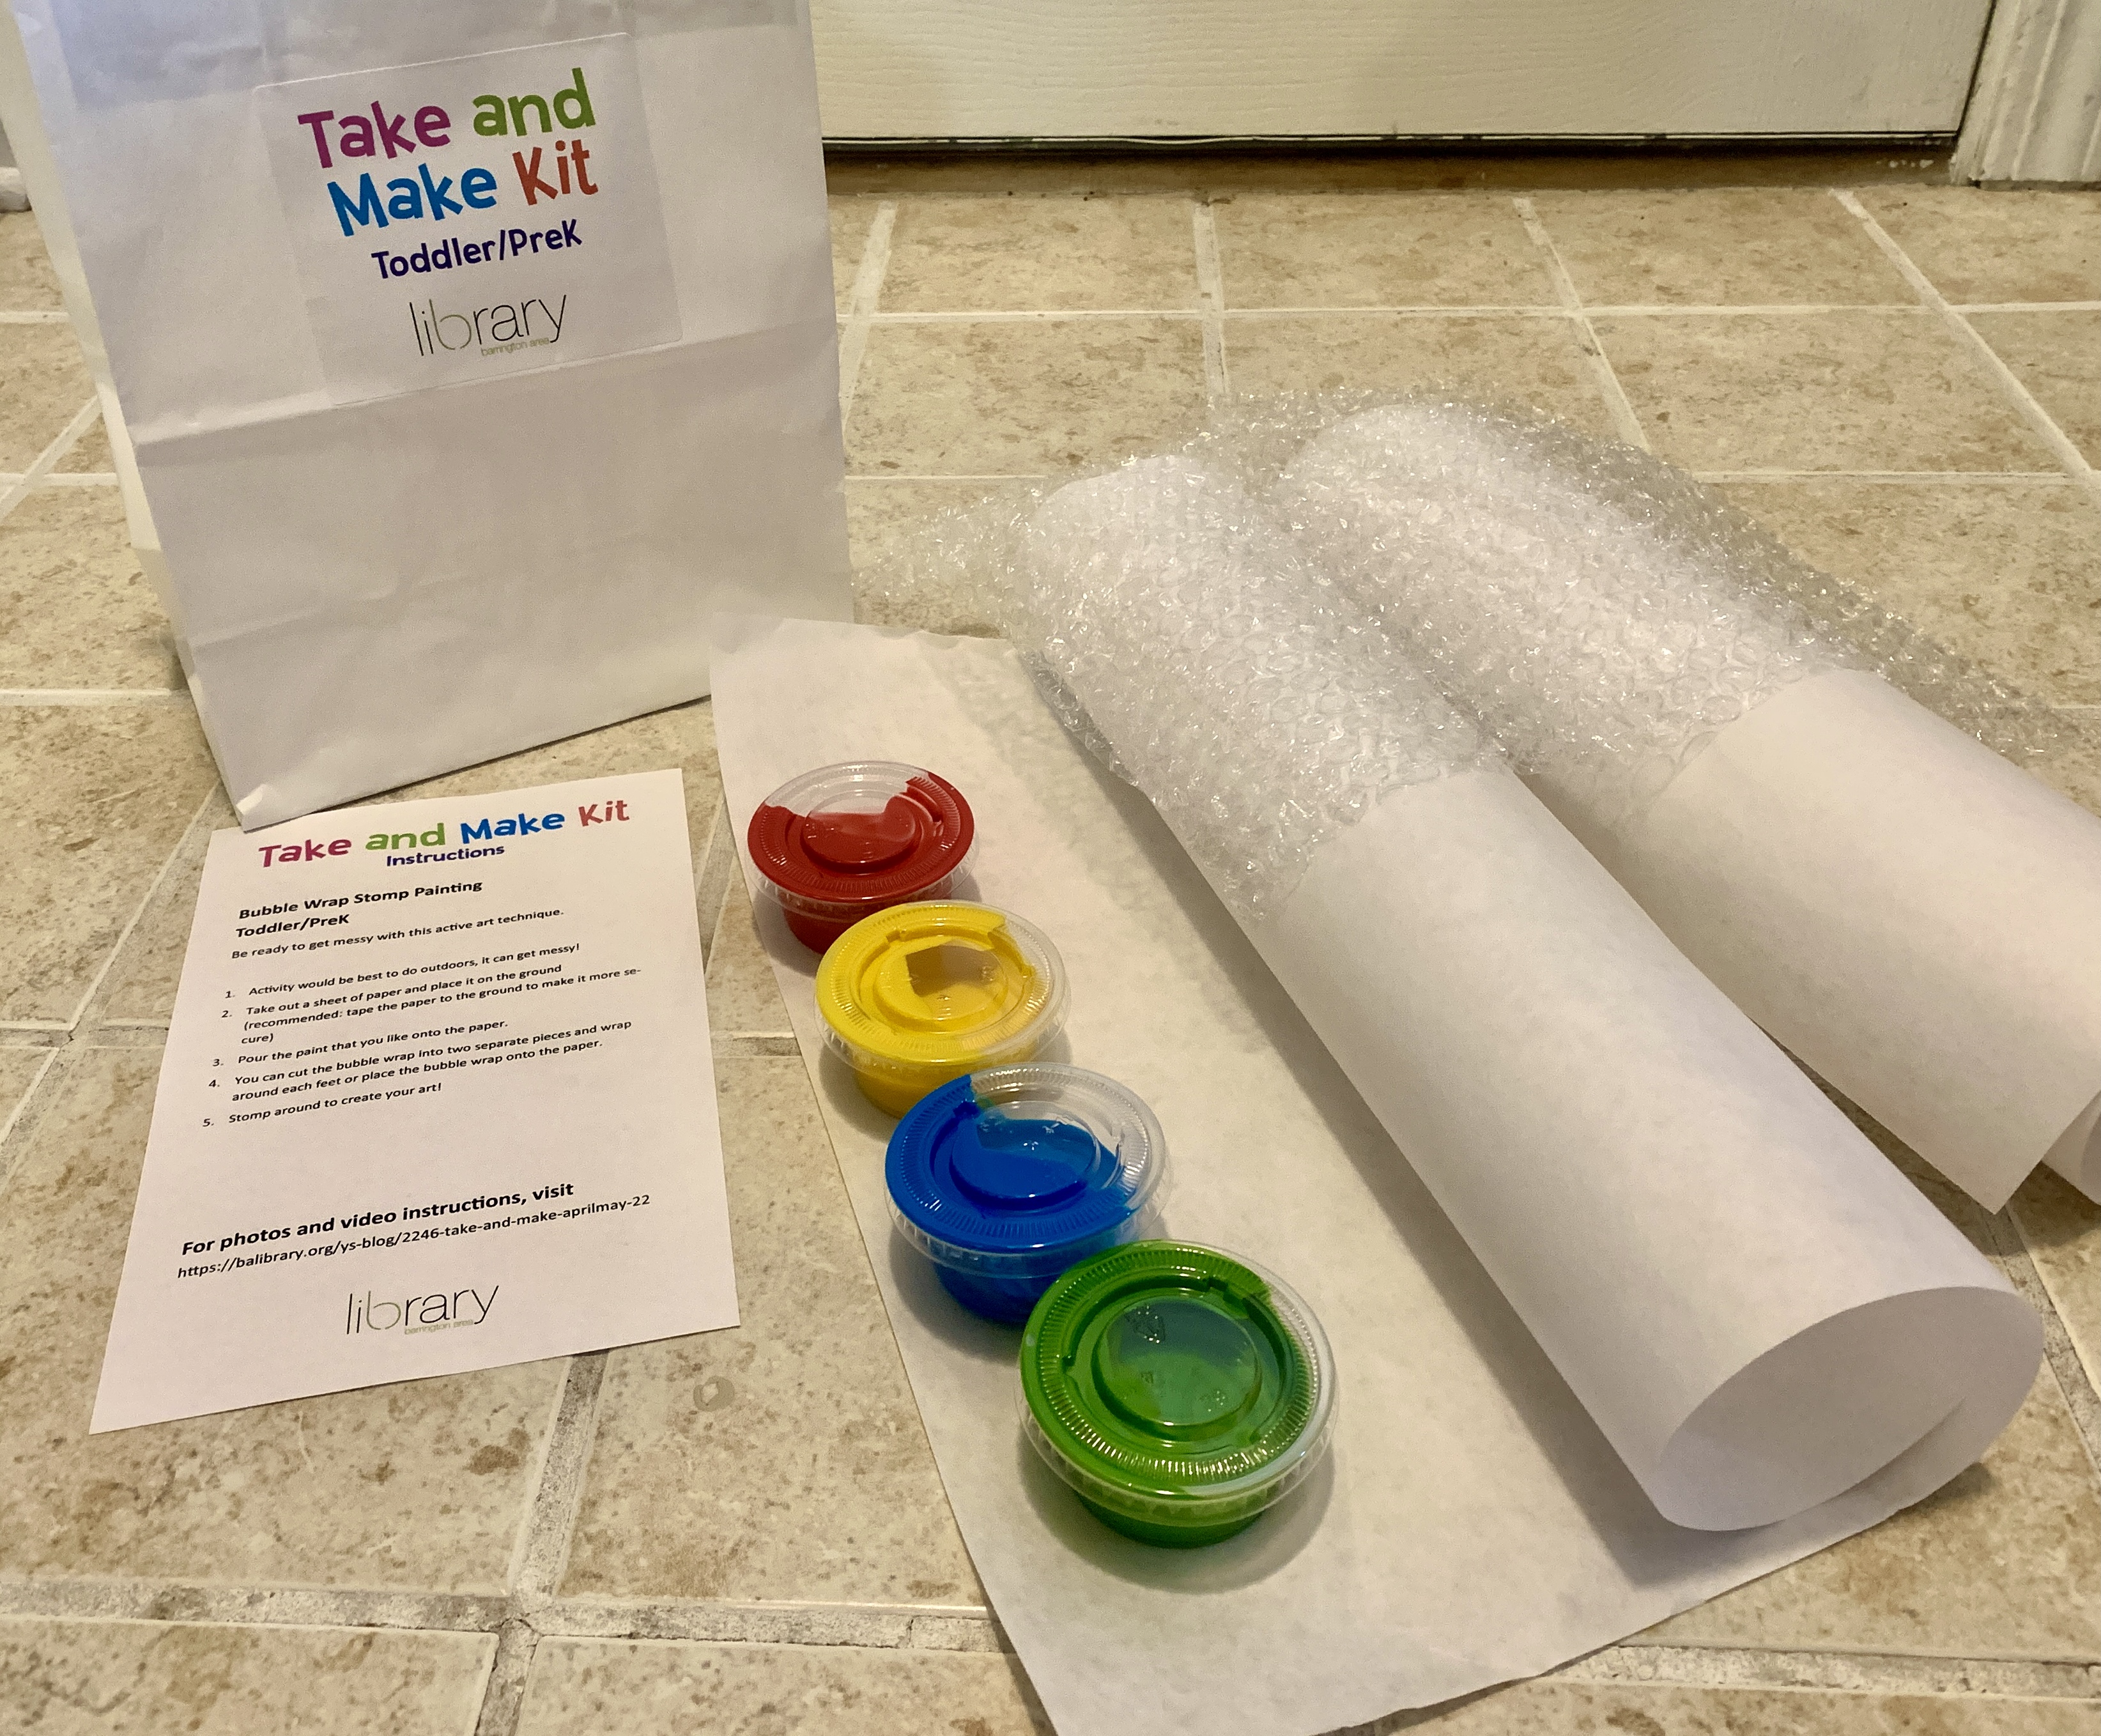
The kit includes: 2 large pieces of paper, 1 bubble wrap, 4 different types of washable tempura paint.
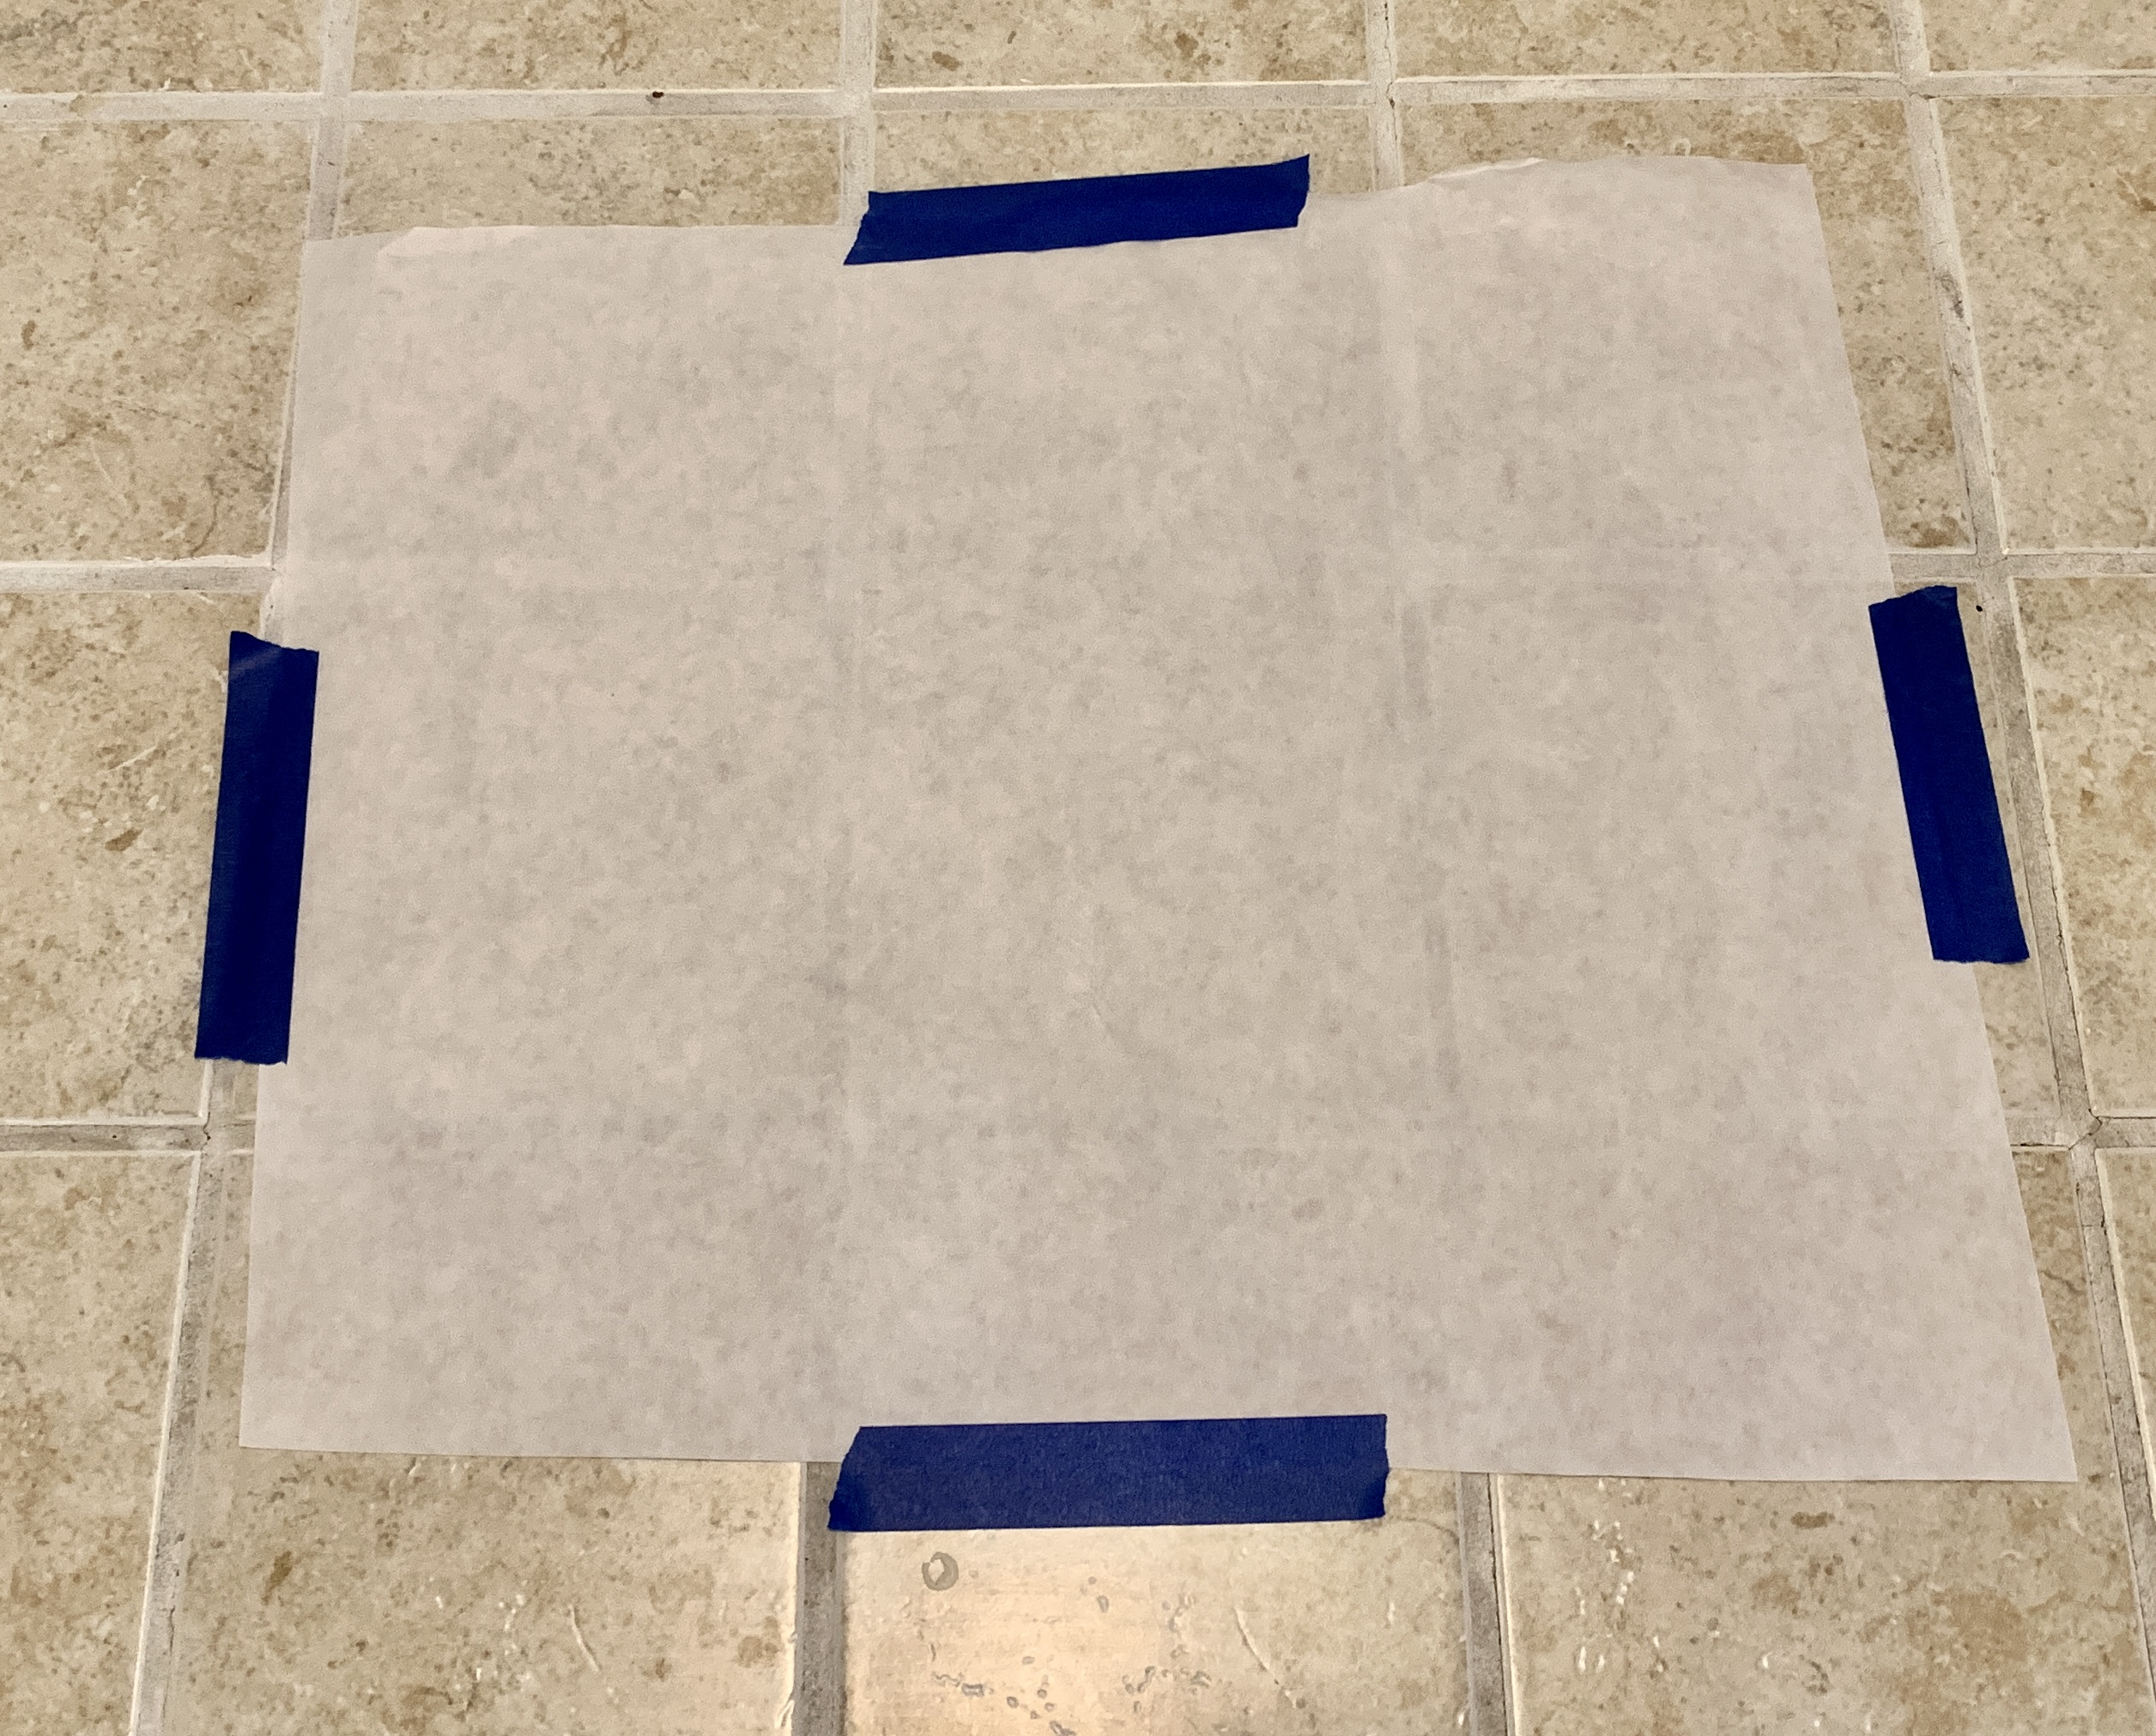
Tape the paper down for extra security.
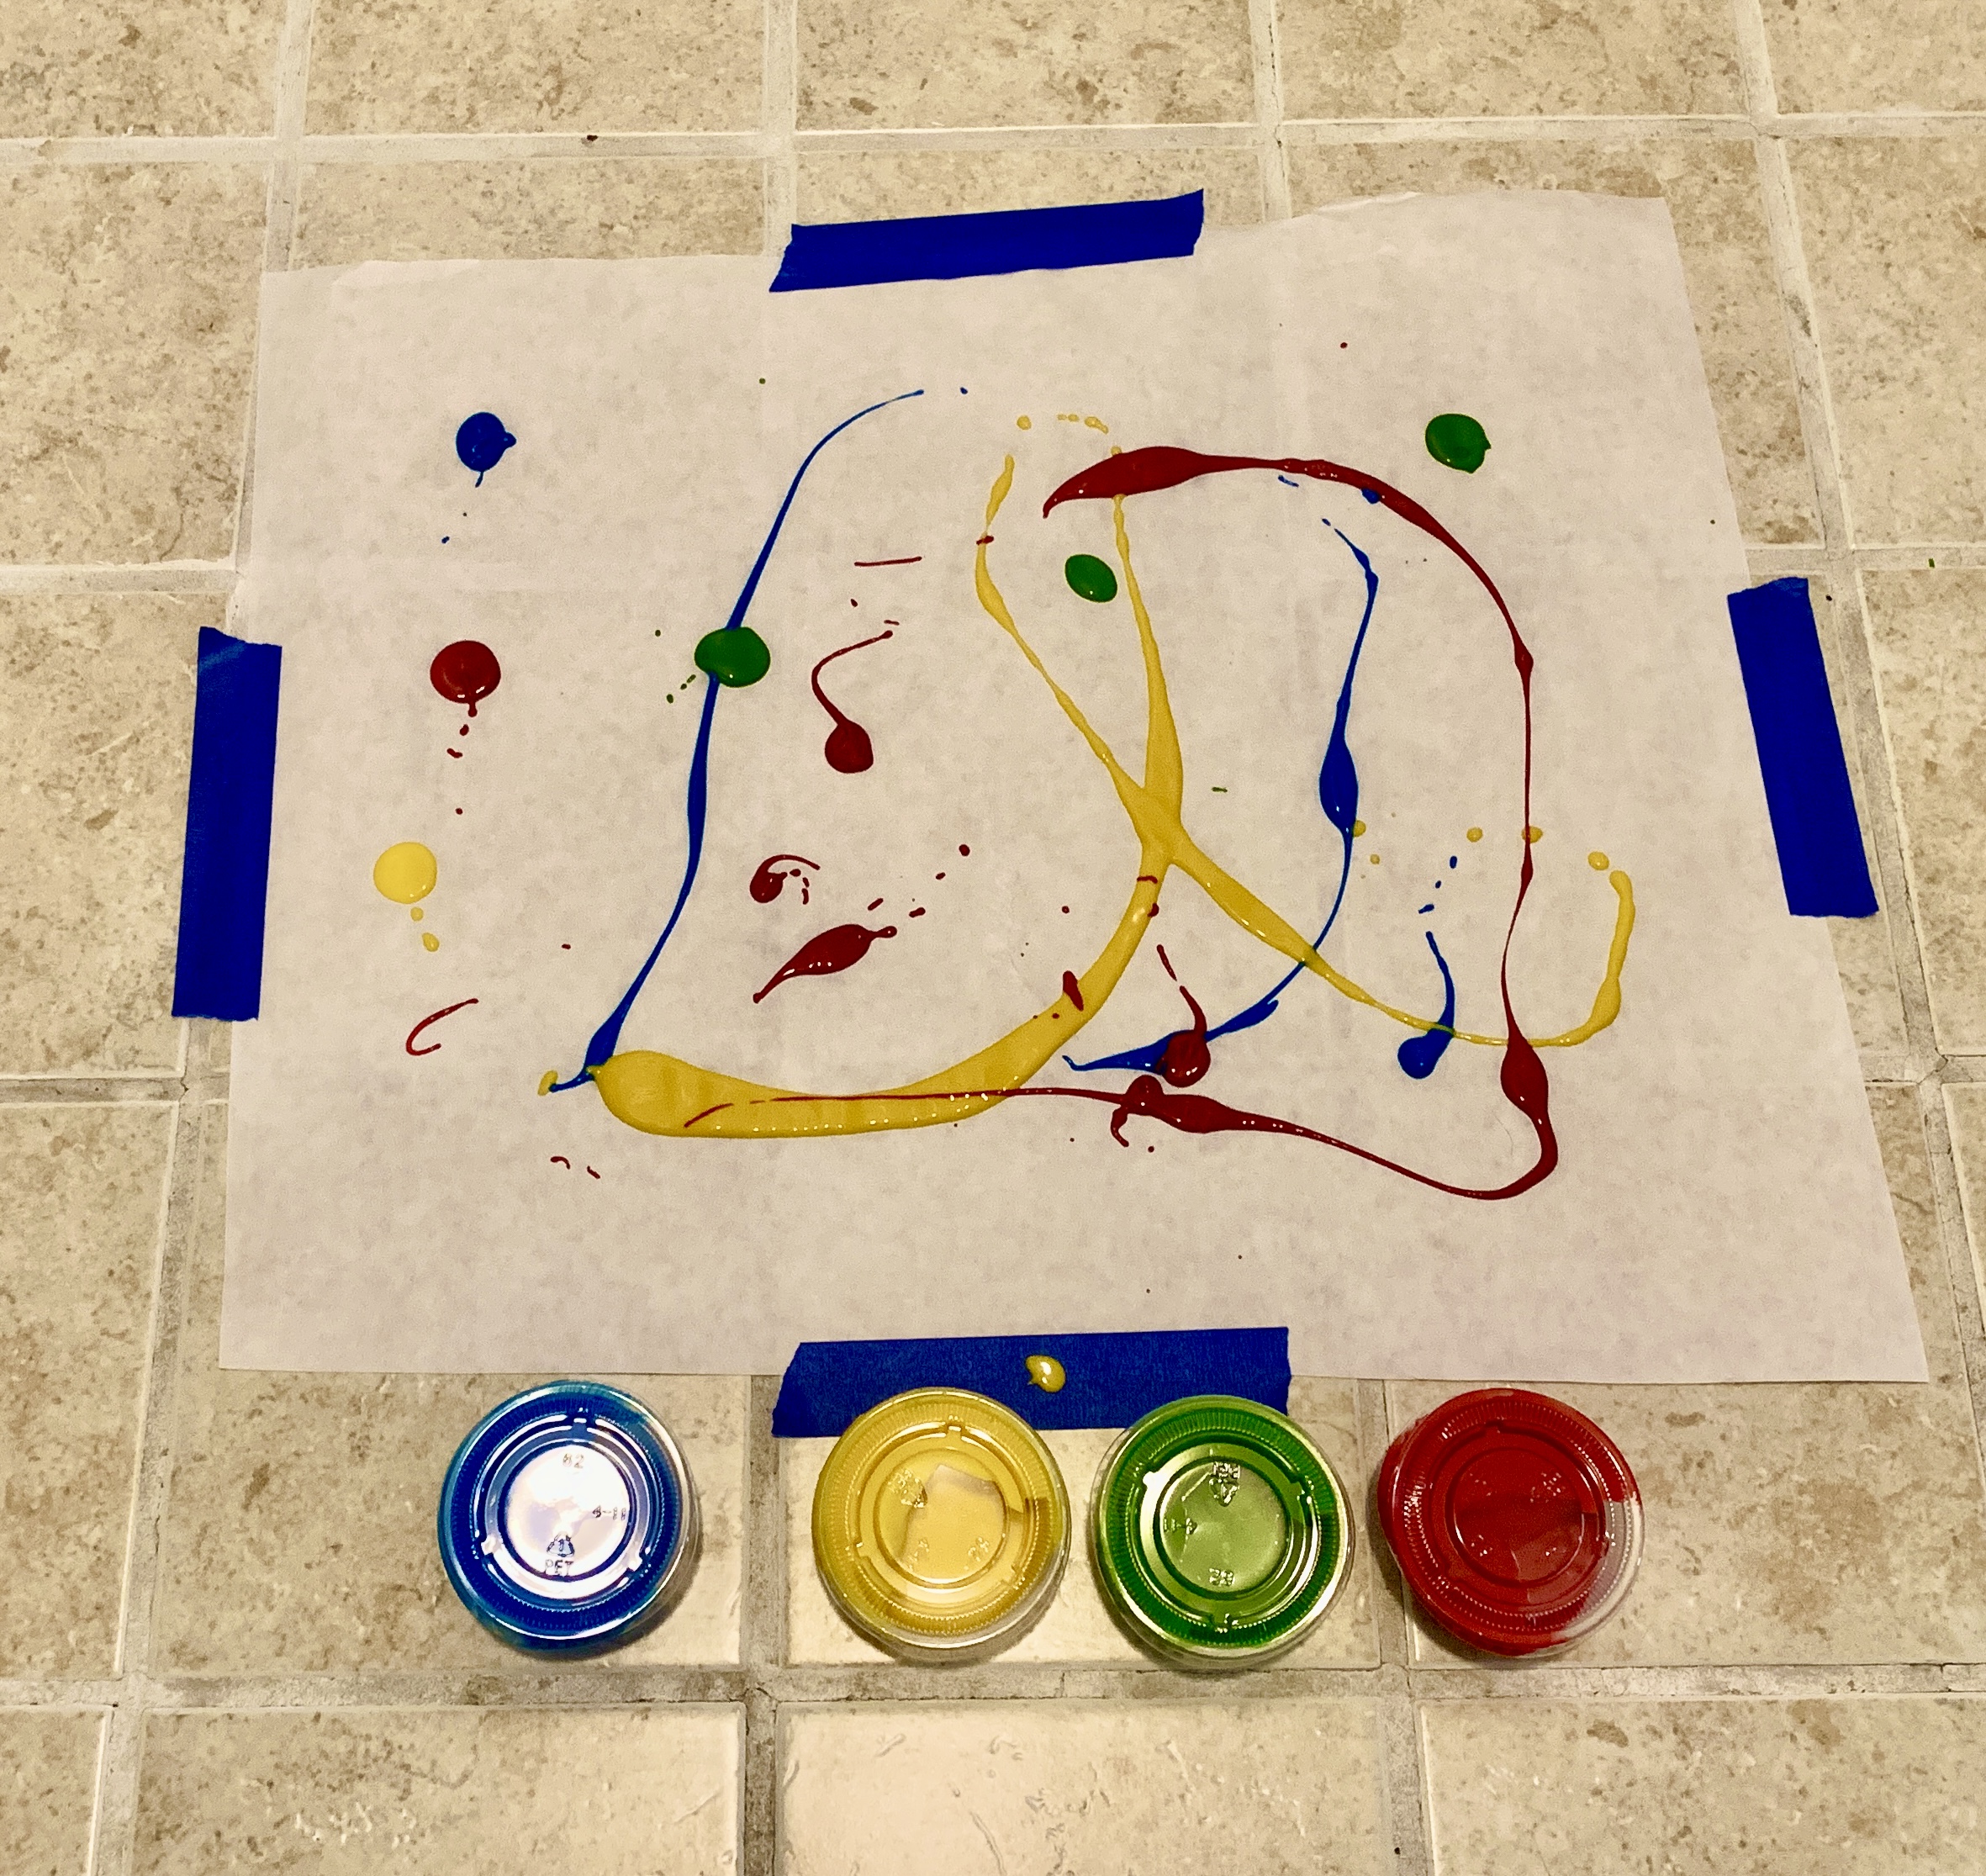
Pour the paint that you like onto the paper.
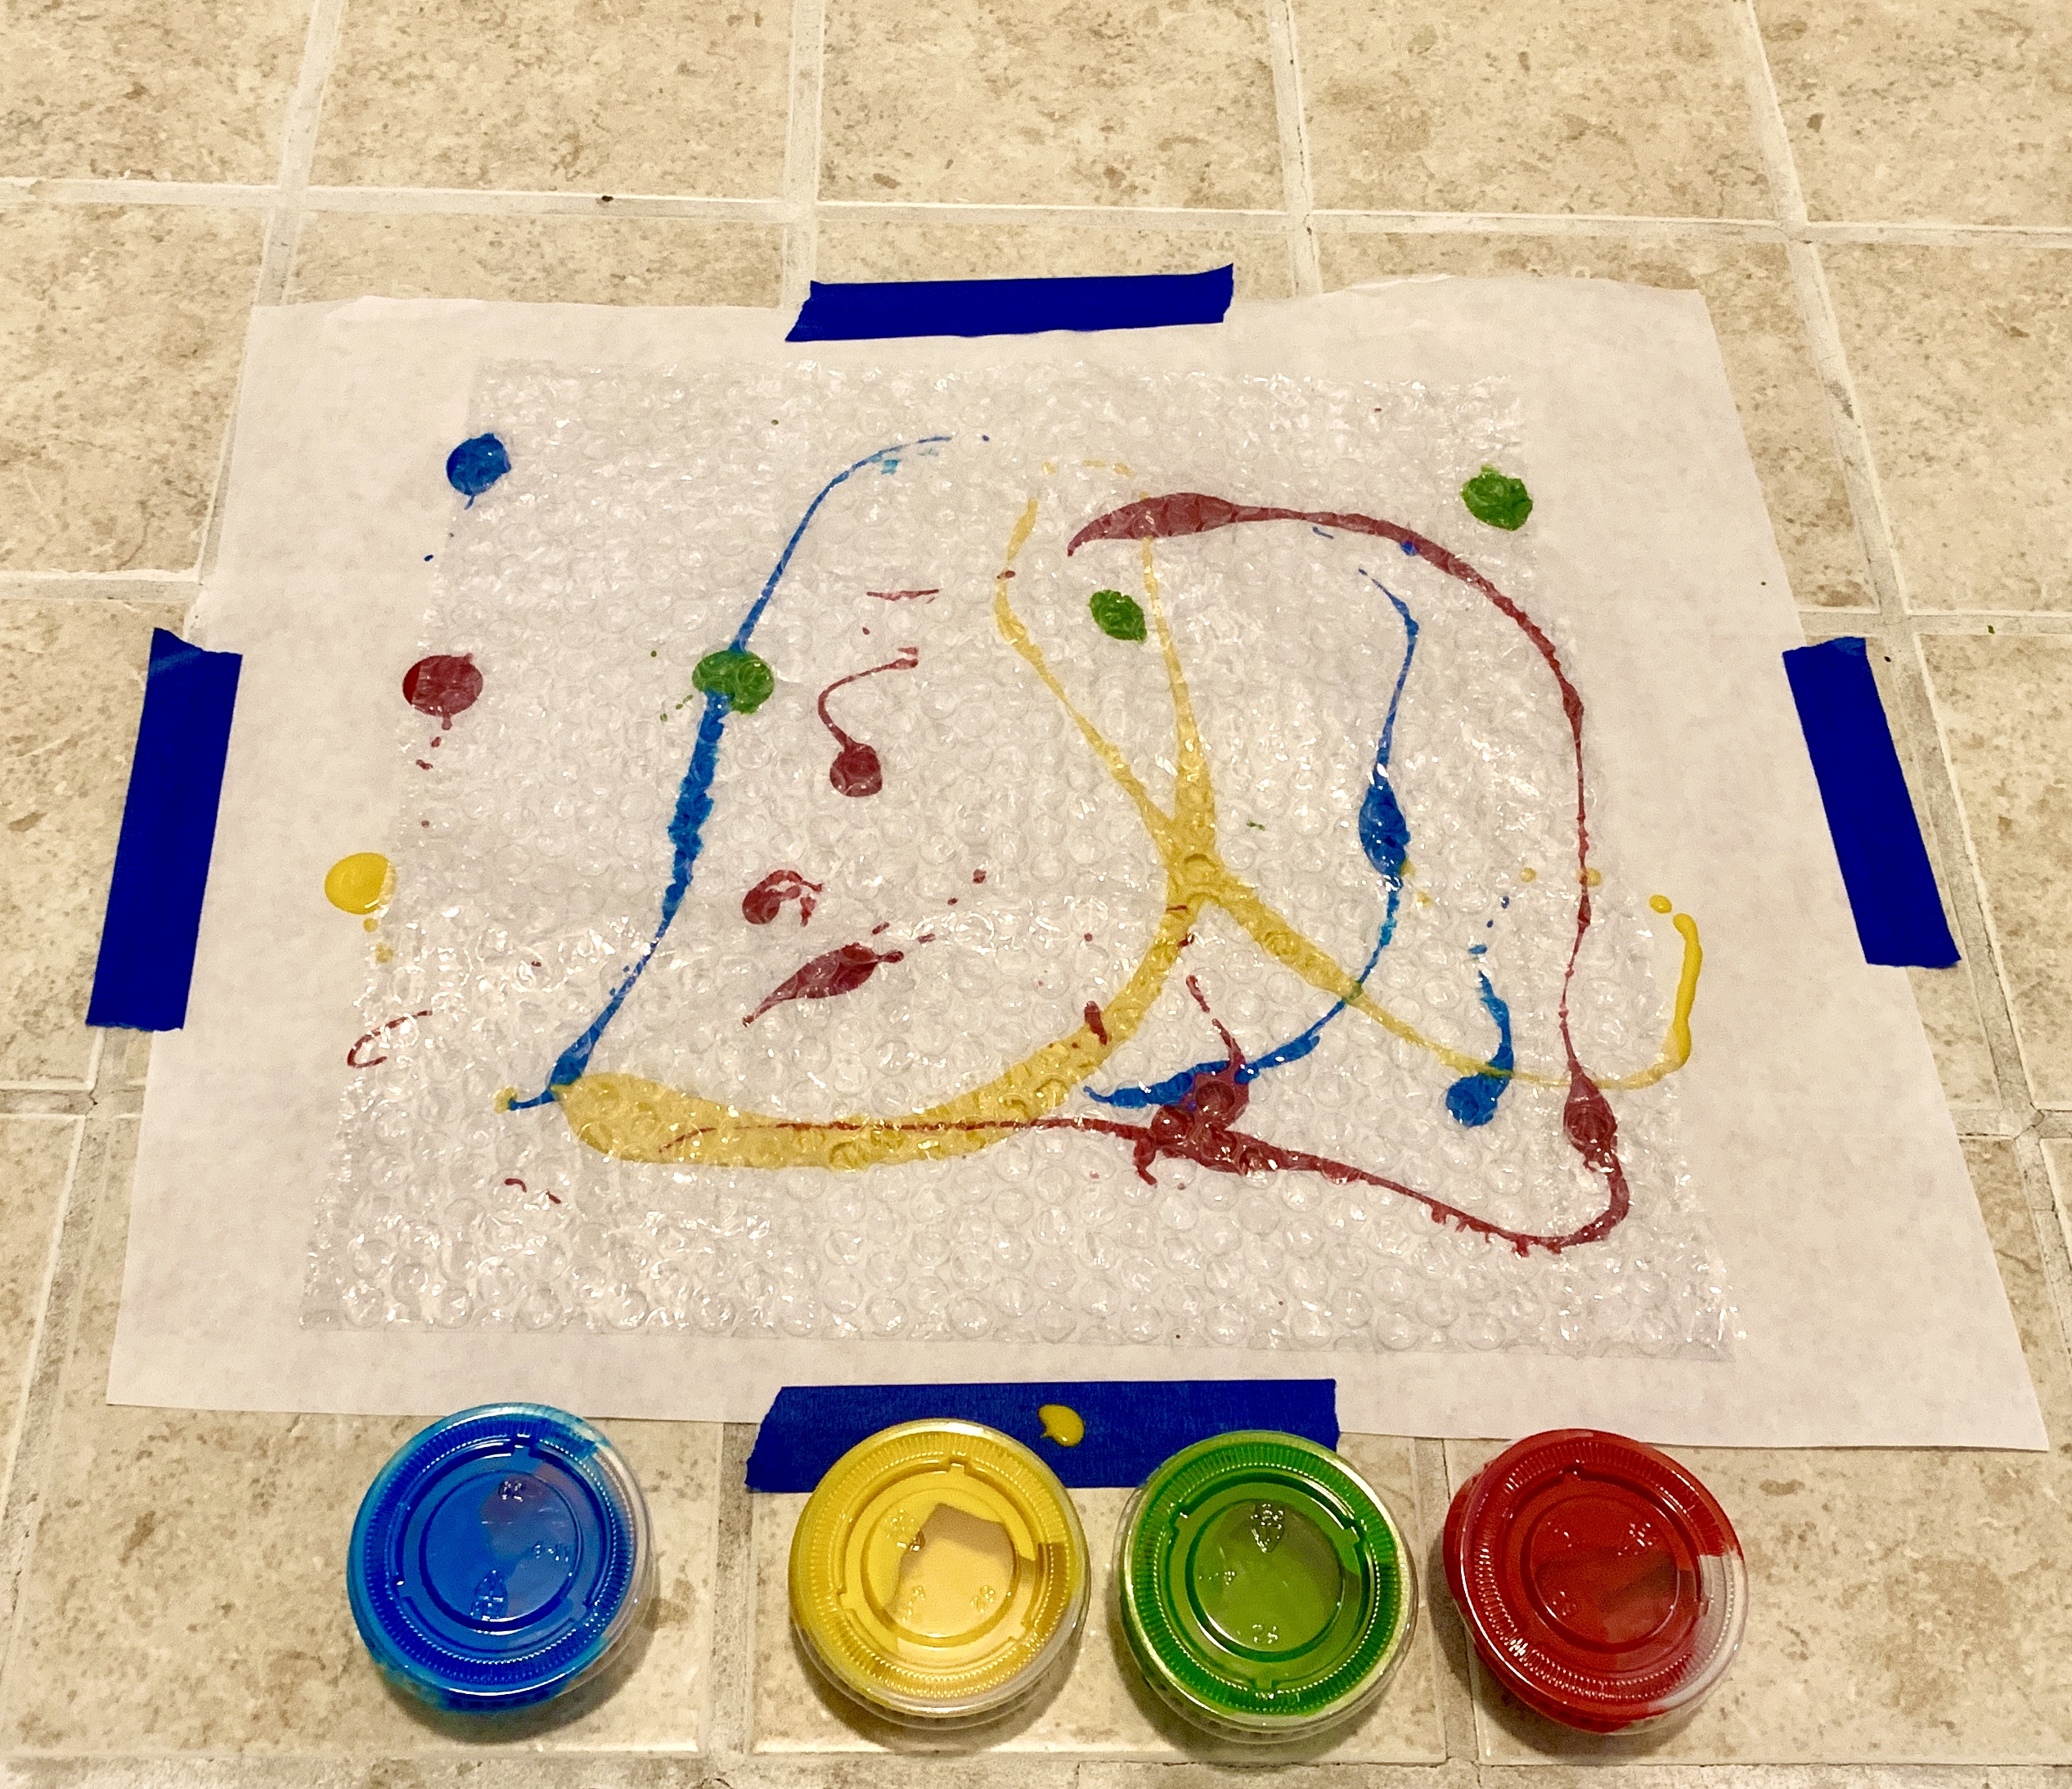
You can cut the bubble wrap in half and wrap it onto your feet, or you can just simply place the bubble wrap onto the paper.

Stomp around to create your art! Remember to use caution when stomping on the paper because it can get slippery. Alternatively, you can use your hands to press the bubble wrap, instead of stomping.
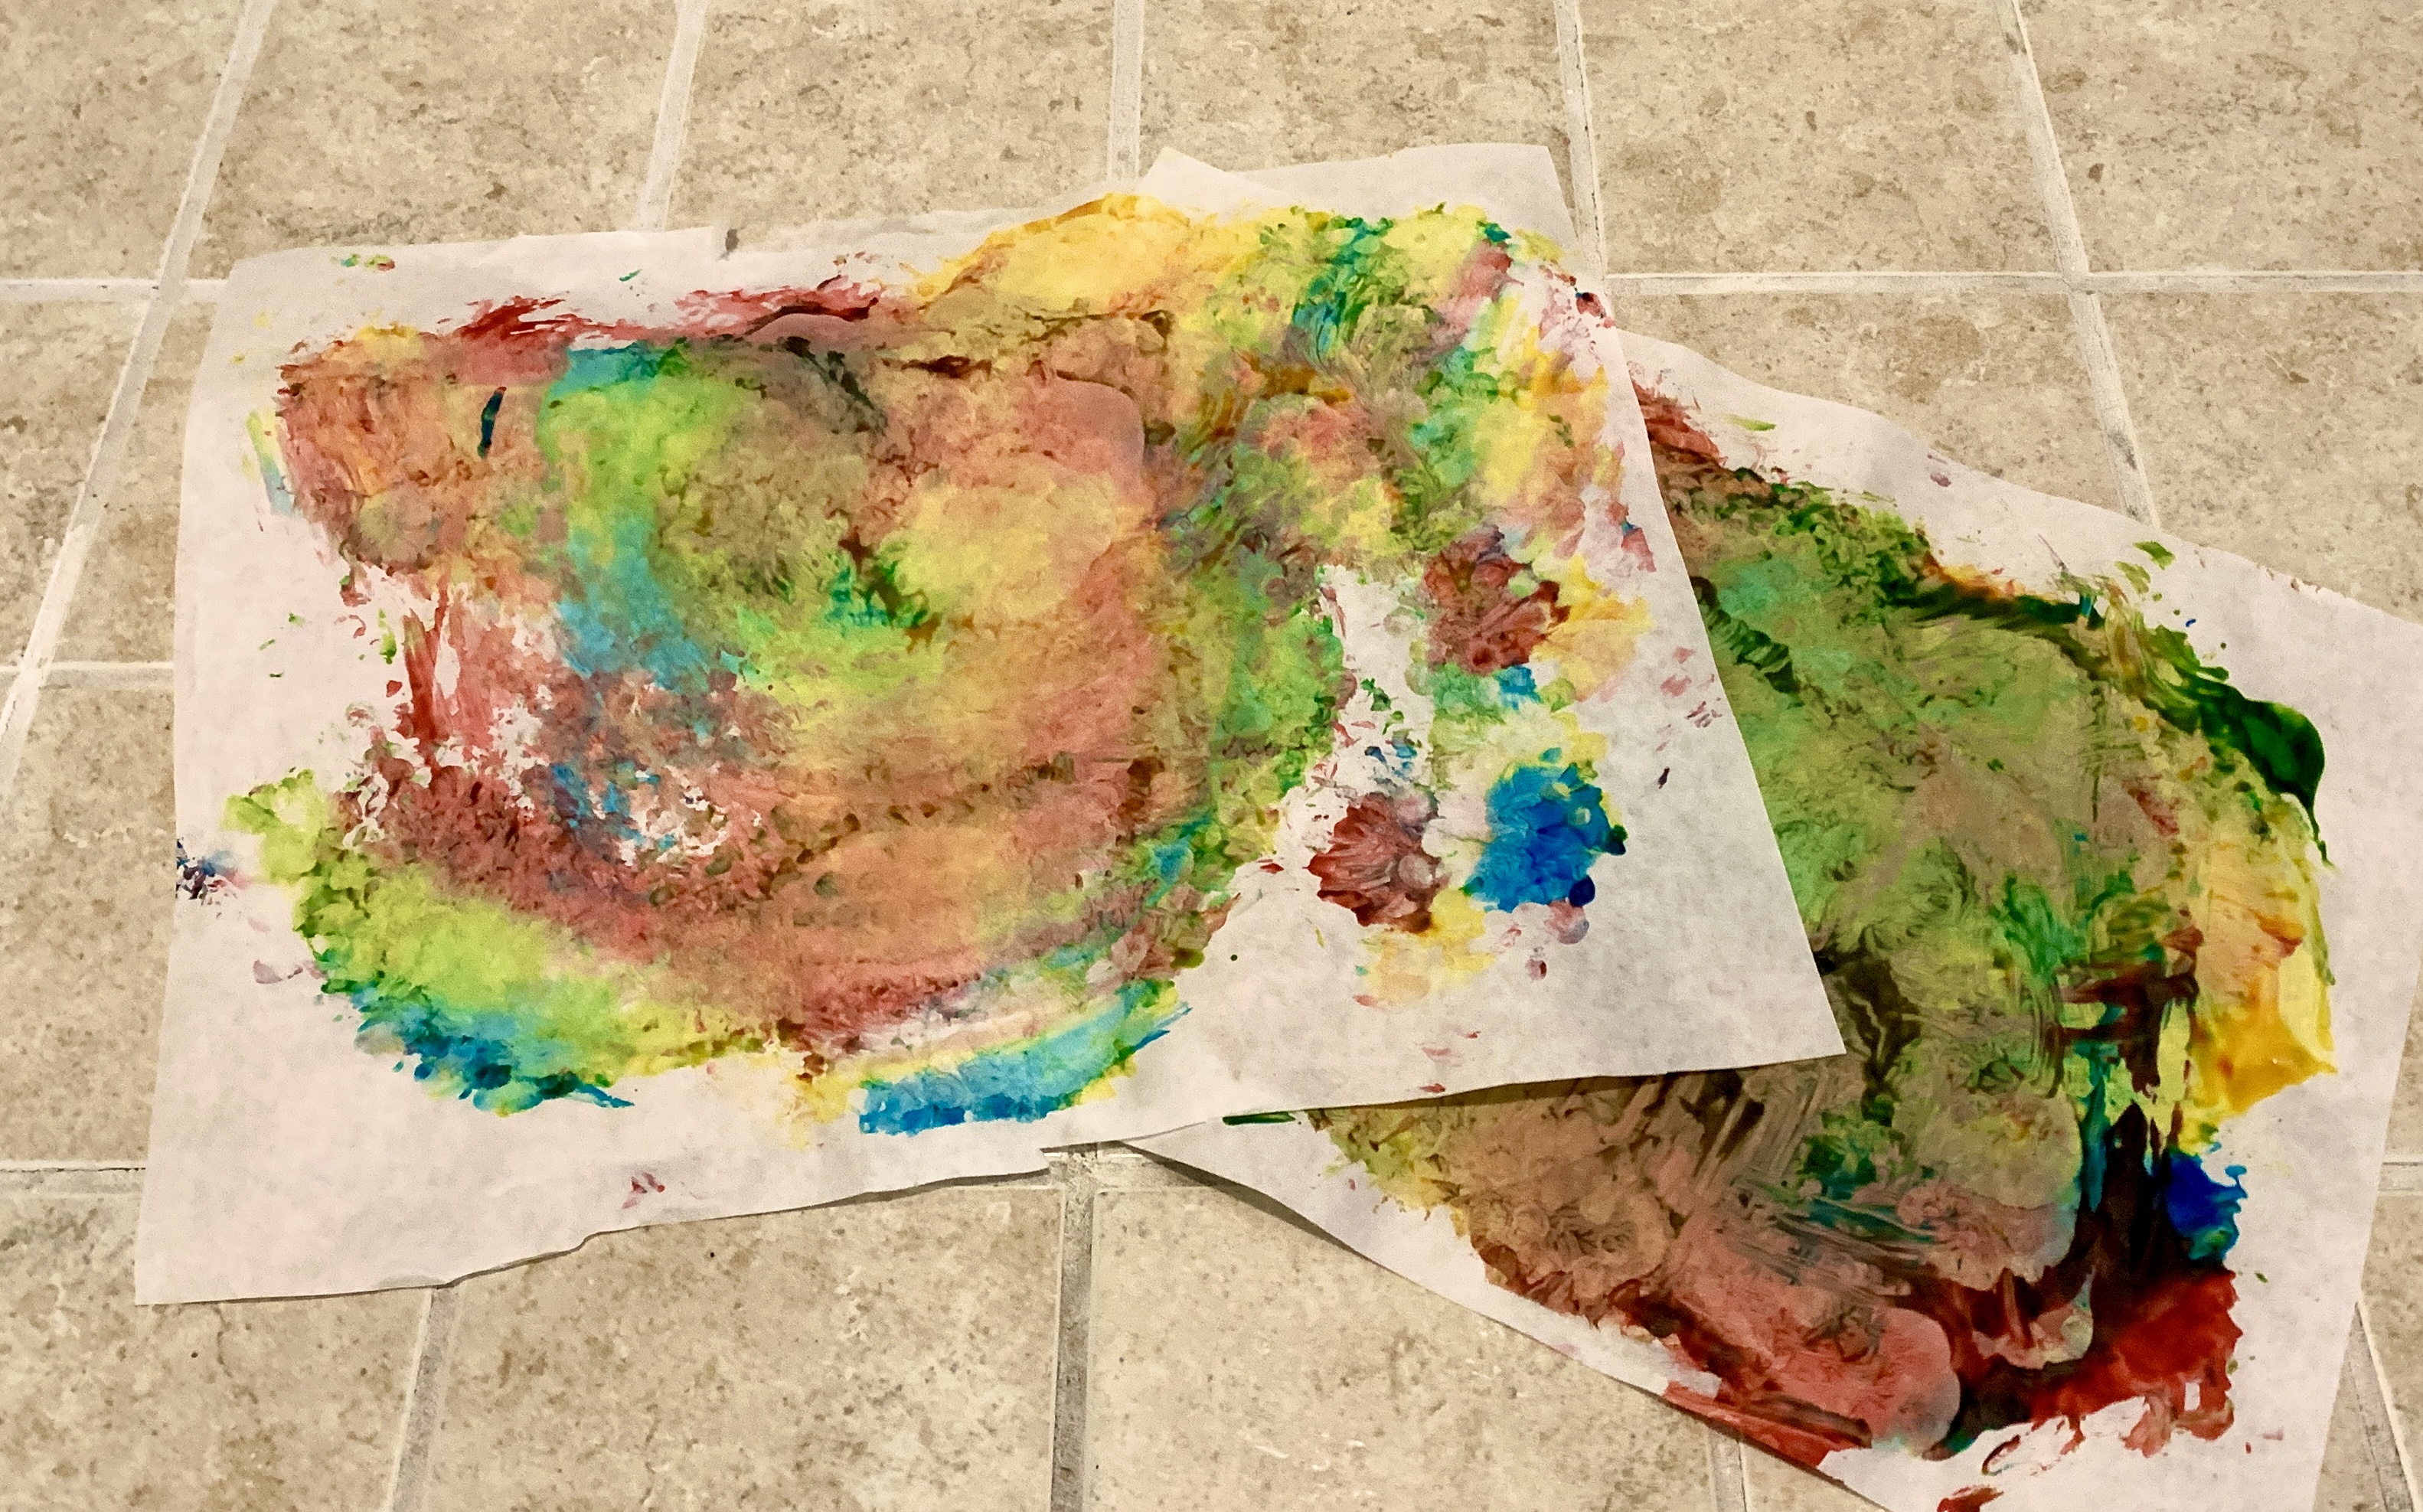
Show us what you created! Send us pictures at youthservices@balibrary.org.
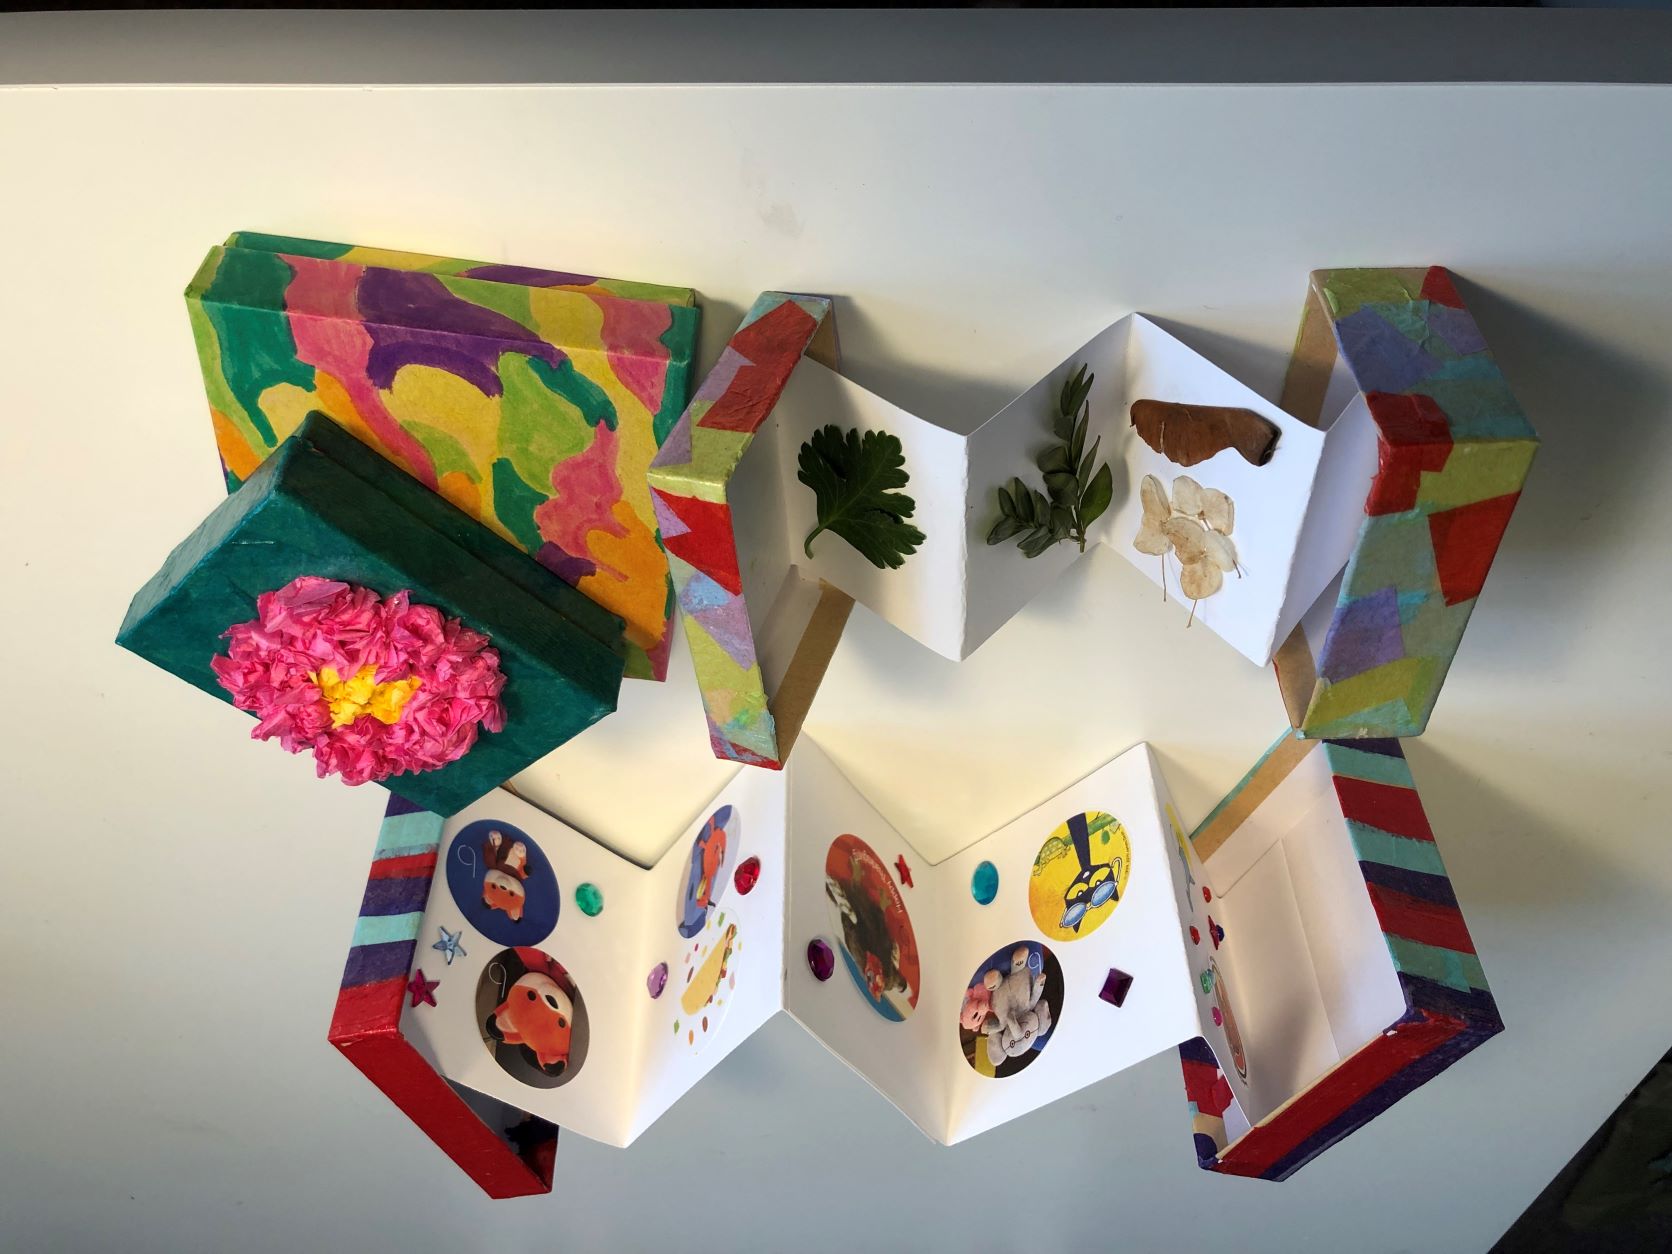
Grades K-2: Mini Collection Boxes
Decorate a box to hold your smallest treasures. Register for the April/May Grades K-2 Take-and-Make Kit here.
Kit contains:
- 2 small boxes
- 1 sponge brush
- 1 container of Mod Podge
- Several sheets of tissue paper
- 4 strips of cardstock
You may also need:
- Scissors
- Ruler
- Pencil
Instructions:
- Cut or tear the tissue paper into small squares or strips.
- Separate the two halves of one of the boxes. Coat one small area with Mod Podge, then place tissue paper bits on top. Keep applying Mod Podge as you go.
- You can overlap the pieces as much as you like. You can either trim the edges, or wrap them on the inside of the box.
- Let dry completely (about an hour). Make sure to wash out your sponge brush while you wait.
- Add a second coat of Mod Podge to seal the tissue paper, and let dry again. (Mod Podge will dry clear, and provides some durability for your design.) (Again, wash the brush!)
- If Mod Podge turns out to be challenging or too messy, you can also decorate the box with any other craft supplies – paint, crayons, markers, stickers, etc. Just make sure the box will still close!
- Fold one of the strips of cardstock paper into an accordion fold. The folds should be a little smaller than the width of the box. You can use a ruler and pencil to help with this.
- Lay the two box halves open and side-by-side.
- Use the sponge and Mod Podge to glue the first and last folds into the insides of the two box halves. Make them as even as you can so the box will close. You can also use double-sided tape.
- Let dry.
- Now your box is ready to store and display a small treasure collection! Stickers are a ready-to-go choice, but you can also glue buttons, class photos, leaves or flowers into your box.
Show us what you created! Send us pictures at youthservices@balibrary.org.
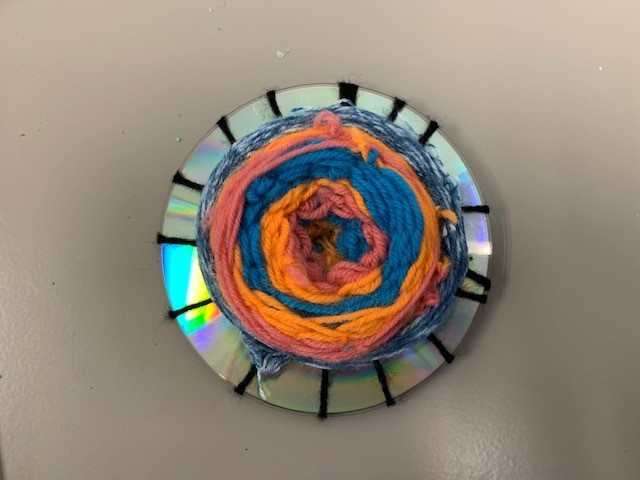
Grades 3-8: CD Weaving
Turn an old CD into a work of art with this simple weaving project. Register for the April/May Grades 3-8 Take-and-Make Kit here.
Your kit contains:
- 2 CDs
- 2 sewing needles
- Black yarn
- Rainbow ombre yarn (color will vary)
- Blue ombre yarn
- 3 small skeins of yarn
1. Pick out a yarn color for the spokes of your CD. You can use the black yarn or a different color.
2. Pull the yarn through the hole of the CD, leaving a small amount of yarn at the end. Secure the yarn by tying a knot to itself.
3. Pull the yarn tightly across the CD and back through the hole, creating a spoke that goes from the hole to the edge of the CD.
4. Continue to make spokes until you have an uneven When you are done creating your spokes, tie a knot to the label side.
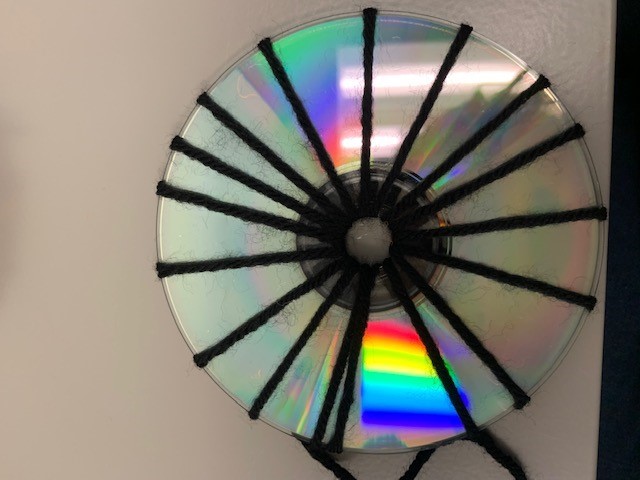
5. Pick out your first color of yarn, cut a piece, and thread it through your needle. Attach the end of the yarn to one of the spokes on the printed side. Weave the needle and thread over and under through the spokes, pulling it taut as you go along.
6. Continue to add different colors of yarn to your CD, until you are done.
Show us what you created! Send us pictures at youthservices@balibrary.org.
Youth Services Assistant Librarian Alyssa -
7 Kids Websites That Combine Games and Learning

Photo by Mimi Thian on UnsplashLooking for educational websites or educational games for kids? Here are 7 websites that are chock full of fun facts, learning experiences, and games.
ABCYa (Grades PreK-6) - This site includes a large number of educational games for kids in PreK-6 grade. The games cover a wide variety of topics including, math, English, and strategy. All games are free on the website. A premium version is available for purchase that includes no ads and mobile access.
FunBrain (Grades PreK-8) - Games, reading selections, and videos for kids in PreK-8 grade. All of the content is free. However, ads are shown on the side and after playing a game.
Google Arts and Culture (Grades 3-8) Explore art, museums, history, and landmarks throughout the world. Games include digital art, puzzles, music experimentation, and augmented reality.
Met Kids (Grades 3-8) - Explore the Metropolitan Museum of Art with interactive exhibits, behind the scenes videos, and project activities inspired by famous artworks.
National Geographic Kids (Grades PreK-8) - Games, videos, and fun facts on animals, history, and science.
PBS Kids (Grades PreK-5) Featuring your favorite PBS Kids characters, including Sesame Street, Daniel Tiger, Curious George, and more! These games cover education topics from engineering to history to math.
Smithsonian Kids ( Grades PreK-8) - Live animal webcams, games, project ideas, and opportunities to explore the Smithsonian’s exhibits.
Looking for more educational information, help with homework, or practice worksheets? Check out ourdatabases for kids!
 Youth Services Librarian Ann
 -
Get Writing with These Journal Prompts
Dear Middle Grade Students,
Are you stuck inside 'cause of COVID? Wanna write but don't know where to start? Just plain bored? Here are 31 journal-writing prompts (a whole month's worth!) to get you started.
By the way, don't worry about word count or anything like that -- express yourself how you want, as much as you want.
1. Describe two people you look up to or admire: one real, one fictional. Why do you admire them? How are they different? How are they the same?
2. What's something that always makes you laugh, whether you're feeling happy or sad?
3. Write about a mistake you made recently. Did you learn anything from it? What did you learn?
4. If you could have any fictional creature as a pet, what would it be and why?
5. Pick your least favorite character from your favorite book and write from their point of view.
6. What was your least favorite thing about quarantine? What was your favorite thing?
7. What's a food you could eat every day for the rest of your life? Do you think you'd get tired of it? Why or why not?
8. If you could learn another language, what would it be? Why? How would you use it?
9. Write a poem about your happiest memory.
10. Write a poem about a sad memory.
11. Do you have a favorite song? If you do, describe what you love about it, how it makes you feel.If not, why? How does music make you feel?
12. If you could talk to your future self, what would you say? Would you want to learn about what happens in your life, or would you want to keep it a surprise?
13. If you could talk to your past self, what would you say? Is there anything you'd suggest they do differently?
14. If it's nice out, find a safe spot outside. Sit down. Close your eyes. Listen to the world around you. What do you hear?If you can't go outside, find a spot by a window. Sit down. Close your eyes. Listen to the world outside. What do you hear? How does it make you feel?
15. Write about something you're proud of, even if you don't think it's a big deal.
16. If you have a hobby, write about why you enjoy it and what got you into it in the first place. If you don't have a hobby, write about one that sounds fun.
17. What is the best advice someone has ever given you?
18. What calms you down when you're upset?
19. Is there anything that worries you about the future? How do you think you'll handle it? Is there anything you can do about it now?
20. Describe three things you enjoy about today, no matter how small.
21. If you could have one superpower, what would it be and why?
22. Imagine you have access to a time machine. Would you go to the past or the future? What do you think it would be like?
23. Write your autobiography in only six words.
24. What is one thing that excites you about the future?
25. Close your eyes. Imagine your favorite color. Now describe it as if you were talking to someone who's never seen it before.
26. What are 5 things you'd like to accomplish during your lifetime?
27. What do you like about the city you live in? What would you change?
28. What are 3 things you will never forget? Why?
29. Write a letter to someone who will never read it.
30. What is something you'd change about school? Why? How do you think students would deal with the change? What about the staff?
31. What is your best quality? Why? If you want to be extra ambitious, write this entry in the form of a one-page comic.
And there we have it -- a whole month of journal prompts. Don't feel like you need to do them all -- just do as many as you'd like.
One last thing: after you're done journaling, think about what you've written. Did you learn anything new about yourself?
Looking for recommendations? Fill out our form to get a custom list of reads or a Book Bundle for pickup.
 Youth Services Librarian Chris
 -
February/March Take-and-Make Kits
Bring home a fun new project! Sign up from our Library Calendar and pick up a kit at the Youth Services desk or through our Parking Lot Pickup service between February 14-March 11.
Toddler & PreK: Coffee Filter Butterflies
Liquid watercolor and coffee filters transform into beautiful butterflies. Register for the February/March Toddler & PreK Take-and-Make Kit here.
Kit contains:
- 5 coffee filters
- 5 pipe cleaners
- 3 containers of watercolor paint
- 1 pipette
Instructions:
- Dress for a mess, and cover your work area—the paint will soak through the coffee filters.
- Smooth one of the coffee filters flat.
- Use the pipette to drop the watercolor paint onto the filter. You can clean the pipette by squeezing fresh water in and out of the pipette a few times.
- Let dry completely. This might take several hours, depending on how much paint you use.
- Pinch two sides of the filter together, creating wings.
- Fold one pipe cleaner in half. Twist the pipe cleaner around the center of the coffee filter, leaving the ends pointing up for the antennae.
- Repeat with the remaining supplies.
Explore more:
- Using a pipette is a great exercise for fine motor control! Kids can experiment with squeezing the liquid out hard and gently to get different amounts of paint.
- You can dilute the paints with water to get lighter shades. Talk about how colors change when we add water, or they mix and bleed together. You might end up with more than 3 colors on your butterflies!
- Try painting with a brush, sponge, or even paper towel. How does that change the way the paint moves and looks?
- Making butterflies is a great opportunity to learn about symmetry. You can try to paint just one half of the coffee filter, and fold it over to achieve a mirrored effect. What other animals or objects look the same on both sides?
- Add tape, magnets, or clothespins to create some cheery decorations with your butterflies.
Show us what you created! Send us pictures at youthservices@balibrary.org.
Grades K-2: Simple Embroidery
Try out a new skill with this introduction to embroidery techniques. Register for the February/March Grades K-2 Take-and-Make Kit here.
Show us what you created! Send us pictures at youthservices@balibrary.org.
Grades 3-8: Gratitude Jar
Decorate a jar to fill with origami stars – use the stars to write down everything for which you are grateful. Register for the February/March Grades 3-8 Take-and-Make Kit here.
Show us what you created! Send us pictures at youthservices@balibrary.org.
Youth Services Assistant Librarian Alyssa -
December/January Take-and-Make Kits
Bring home a fun new project! Sign up from our Library Calendar and pick up a kit at the Youth Services desk or through our Parking Lot Pickup service between December 20-January 14.
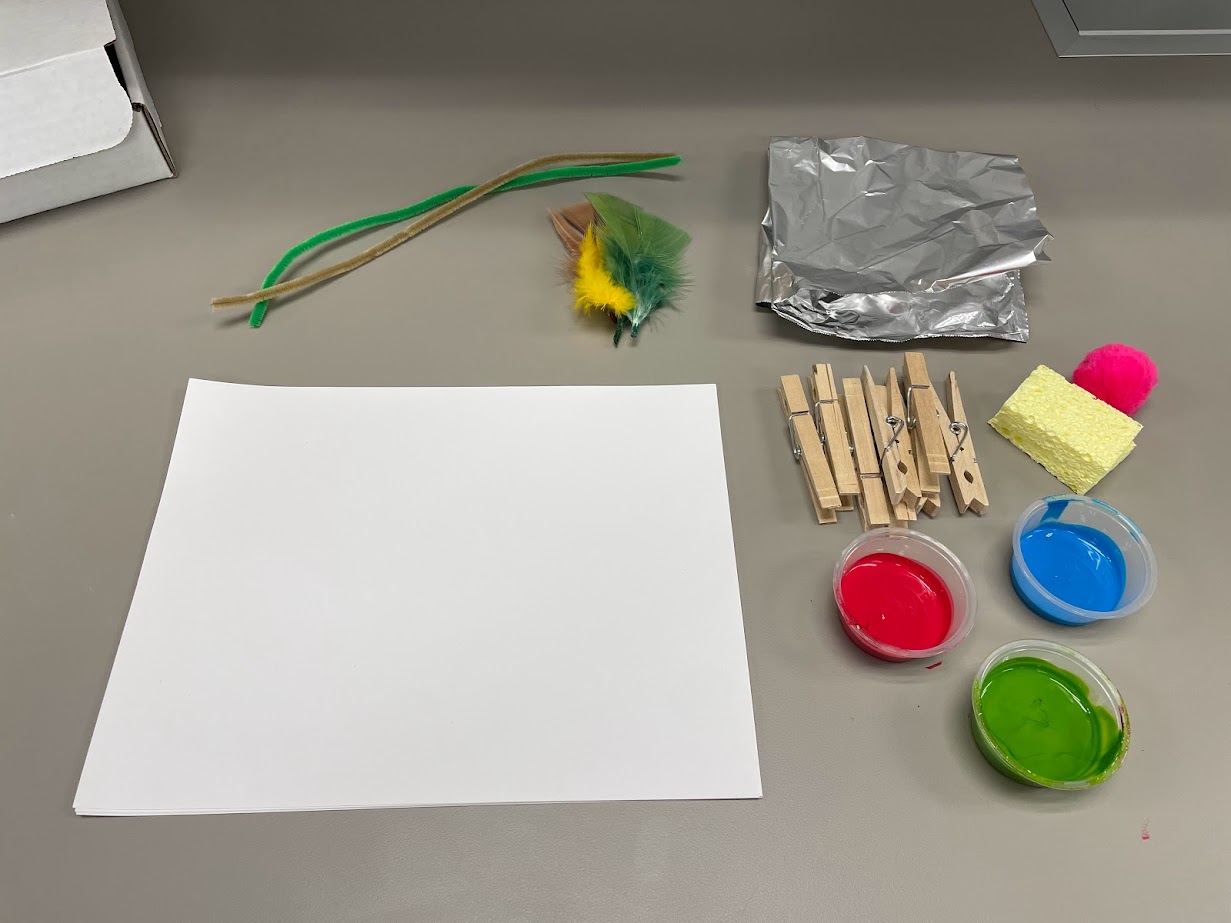
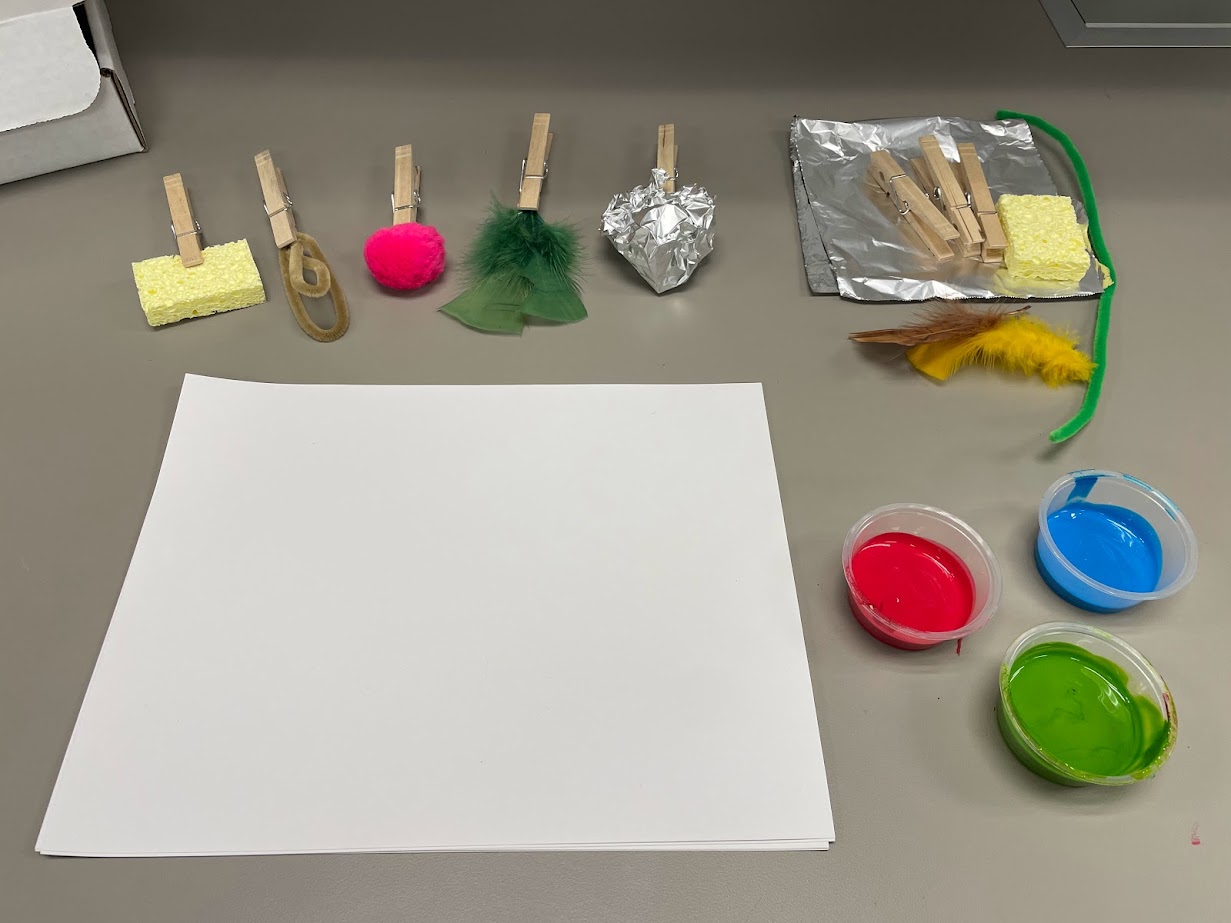
Toddler & PreK: DIY Paint Brushes
Turn some common items and clothespins into paint brushes to see what you can create. Register for the December/January Toddler & PreK Take-and-Make Kit here.
Your Kit Contains:
- 5 sheets of cardstock
- 8 clothes pins
- 2 pipe cleaners
- 2 pieces of sponge
- 4 feathers
- 1 pom pom
- 1 sheet of aluminum foil
- 3 cups of different colored paint
Instructions:
1. Take all of your items out of the box.
2. Assemble paintbrushes by attaching one clothes pin to each of the 5 different materials in the box. For example: secure just 1 or all 4 feathers to a clothespin to create a feather brush.
3. Optional—find 3 more materials from around the house to create your own paintbrushes with the extra clothespins.
4. Use assembled brushes to apply paint to a sheet of cardstock.
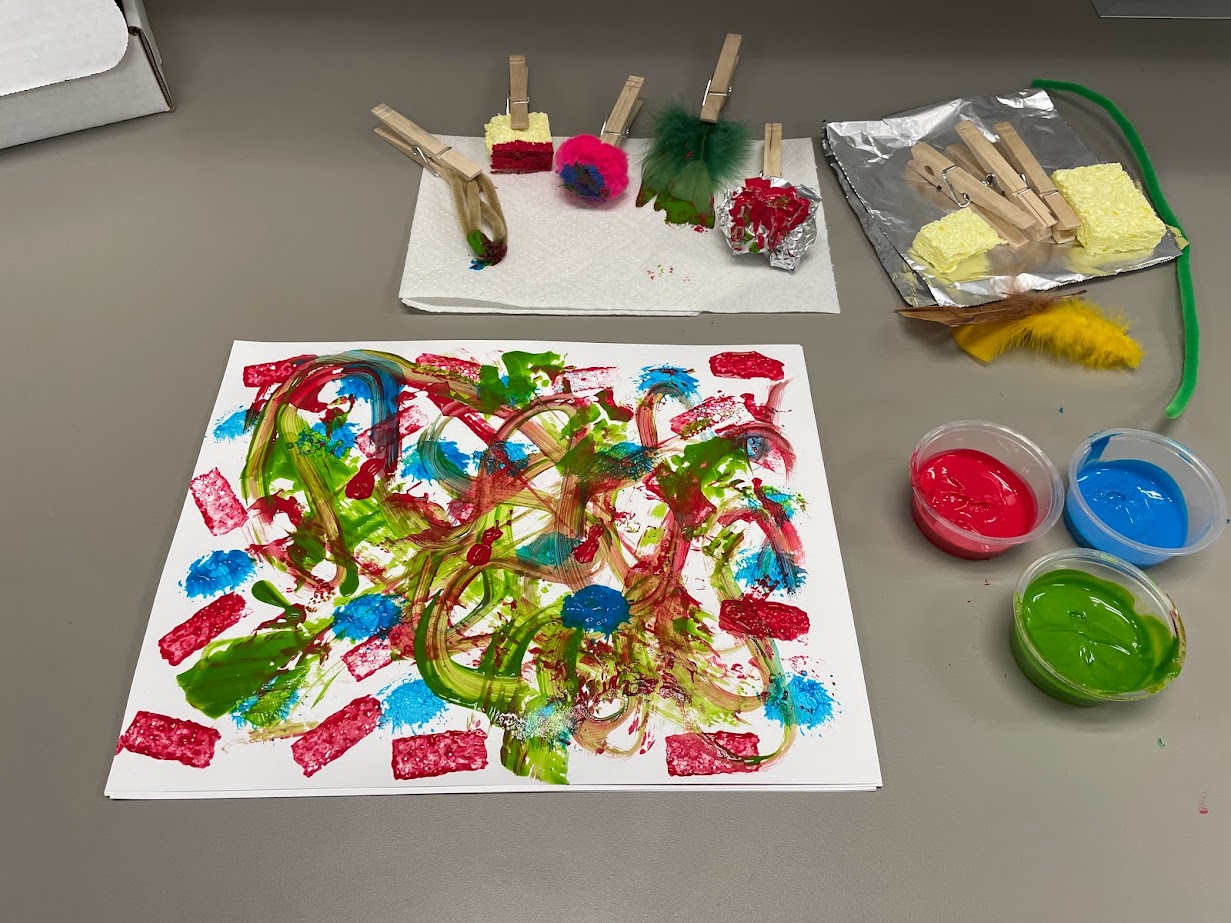
5. Let dry.
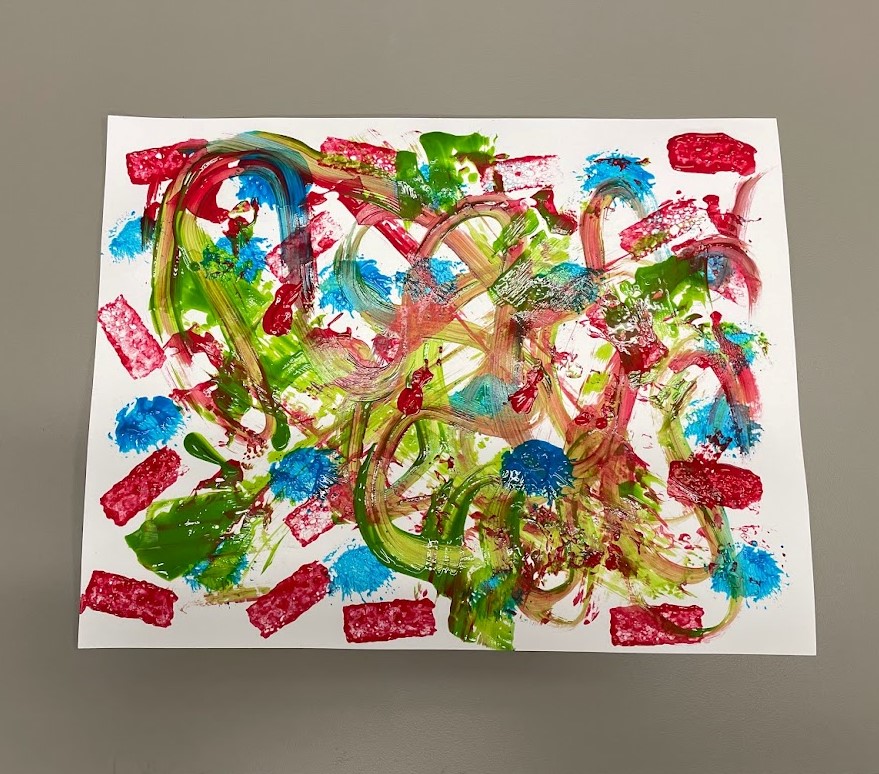
6. Enjoy your artwork!
Extension Questions/Discussion:
- Identify each color paint by name.
- Can you mix the paint colors together to create new colors?
- What other types of things do you think would make good paintbrushes? Why?
- How do each of the different paintbrushes feel as you put paint on the paper? Which one is hardest to use? Which one is easiest?
- How does the paint look on the paper with each of the different paintbrushes? Describe it.
- Which brush is your favorite? Why?
Show us what you created! Send us pictures at youthservices@balibrary.org.
Grades K-2: Pour Painting
Drip, drop, pour, and spread paint to create a unique work of art. Register for the December/January Grades K-2 Take-and-Make Kit here.
Supplies in your kit:
- Canvas
- 3 bottles of tempera paint
You’ll also need:
- Disposable cups (or something to hold up your canvas while you paint)
1. Find a surface where you can get a little messy. You can lay out a tablecloth, some paper towels, or whatever you have on hand.
2. Arrange four disposable cups so that you can rest your canvas on top.
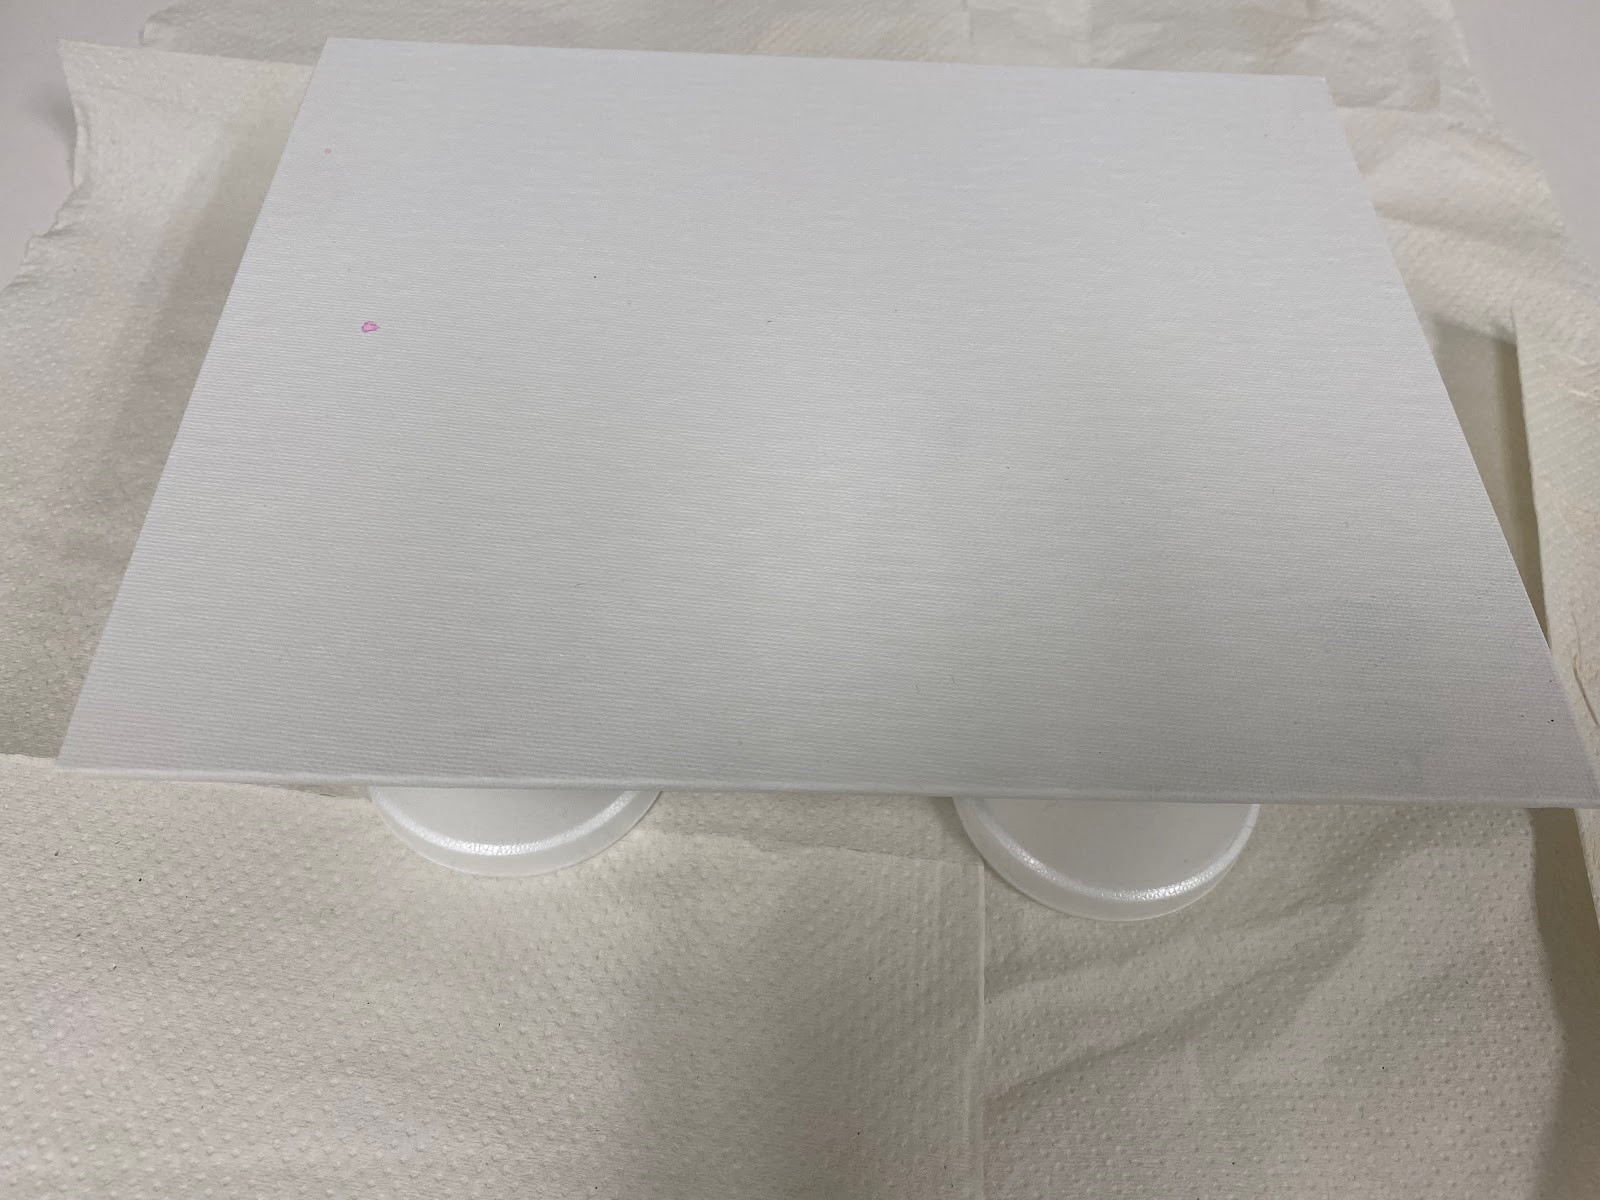
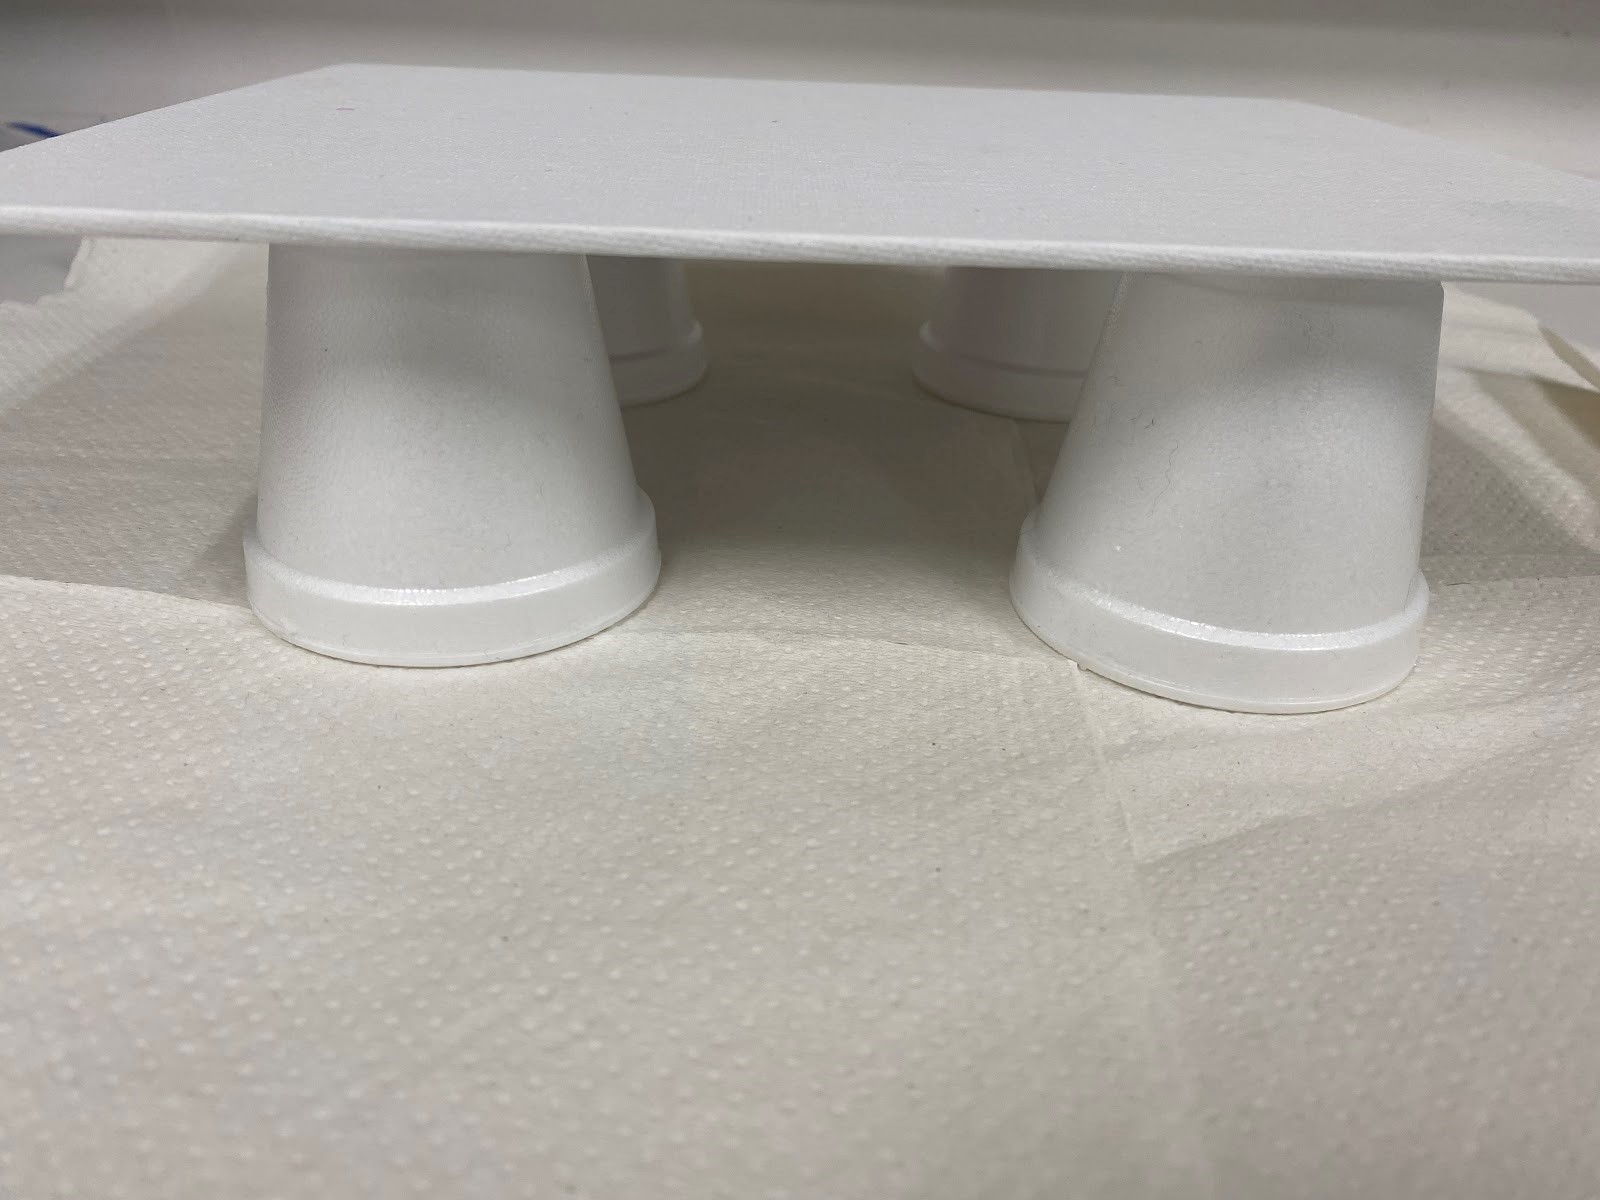
3. Open your bottles of paint and begin to pour the paint directly onto the canvas from the bottle. I made squiggly lines, but feel free to experiment.
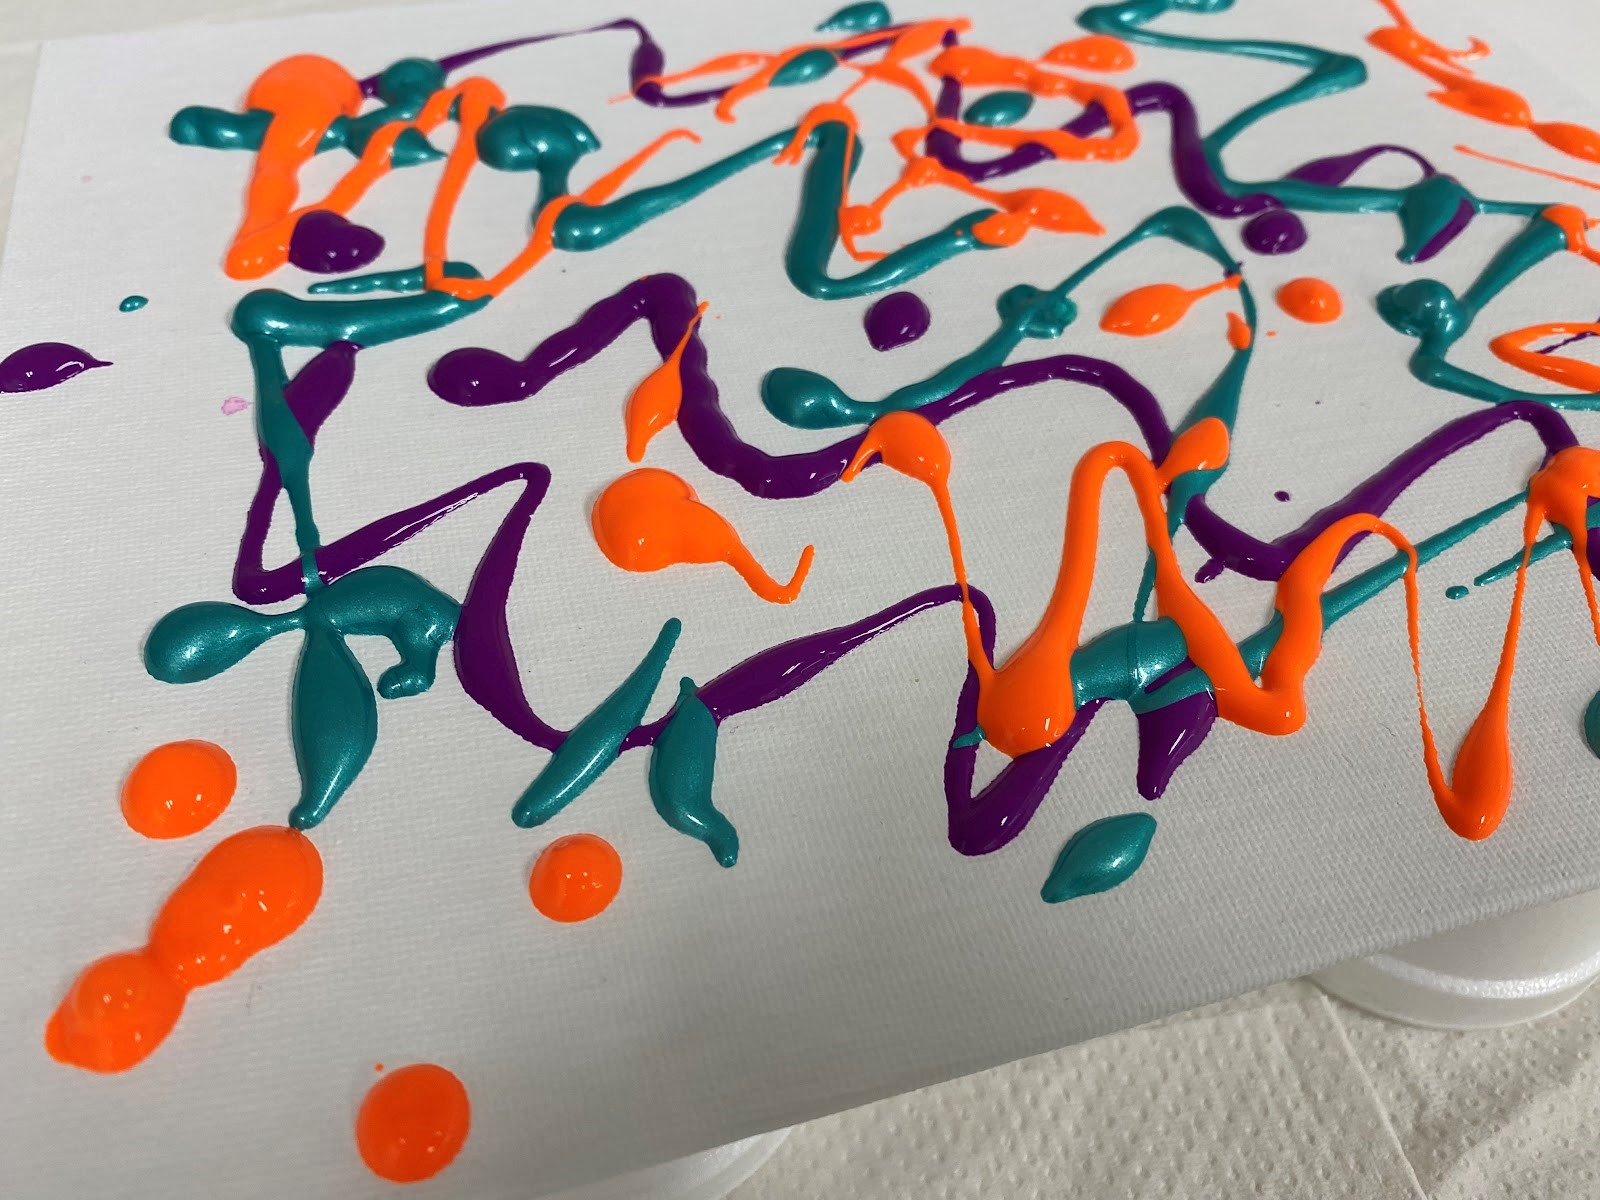
4. Continue pouring the paint onto the canvas, until a majority of your canvas is covered in paint.
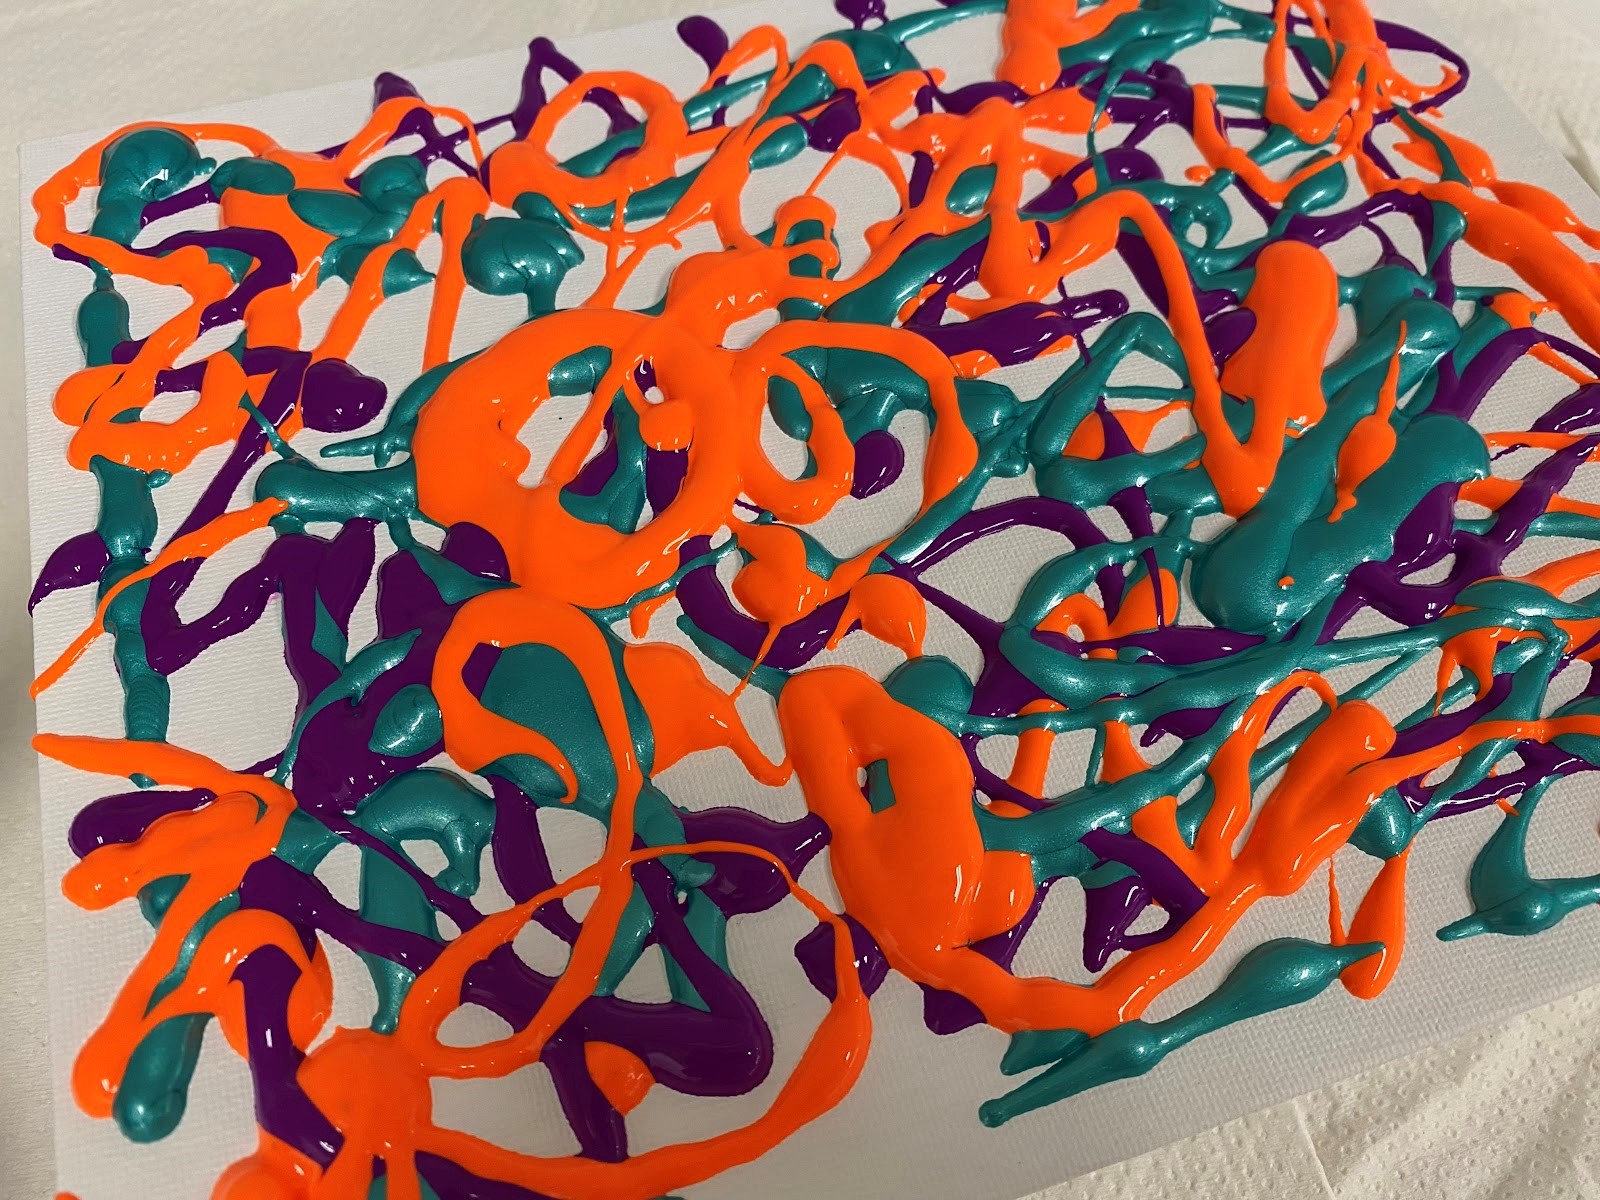
5. Once you have enough paint on the canvas, pick up your canvas and begin to move it around in different directions, so that the paint will drip into the empty spaces and cover the whole canvas.
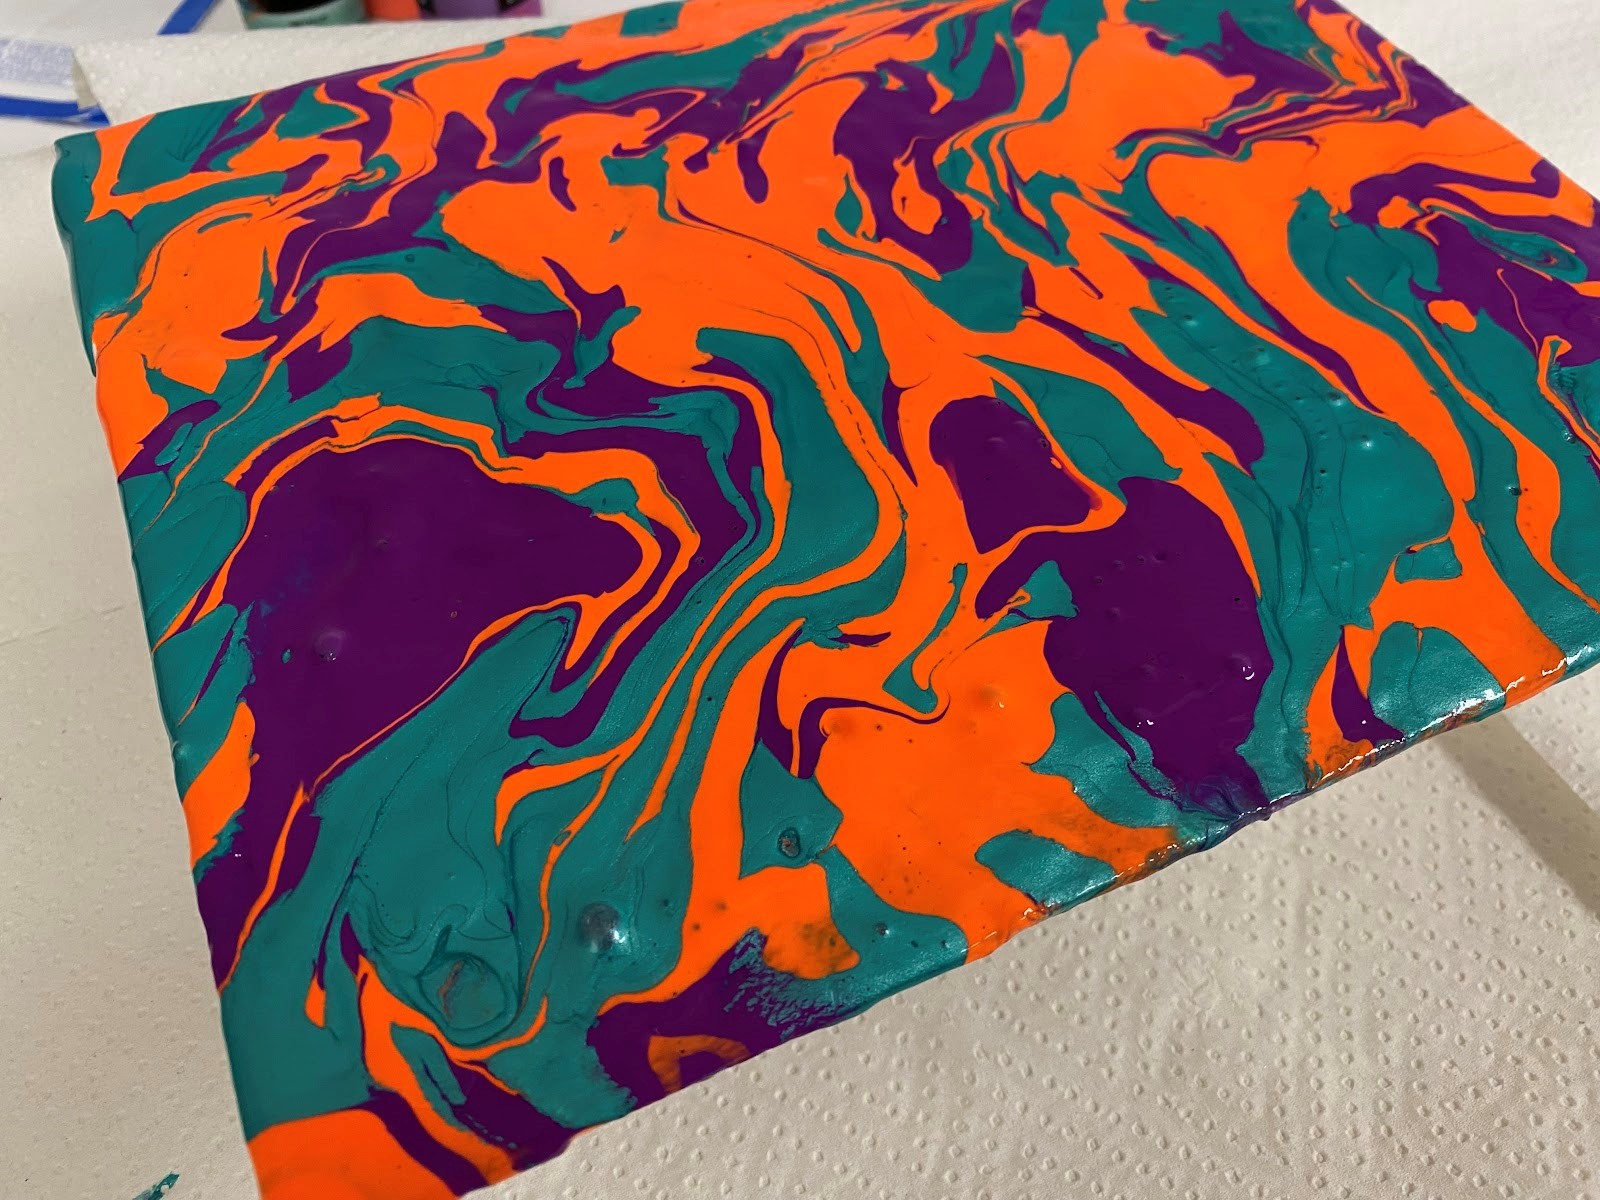
6. Let your canvas dry overnight.
Show us what you created! Send us pictures at youthservices@balibrary.org.
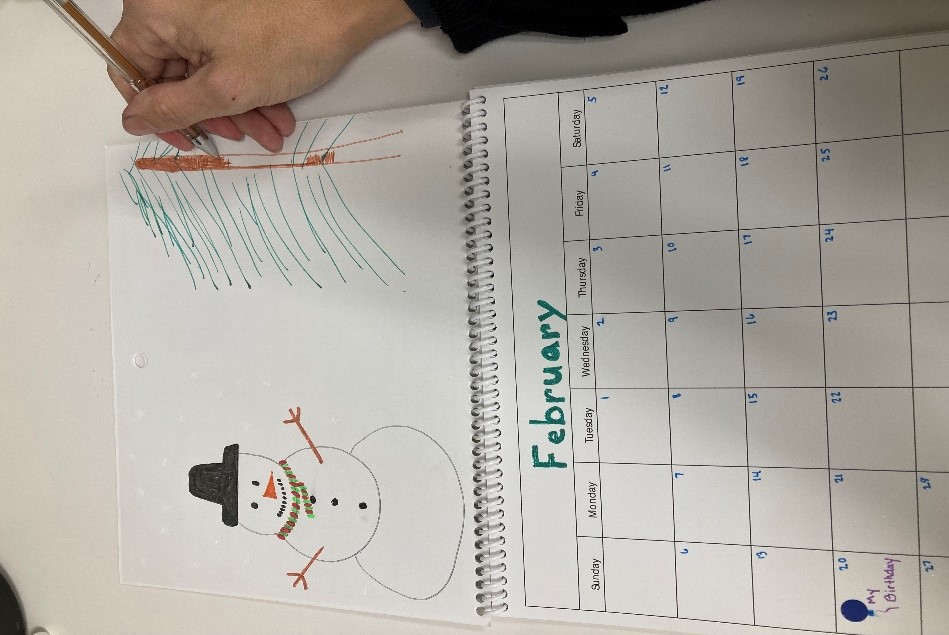
Grades 3-8: DIY Calendar
Put your personal touch on this monthly calendar and use it to keep track of important events throughout the year. Register for the December/January Grades 3-8 Take-and-Make Kit here.
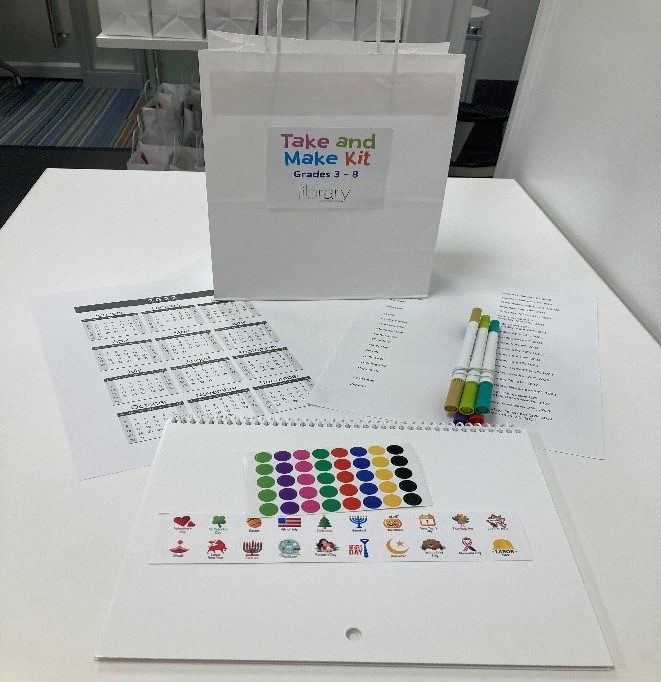
Your Kit contains:
- Blank calendar
- 5 markers or pens
- 1 set of holiday stickers
- 1 set of colored stickers
- 2022 Calendar print out
- Holiday date print out
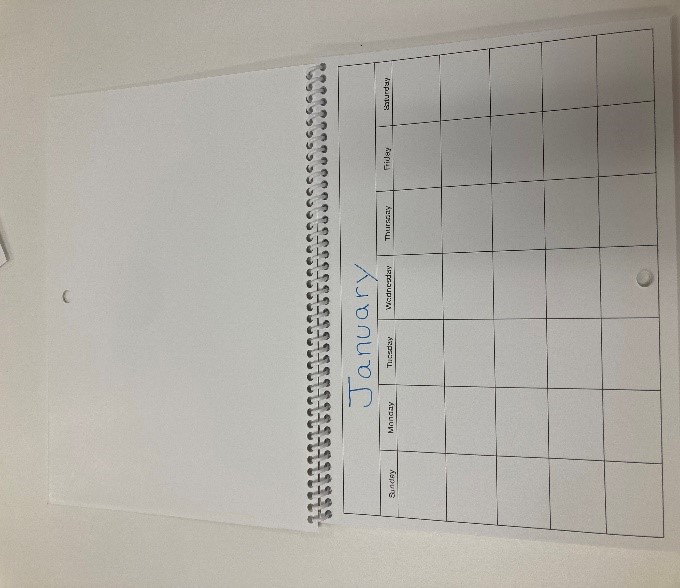
1. Flip open the calendar, in the long rectangle on the top of each calendar page label the correct month.
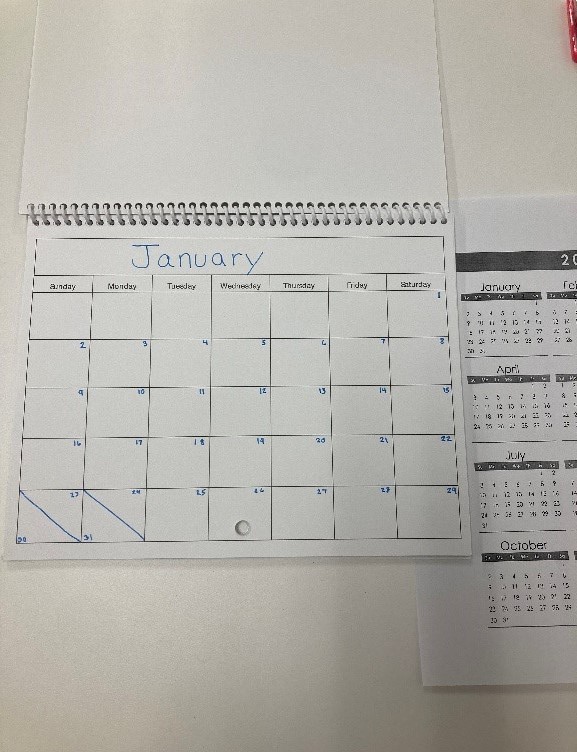
2. Use the provided sheet to number the days of the month in the corresponding boxes.
3. The holiday stickers correspond with the listed Holidays and their dates on the sheet of paper. Locate the dates on your calendar and add the correct sticker.
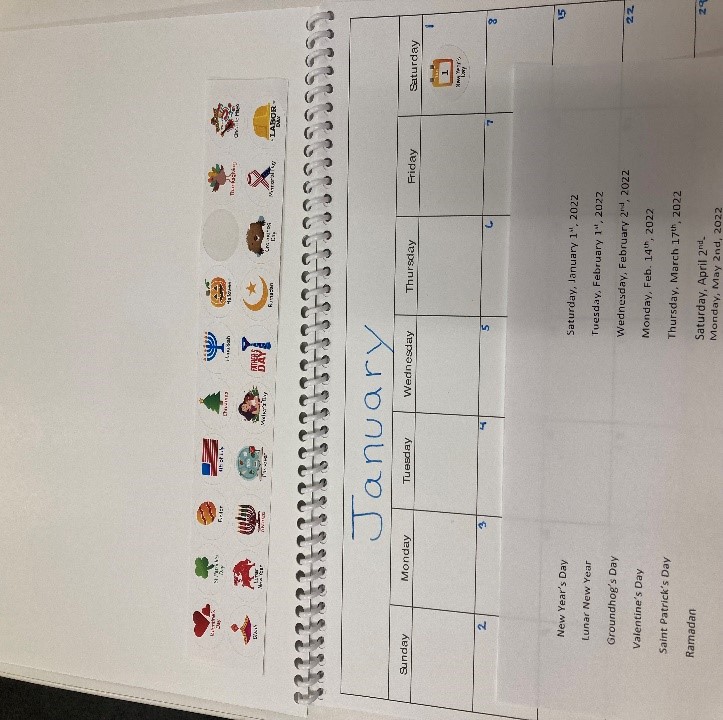
4. Add dates that are important to you and your family: birthdays, sporting events, lessons, beginning of a new season, appointments, special plans, etc…
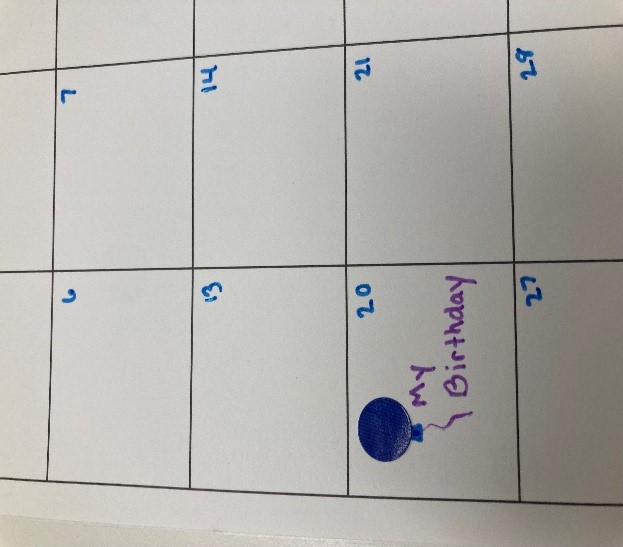
5. Use the provided pens and decorate the calendar however you choose. Feel free to use any materials that you have at home to add to the calendar design. Magazines, glitter glue, colored pencils, anything!
Show us what you created! Send us pictures at youthservices@balibrary.org.
Youth Services Assistant Librarian Alyssa -
6 "Kindie" Albums for Hipsters of All Ages
Are you looking for some sweet tunes that'll match your little one's independent spirit? Have you memorized every Disney soundtrack? Can you recite the lyrics to every Wiggles album ever? Looking for something a little different? Join the kindie rock revolution!
Kindie ("kid" + "indie") music is a relatively new genre of children's music in which artists approach child-friendly themes with an earnest, singer-songwriter mindset.
Here are 6 great albums to get started.
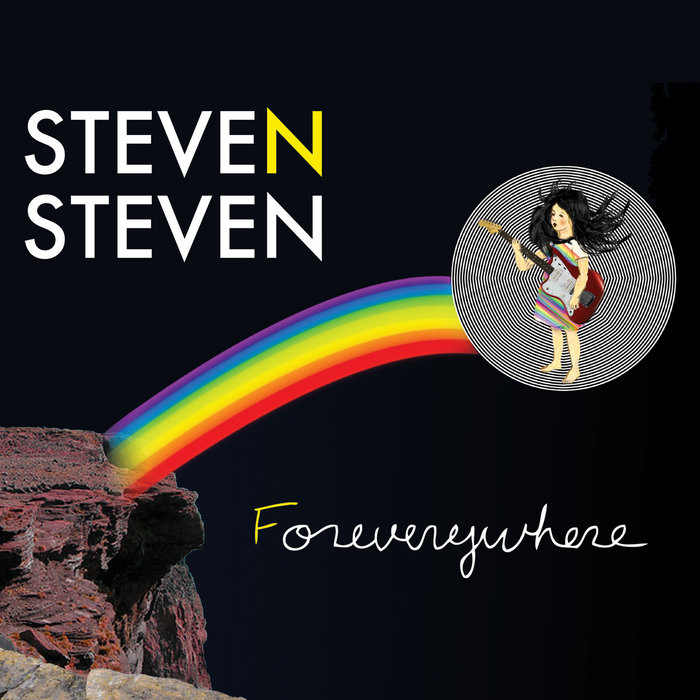
STEVENSTEVEN
ForeverywhereFormer Blue's Clues host and children's media superstar Steve Burns teams up with Flaming Lips multi-instrumentalist Steven Drozd to produce a sprawling, ambitious album that's as laugh-out-loud funny as it is radically sincere. Burns accompanies the listener through a bizarre world occupied by unicorns ("The Unicorn and Princess Rainbow"), giants ("If You're Ginormous and You Know It"), clever ocean critters ("Mimic Octopus"), and more. Sometimes songs are instructional, like "A Fact Is a Gift You Give Your Brain," whereas others are dedicated to exploring feelings of joy, sadness, love, disappointment, and determination ("The Happy Then Sad Then Triumphant Spider," "The Lonely Unicorn Is Never Giving Up!"). Burns knows that kids are just as capable of genuine insight as they are total absurdity, and he manages to walk the line between these two extremes without sacrificing musical quality. The album never wears out its welcome, as Burns and Drozd make every song dynamic and unique, from the garage rock-tinged "Space Rock Rock" to the narrated soundscape of the titular closing track. Foreverywhere is a treat for adults and kids alike, and is sure to enjoy regular rotation around the house.
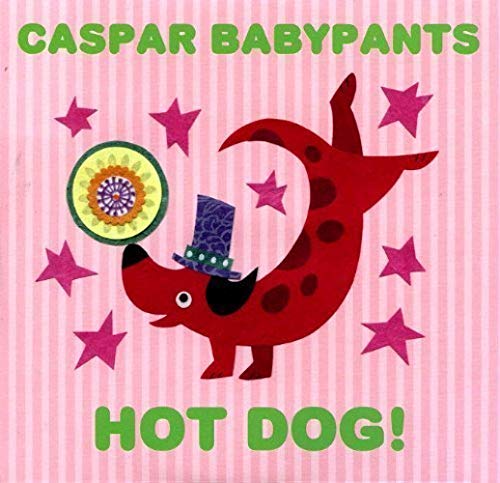
Caspar Babypants
Hot Dog!Erstwhile singer of the Presidents of the United States of America ("Lump," "Peaches") Chris Ballew offers up 19 cozy, kid-friendly tracks with an old school rock-and-roll sensibility. Ballew-as-Babypants is so prolific that I could have filled this post with nothing but his music and that would still be a decent introduction at best... so if he's a hit with your family, you're in luck! Hot Dog! begins with the doo-wop-influenced "Sugar Ant," then transitions into rock-and-rollers like "Crazy Blue Beetle" and "Summer Baby (Let It Ride)," as well as softer tracks like "This Old Whale" and "Eleanor the Elegant Elephant." Songs like "Bunny Brown" and "I Don't Mind" would feel perfectly at home in the repertoire of Buddy Holly and the Crickets. Babypants's world is gentle, absent of the world-shaking revelations of Foreverywhere -- but no less empowering. And for you Beatlemaniacs out there: he has released three albums of Beatles covers -- Baby Beatles!, Beatles Baby!, and Best Beatles! I'm particularly fond of his cover of "Here Comes the Sun," which enjoyed regular play in our program playlist.
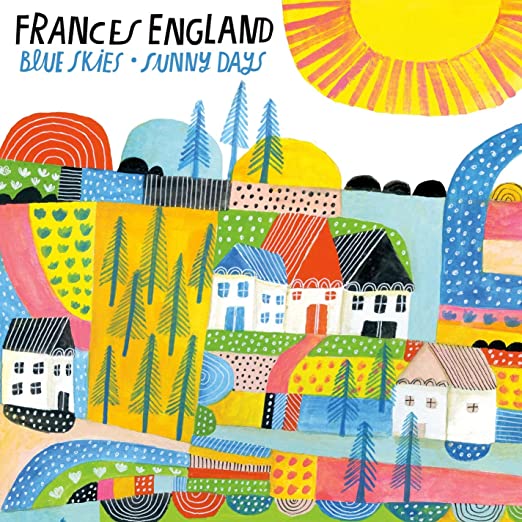
Frances England
Blue Skies and Sunny DaysThis gentle, 8-song adventure from kindie veteran Frances England is the perfect soundtrack to a lazy day filled with play, a road trip, or much-needed downtime after a long, stressful day. England immediately sets the tone with the aptly-titled "Carefree," capturing the feeling with verses about school's end, going to the movies, and most importantly, spending time with the ones you love. Despite its title "Into the Wild" maintains a cozy, laid-back approach as England explores the difficult position of being bored and having too much energy. "Not Just My Sister" celebrates the titular sibling ("she's not just my sister, she's my best friend"). "Good Day" is a slice-of-life anthem punctuated with finger snaps and self-backing vocals. "If You Want to Sing Out" encourages little ones to forge their own paths, to express themselves however they're comfortable ("if you want to be me, be me/if you want to be you, be you"). "Mama Said" has the narrator find strength in their mother's advice. "Perfect Tuesday Afternoon" feels like a sonic sibling to "Carefree." Album closer "Watching You Grow" flips the perspective to the caretaker, as England celebrates the joy of watching her little one grow up ("I feel so proud it's hard to measure/A love so big, so deep forever/Watching you grow, watching you grow").
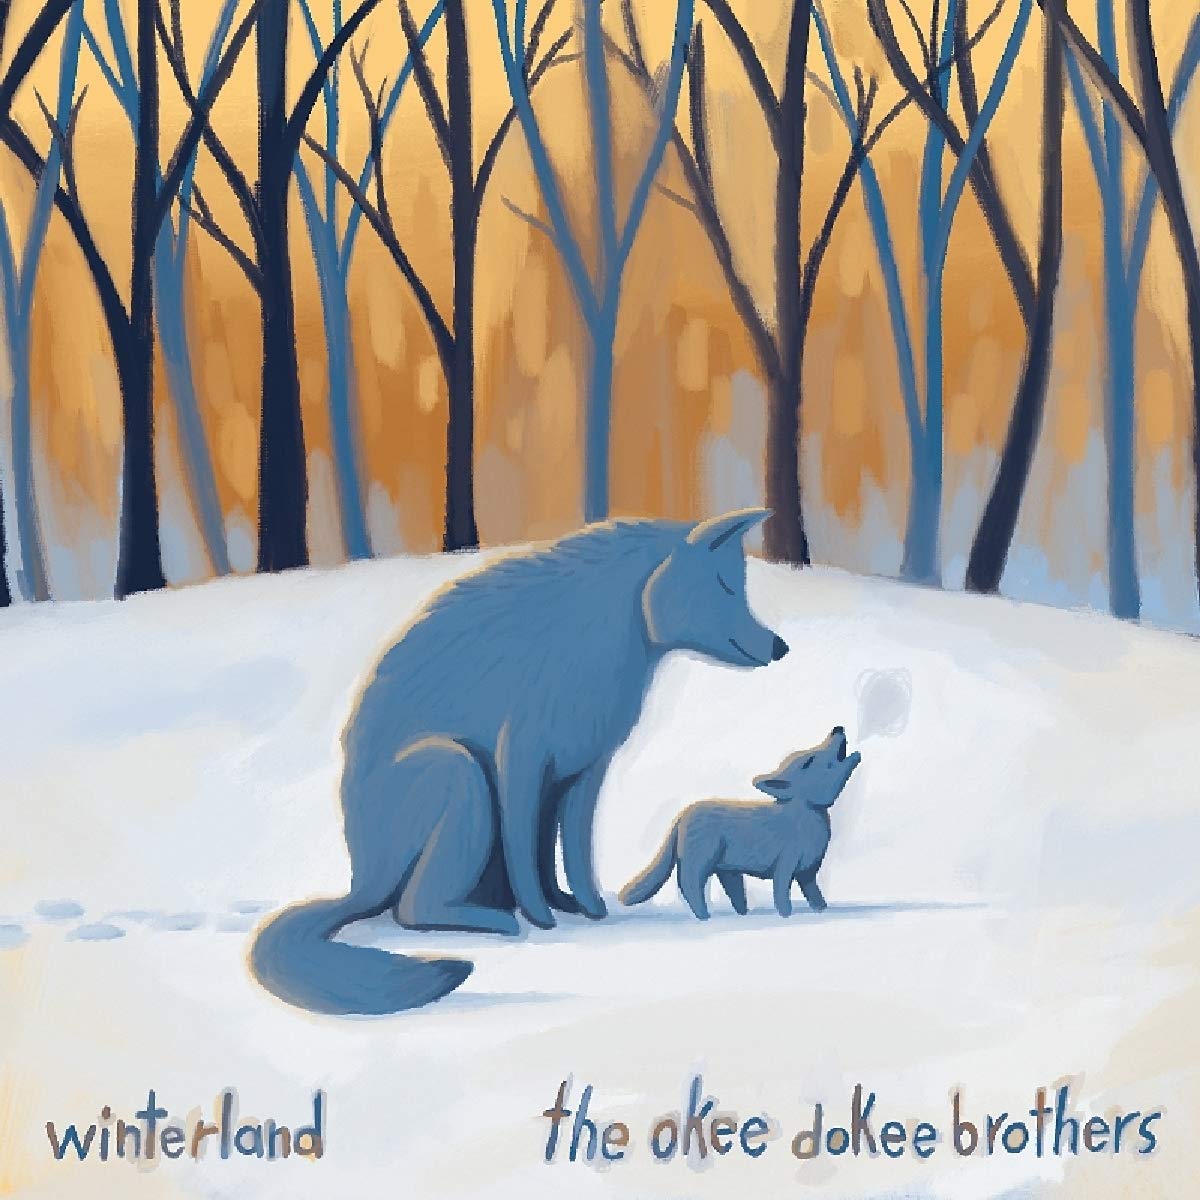
The Okee Dokee Brothers
WinterlandTime for some seasonal fun! Bluegrass musicians the Okee Dokee Brothers celebrate winter, from the first snowfall to the first signs of spring. The Brothers open the album with "Blankets of Snow," a joyous Appalachian-style number complete with hollers and shouts. "Ice Fishin' Shack" portrays the simple joy of spending time with a buddy. Silly banjo-driven tune "The Abominable Yeti" warns listeners about the mythical beast. "You You You," a potential bedtime favorite, thanks the listener for being themselves. The mostly-a cappella interlude "Slumberjack" gives the listener tips on how to fall asleep. The Brothers incorporate ukulele in the self-explanatory "Ukulele in a Snowstorm." "Howl" celebrates being "the wild ones," complete with wolfish howling -- a great song for getting out some excess energy! The appropriately-sleepy "Lazy Day" is accented by muffled brass and yawns. The energy picks up afterward with "North Country Dance Band," followed by the ode to nature "Great Grandmother Tree." Penultimate track "New Year" explores the gentle transition between the old and the new. The album closes with the upbeat "Signs of Spring," pointing out the little moments that make the incoming season so lovely, while acknowledging that, like the cycling seasons, "death is part of life." For fans of Mumford & Sons, the Lumineers, Fleet Foxes, or anyone looking for the perfect album to accompany a cold night in.
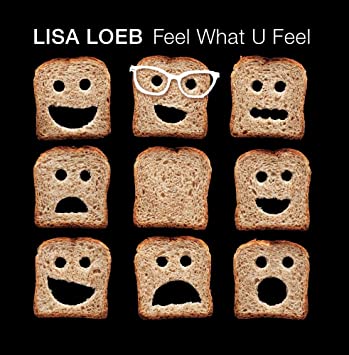
Lisa Loeb
Feel What U FeelLisa Loeb kicks off this sunny slab of pop rock with the infectious "Moon Star Pie (It's Gonna Be Alright)," assuaging childhood anxieties with reassurances and advice ("twist yourself up like a cinnamon pretzel, connect the dots with the spots of your freckles"). "Say Hello," which encourages listeners to overcome that-all-too-awkward feeling when one meets someone new, is bolstered by bombastic orchestral flourishes. Craig Robinson (The Office, Brooklyn Nine-Nine) hops onto the title track, which finds him trading off kid-friendly raps about feelings and why it's okay to experience them:
"Feeling weird-o
Itchy beard-o
Something’s just not right
Rat race
Need space
Skin’s on too tight
Guess what? It’s okay!
Go on and feel what u feel today..."The gentle chords of heartstring-tugger "I Was Here" are perfect accompaniment to the track's self-affirming lyrics. "You Can Count on Me" and "The Sky Is Always Blue" assure the listener that they are not alone and that things will work out in the end. "Wiggle" is an instructional dance number. Craig Robinson rejoins Loeb for "It's All Right to Cry," telling kids that, even if they're strange, feelings are real, and they change, and that's okay. Loeb rounds out the album with a lullaby version of "You Can Count on Me" -- another potential bedtime favorite.

Jack Forman
Hold the PhoneRecess Monkey alum Jack Forman opens this indie pop-influenced opus with "The Sun Comes Up Again," an ode to our favorite star and the things it does for us. Ska number "I Had to Pee (On a Ferris Wheel)" describes this exact nightmare scenario with side-splitting detail. Harry Potter fans will enjoy "Little Dobby Does It," a sonic biography of the hapless house elf. "The Cat Walk" paints a portrait of a particularly arrogant furry family friend, complete with meowed vocals. "Surprise Party" invites the listener to join a birthday party. "I Can't Believe I Ate the Whole Thing" finds the narrator lamenting his decision to eat an entire birthday cake, a sleeve of Girl Scout cookies, and other treats. Forman utilizes his upper register in "Tooth Fairy Works Nights," paying tribute to that unsung provider of small bills. The chaotic "Assembly Line" describes all the little things that have to happen just to get a little one to school. If you're looking for something on the silly side, be sure to check out Hold the Phone.
Looking for some personalized selections? Fill out this form and you’ll receive a customized list direct to your inbox!
Youth Services Librarian Chris -
October/November Take-and-Make Kits
Bring home a fun new project! Sign up from our Library Calendar and pick up a kit at the Youth Services desk or through our Parking Lot Pickup service between October 18-November 12.
Toddler & PreK: Fall Suncatcher
Catch the fall sun with this easy process art project. Register for the October/November Toddler & PreK Take-and-Make Kit here.
Show us what you created! Send us pictures at youthservices@balibrary.org.
Grades K-2: Fall Lantern
Turn a jar and tissue paper into a seasonal lantern. Register for the October/November Grades K-2 Take-and-Make Kit here.
Your kit contains:
- Mason jar
- Foam brush
- Container of mod podge
- Bag of precut tissue paper
- Black card stock
- Flameless tea light candle
- Instructions
Instructions:
1. Use the foam brush to apply a very thin layer of mod podge over your jar (move on to step 2 immediately).
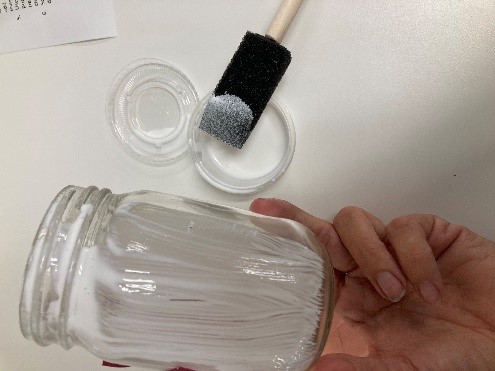
2. Working quickly, wrap your tissue paper around the jar.
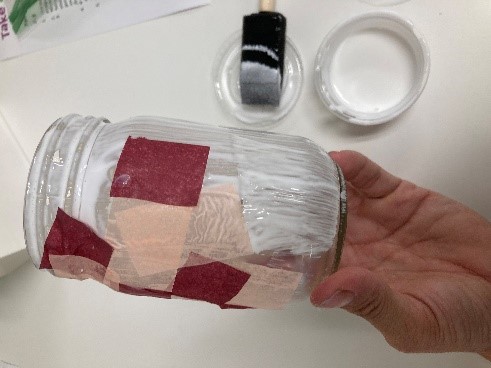
3. Smooth the tissue paper out as much as you can with your hands (don’t expect it to be perfectly smooth). If you get a tear; just dab a little mod podge and patch it with a small piece of tissue paper then smooth it over with your fingers.
4. If needed, use scissors (not provided) to snip away any excess tissue around the rim. Continue to press the tissue down with your fingers.

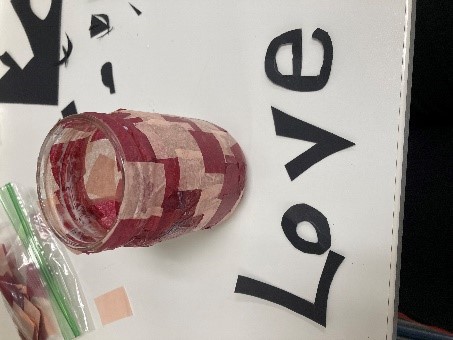
5. If desired, while your mod podge is drying (about 15 mins), cut cardstock to make a design. Use the foam brush and dab some mod podge on the area where you want to add your cardstock design. (Mod Podge acts as a glue and a sealer, so it will be our adhesive and our topcoat for this.)
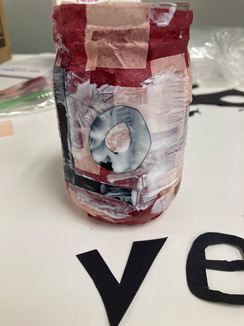
6. Use your foam brush to paint another thin layer of mod podge all over your jar, this time on top of the tissue paper/ cardstock. Allow it to dry (about 15 mins). It will dry clear.
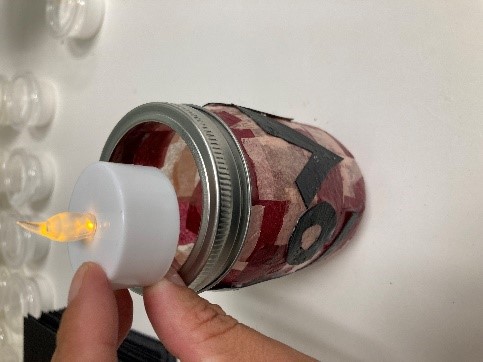
7. Screw on the ring part of the lid and add the tea light candle.
Show us what you created! Send us pictures at youthservices@balibrary.org.
Grades 3-8: Button Canvas Art
Use a variety of buttons to create silhouette art. Register for the October Grades 3-8 Take-and-Make Kit here.
Instructions:
1. Pick out one of the cardstock templates for your design, or make your own. Your design can be anything that strikes your fancy!
2. Tape the template to the canvas.
3. Lightly draw the outline of the template with the pencil.
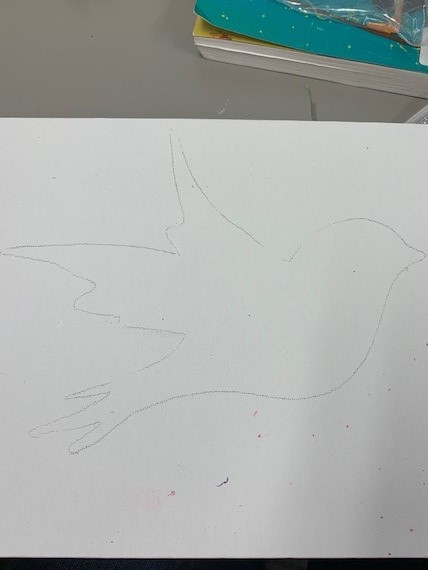
4. Remove template.
5. Optional: lay out the buttons you plan on using on the design. Include a variety of button sizes.
6. Using the cotton swab, glue buttons to canvas.
7. Optional: outline design with a marker.
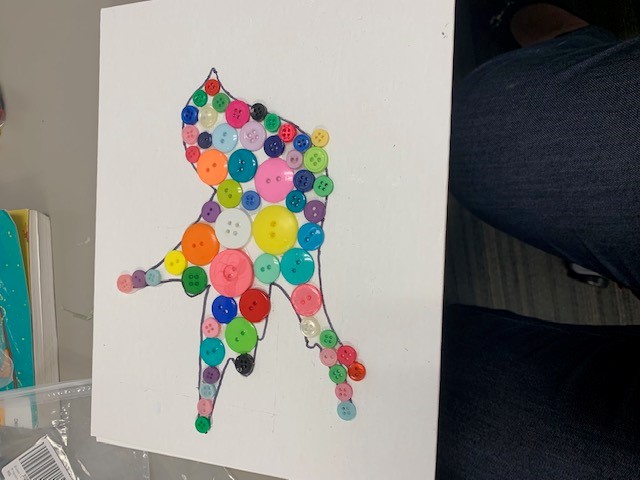
Show us what you created! Send us pictures at youthservices@balibrary.org.
Youth Services Assistant Librarian Alyssa -
September Take-and-Make Kits
Bring home a fun new project! Sign up from our Library Calendar and pick up a kit at the Youth Services desk or through our Parking Lot Pickup service between September 13-24.
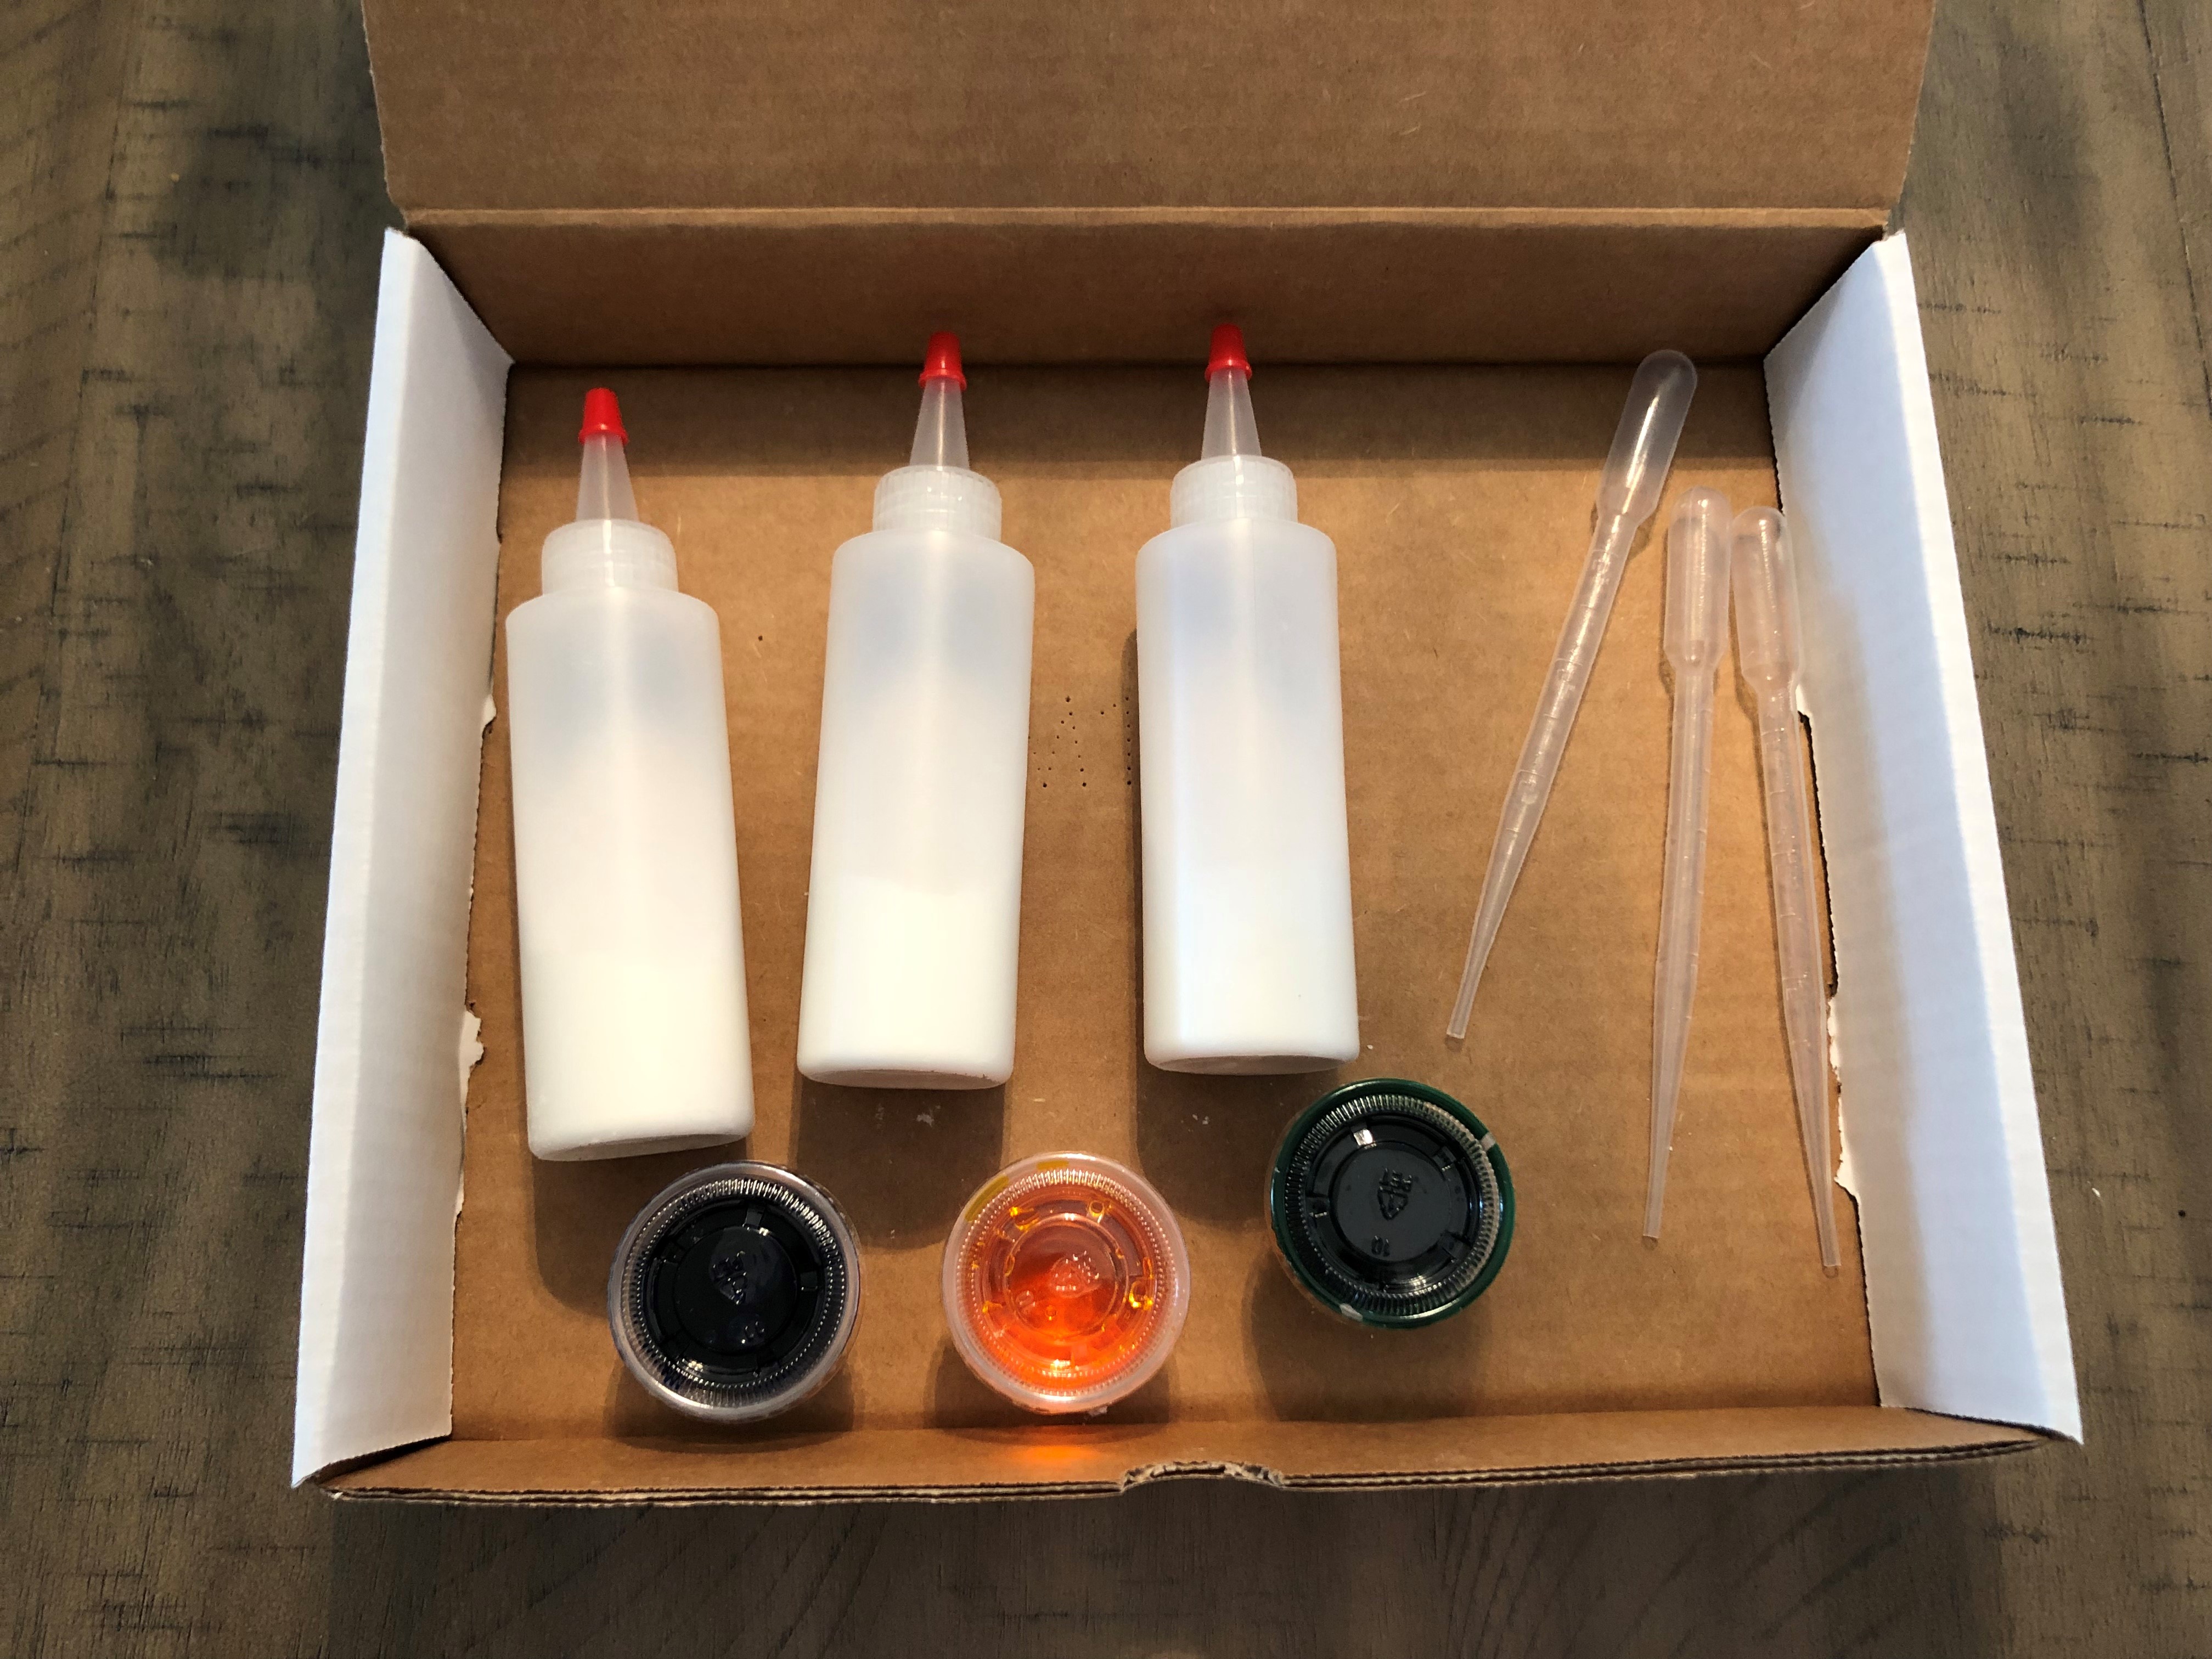
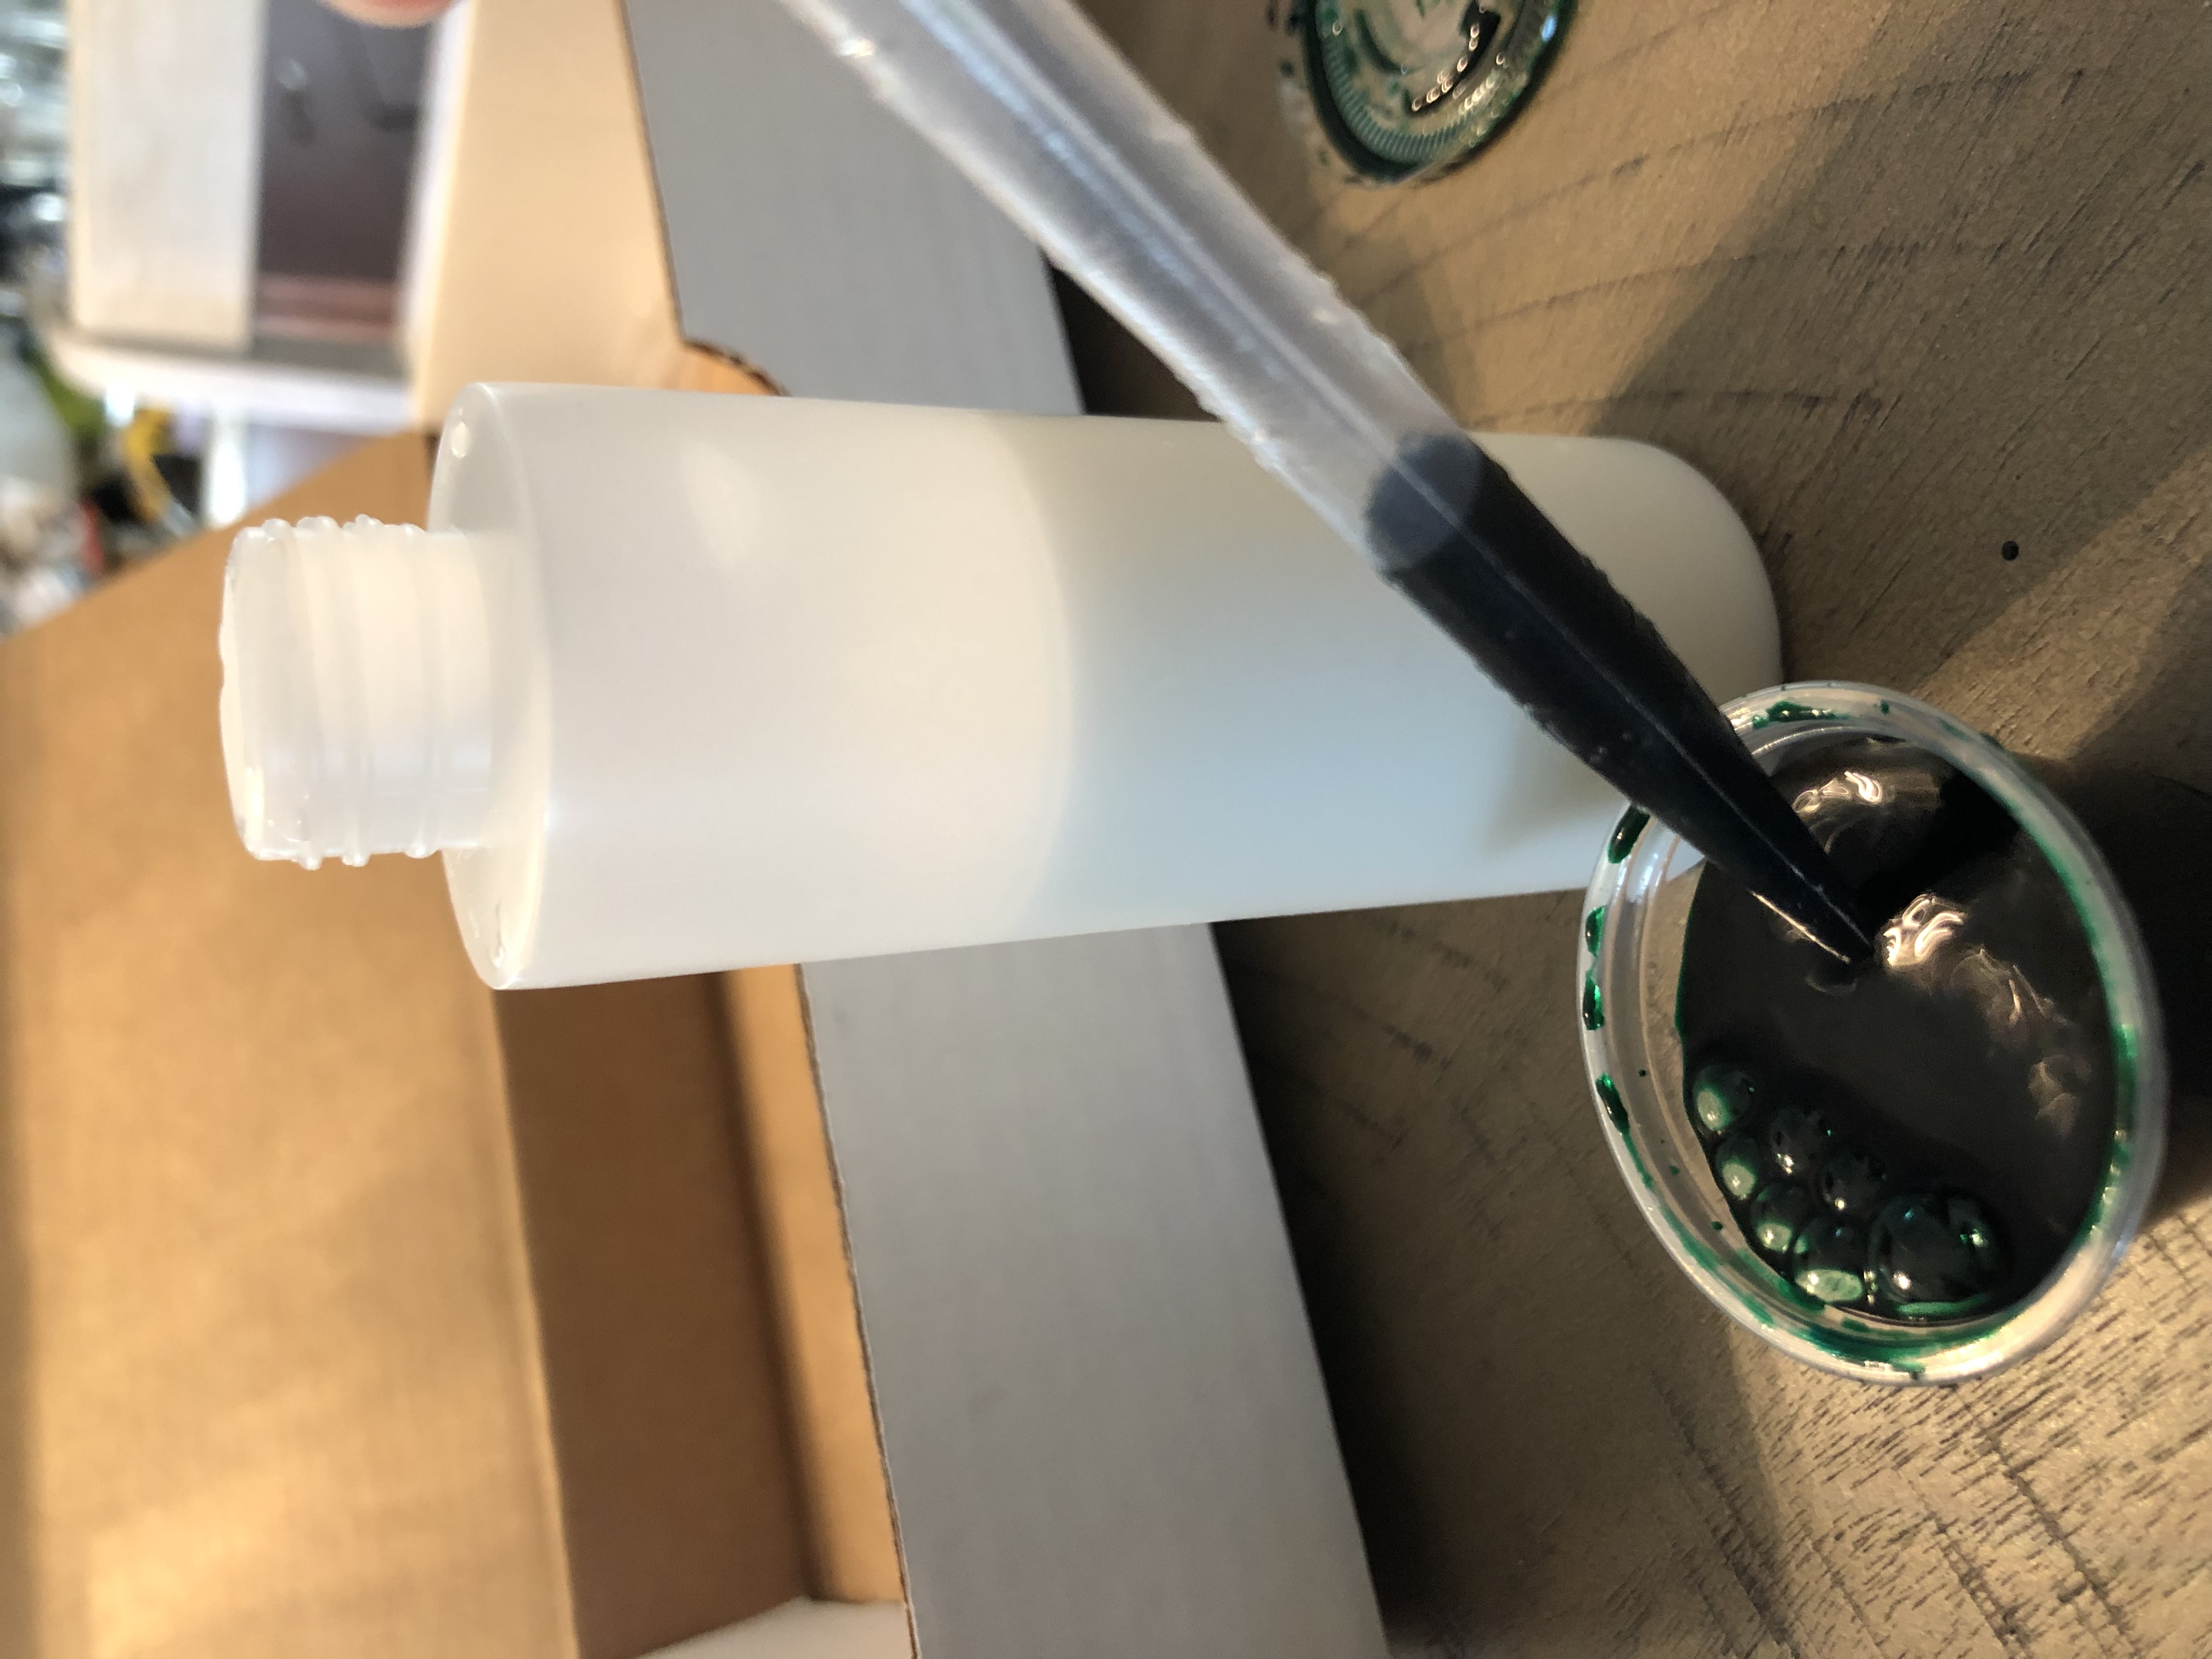
Toddler & PreK: DIY Liquid Chalk
Mix simple ingredients to make your own liquid color, then see what you can create on the sidewalk. Register for the September Toddler & PreK Take-and-Make Kit here.
Your kit contains:
- Three squeeze bottles pre-filled with one ounce of baking soda and one ounce of corn starch
- Three one-ounce cups of liquid watercolor
- Three pipettes
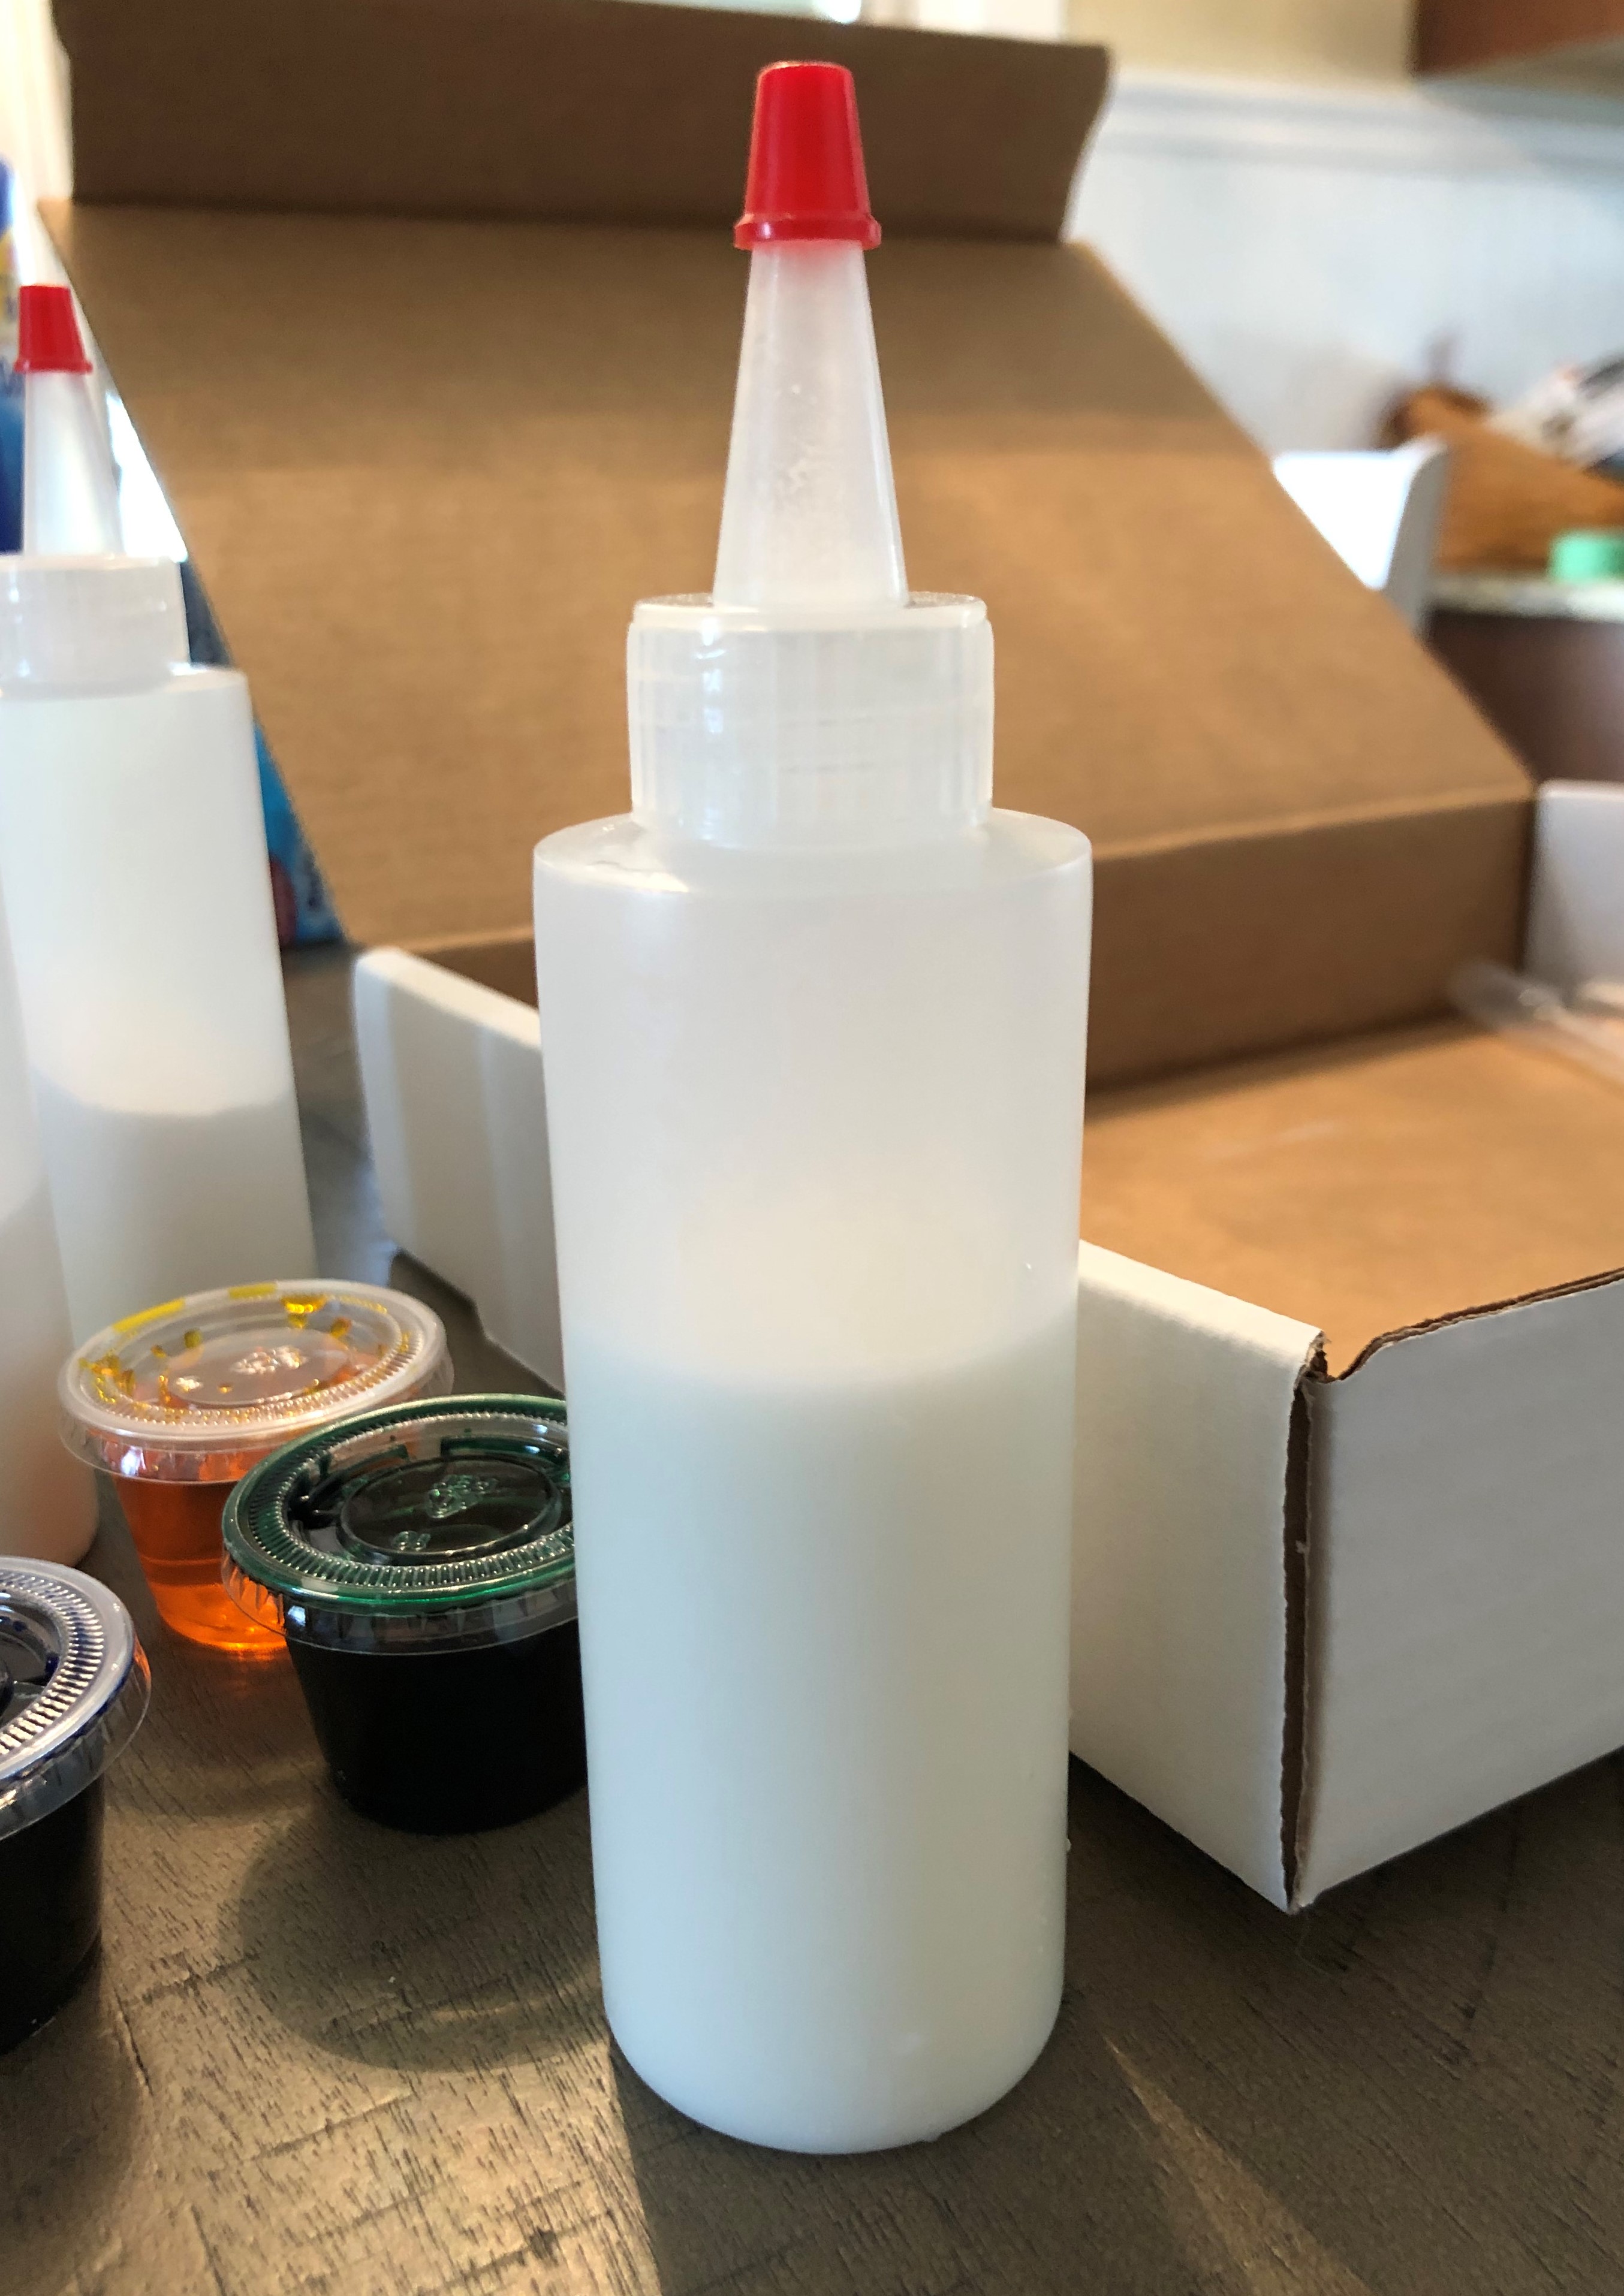
Instructions:
1. Untwist the top of the squeeze bottle and fill it about two-thirds full of water. Remember to save space for the liquid watercolor!
2. Put the cap back on the bottle and shake vigorously to mix the water with the baking soda and corn starch at the bottom. It should look a little milky when mixed.
3. Using a pipette, transfer the liquid watercolor into your squeeze bottle.
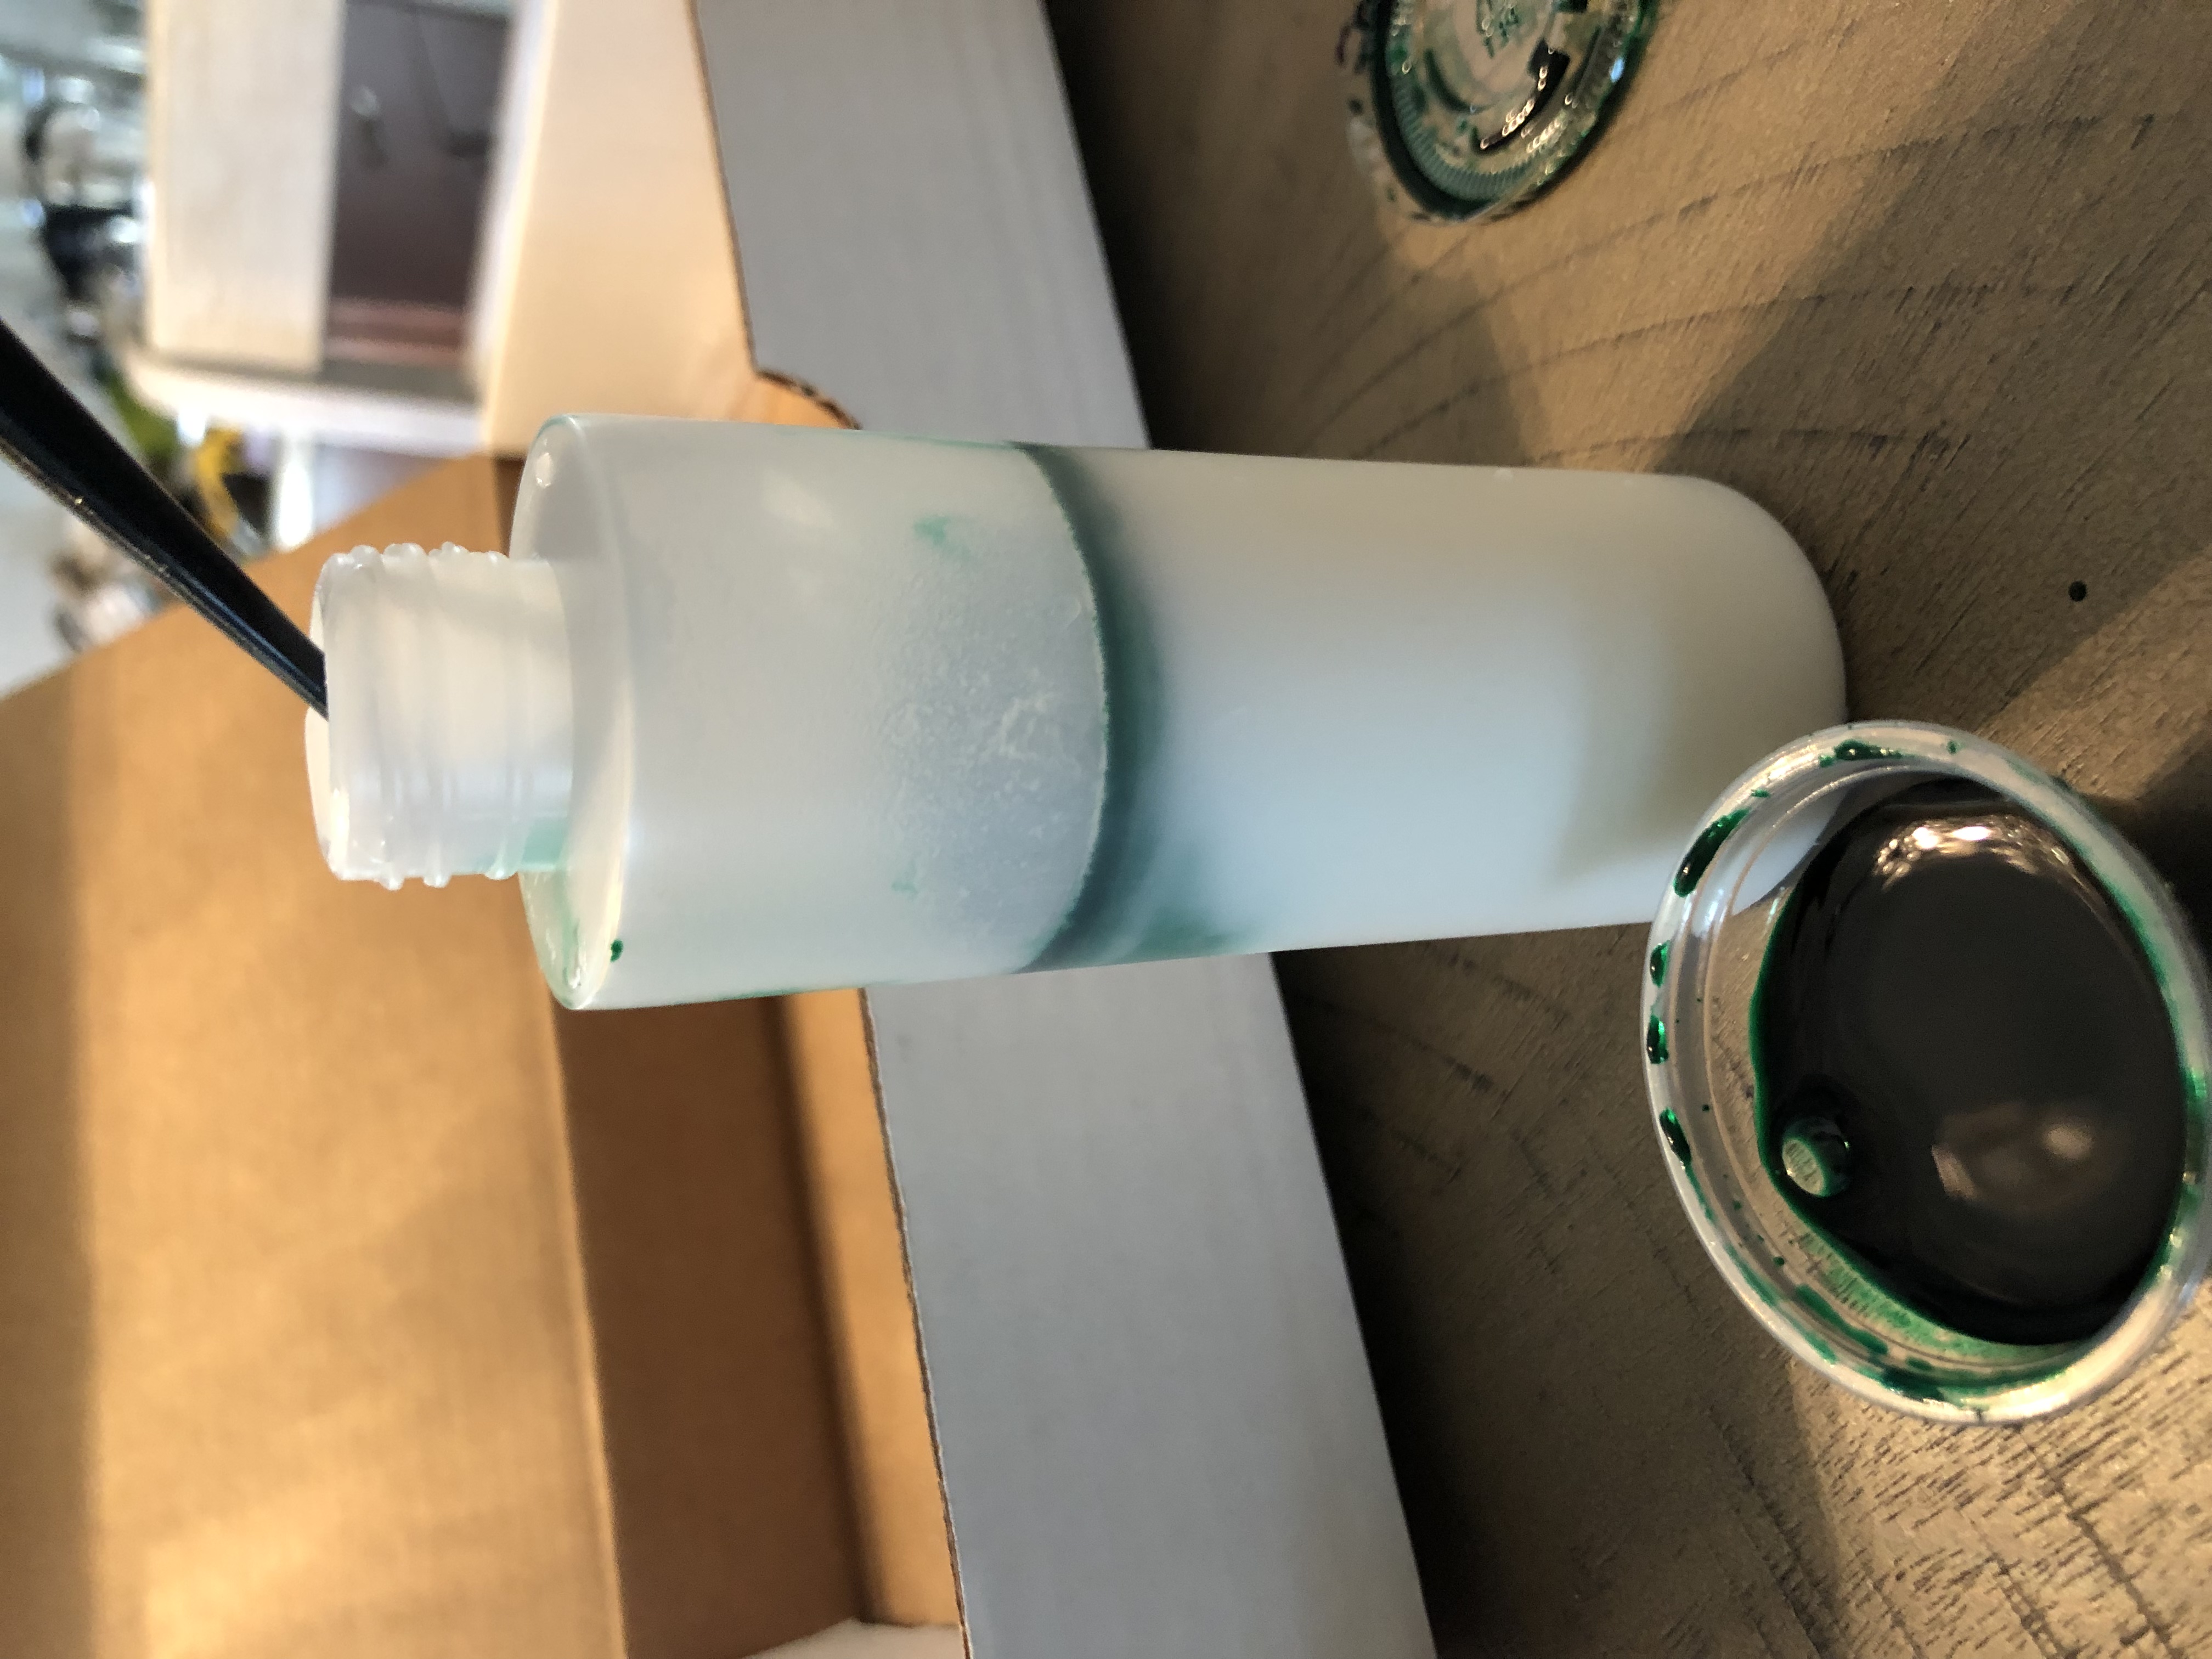
4. Put the cap back on the bottle and shake until the watercolor is distributed evenly.
5. Repeat steps 1-4 for each squeeze bottle using a different color of watercolor for each.

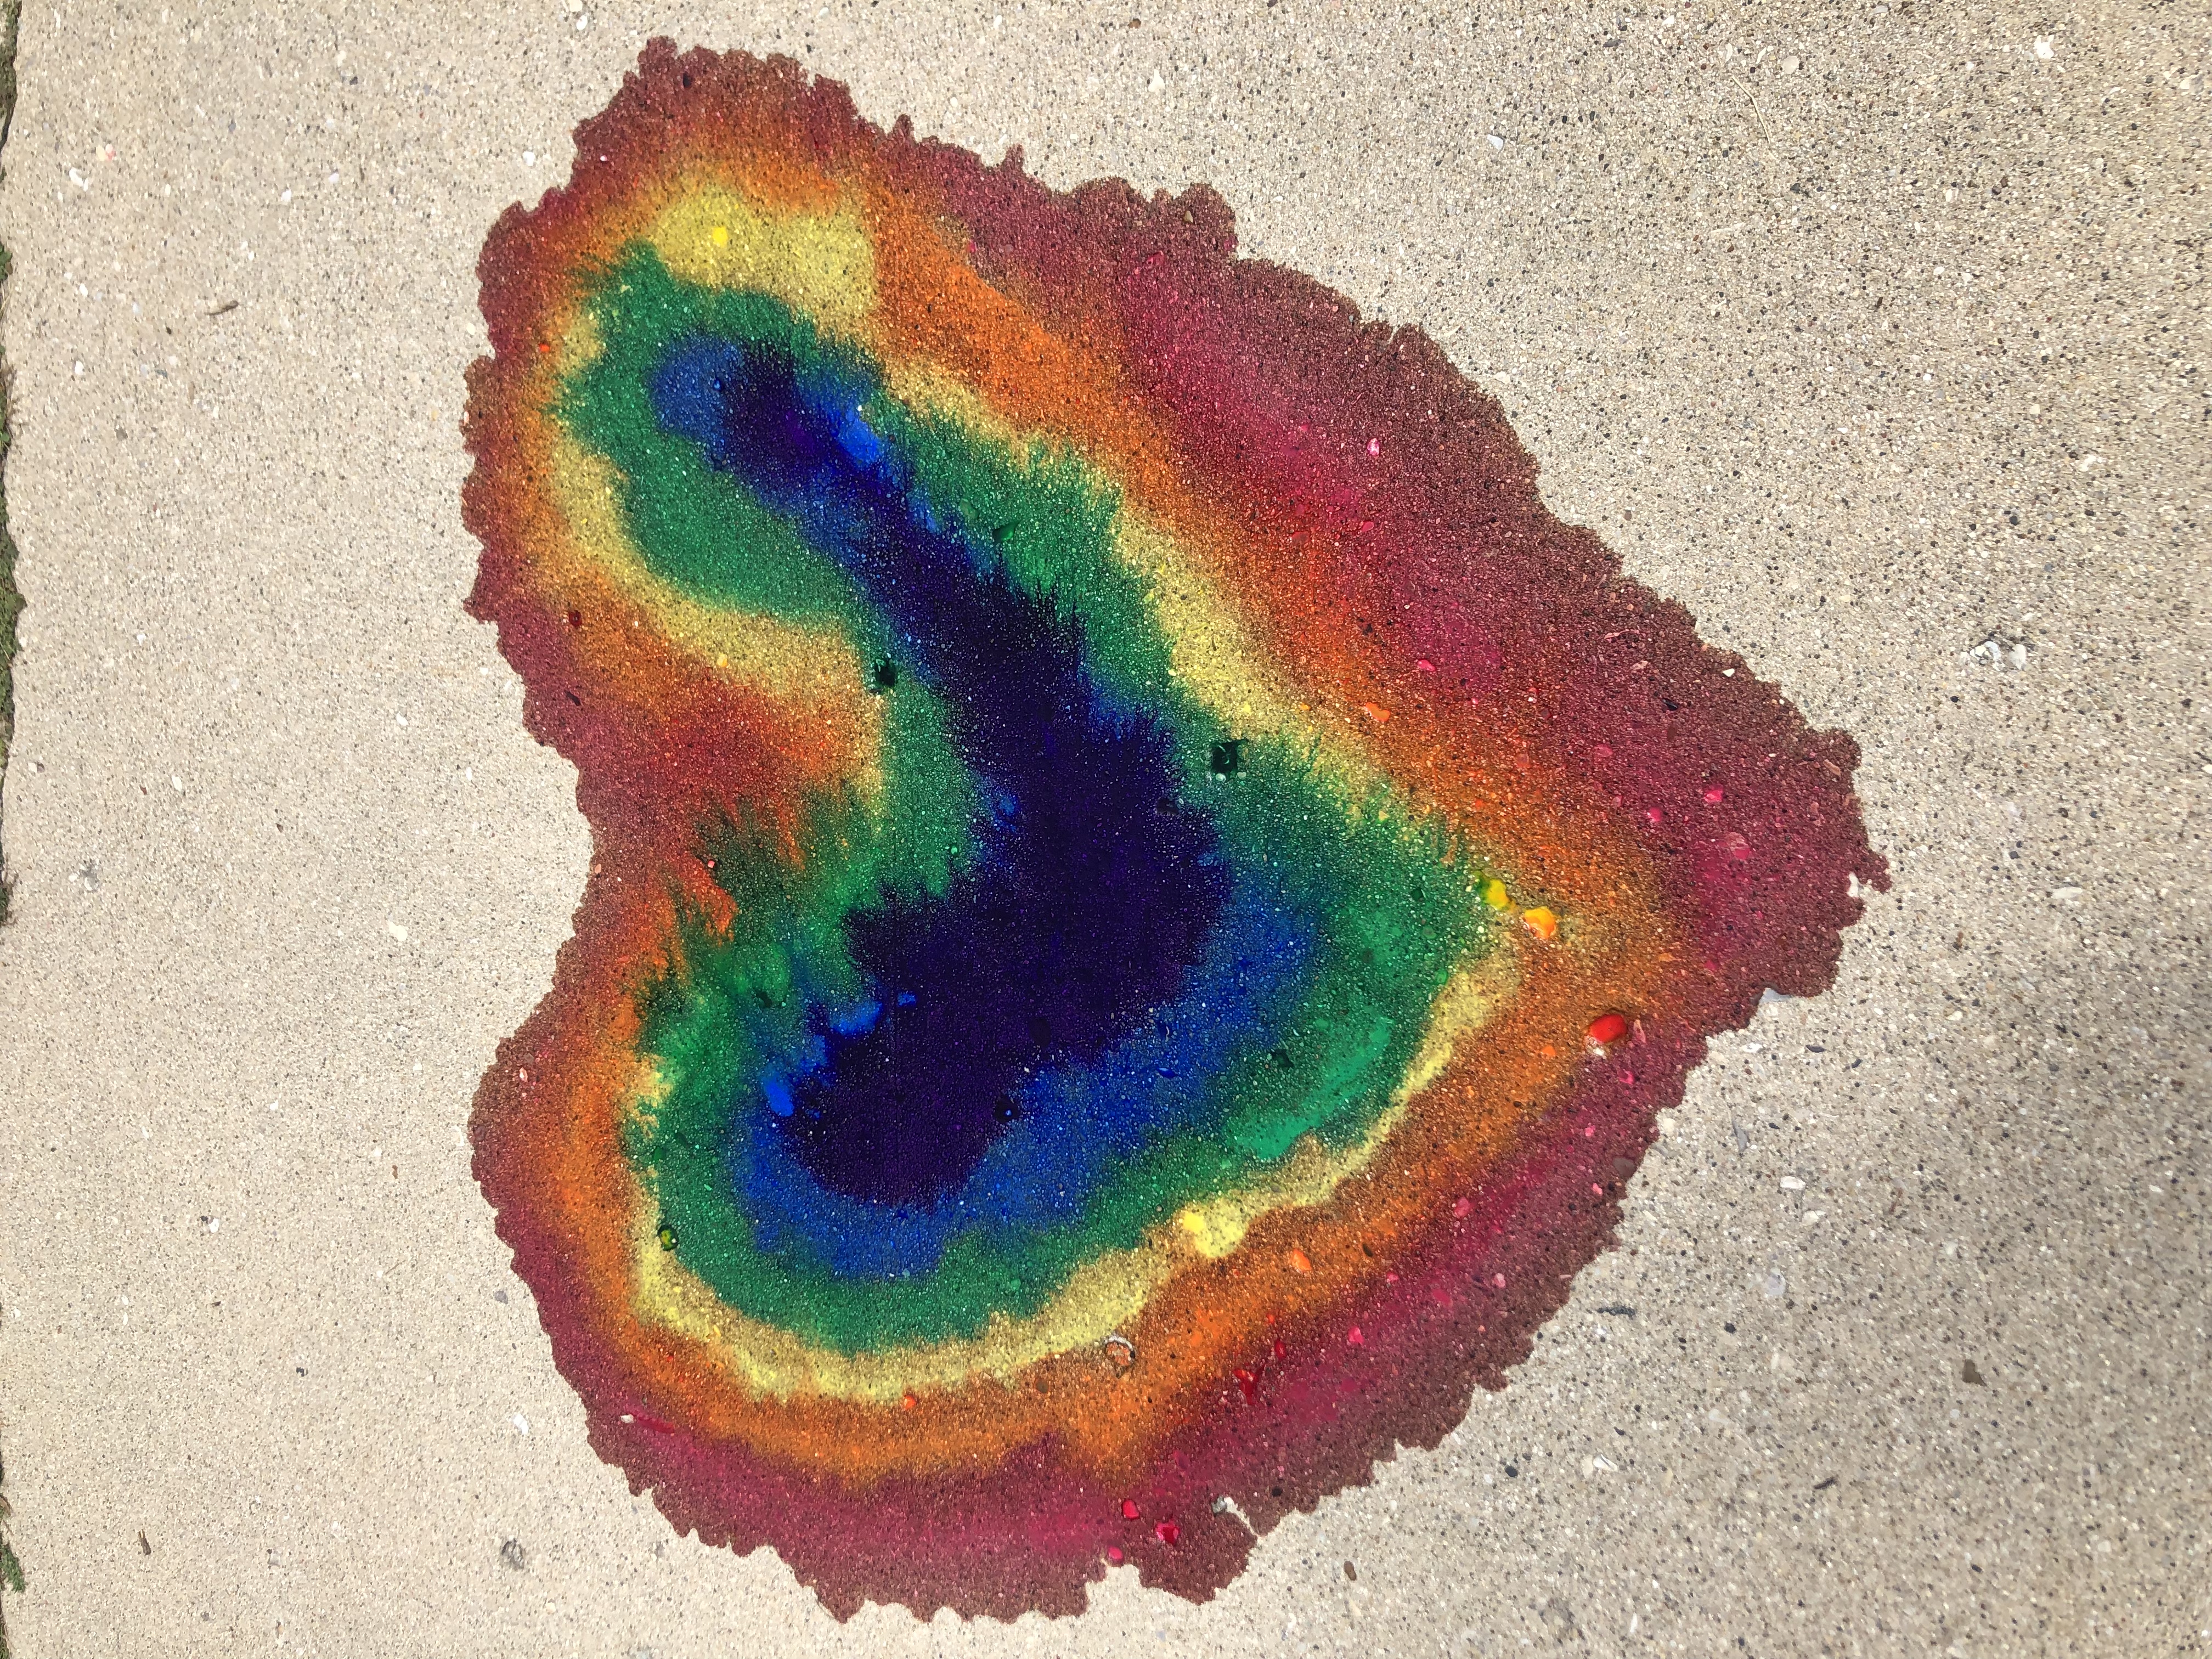
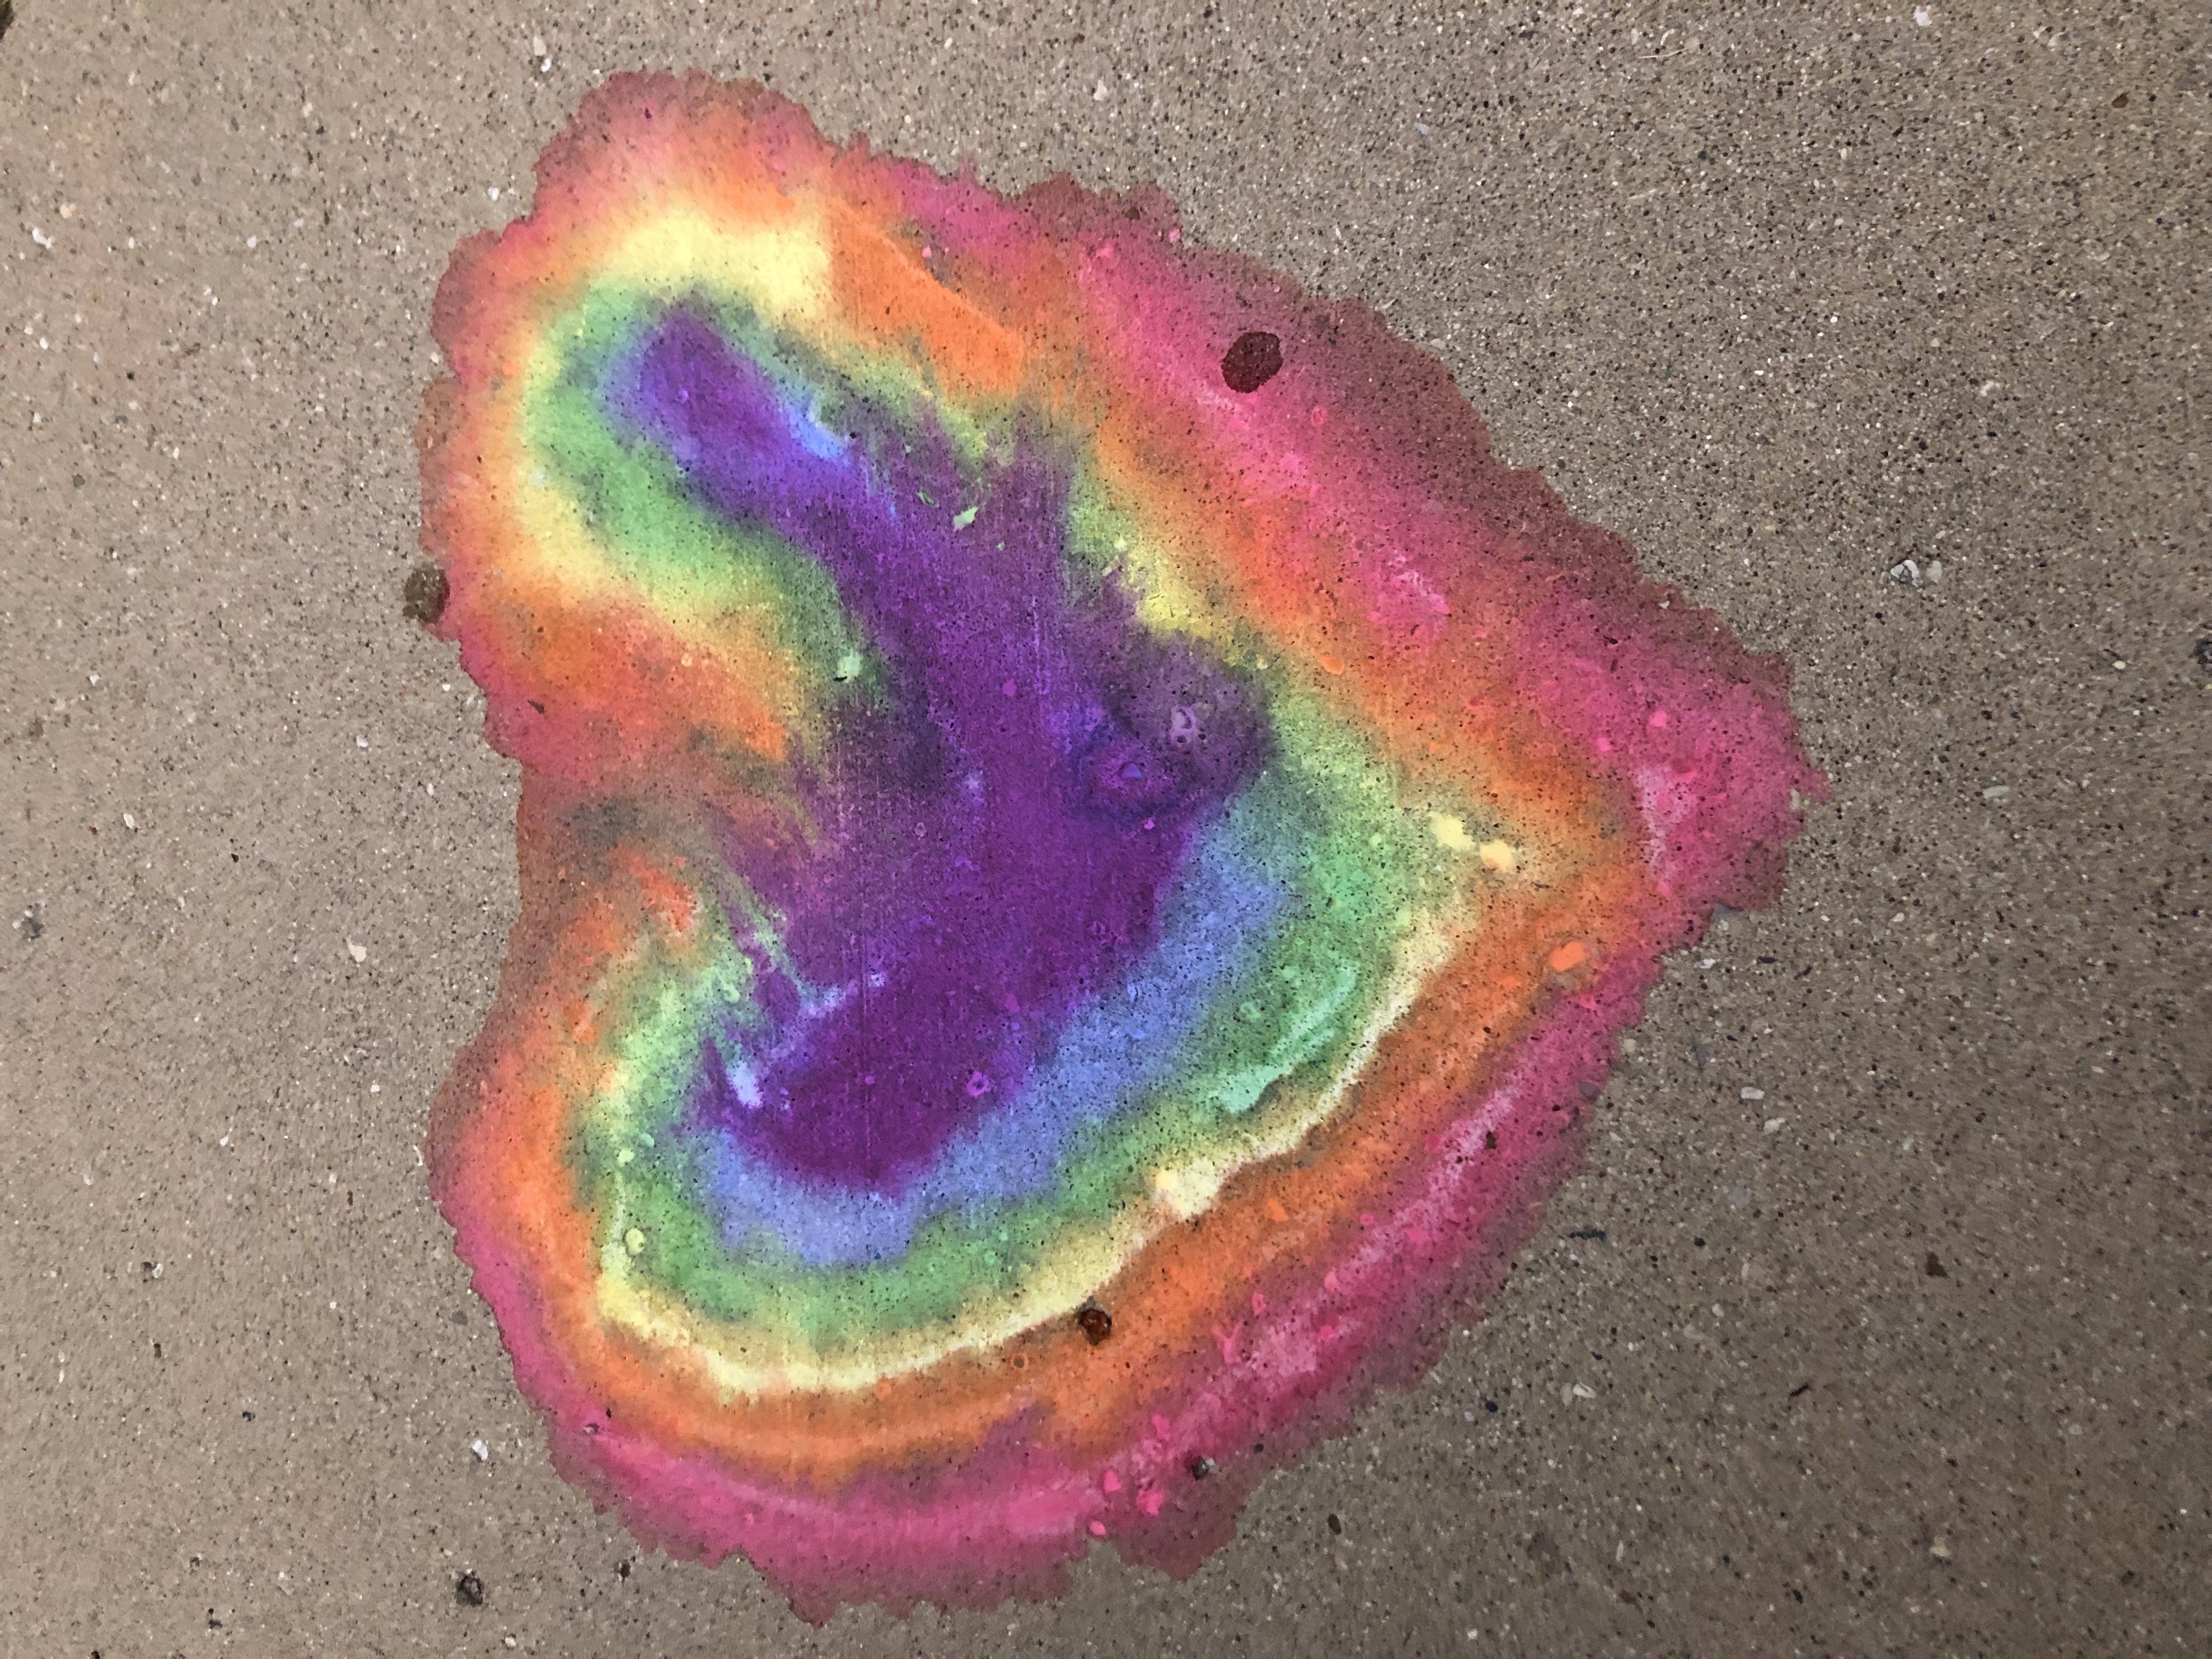
6. Take your liquid chalk outside and paint on the sidewalk. Tip: The liquid chalk may be hard to control and come out looking splatter-y. Embrace the messiness of it! For lighter colors, you may need to wait for the chalk to dry before the color fully comes through.
7. Step back and enjoy your creations!
Bonus tip:
To reuse your squeeze bottles and make more liquid chalk, rinse bottle thoroughly and then fill it with one ounce (two tablespoons) of baking soda and one ounce of corn starch. To add color, use liquid watercolor or substitute with food coloring. This recipe is based on the four ounce squeeze bottles provided in the kits, but if you use another squeeze bottle that you own, just make sure to use an equal amount of baking soda and corn starch, adjusting the amount for the size of the bottle.
Show us what you created! Send us pictures at youthservices@balibrary.org.
Grades K-2: Animal Mobile
Create a floating menagerie for your bedroom with these supplies. Register for the September Grades K-2 Take-and-Make Kit here.
Kit contains:
- Two dowel rods
- Eight foam sheets
- Six animal stencils
- One plastic needle
- Two sets of embroidery thread
- Four jingle bells
- Twelve pony beads
You will also need:
- Scissors
- Pen
Instructions:
- Trace animal stencils onto foam sheets and cut out. Use as many colors and animals as you wish. You will need at least 4 animals, though you can use more. Feel free to design your own shapes, too!
- Cut a length of thread about 1 foot long. Place the two dowels in an X-shape, and then tie them tightly together with the thread. Leave extra thread so you can hang the mobile. You can use more thread to wrap the two rods tightly together in different directions, to make sure it is secure. Test out the balance, and adjust the rods so they hang pretty straight.
- Cut another strand of thread about 1 foot long. Thread the needle with the cut piece, then use the threaded needle to punch a hole through the top of one of the foam animals. Tie a knot to secure.
- You can connect multiple animals in the same string if you would like.
- Cut another piece of thread. Tie a jingle bell and, if you’d like, some pony beads on one end. Thread the other side through the needle and punch it through your bottom-most animal on the string. This will help weigh the mobile down.
- When you’re done with your string of animals, tie them to one end of the dowels. (Optional: secure with glue)
- Repeat three more times, one string for each dowel end.
- Hang your mobile up, and watch your animals float and fly!
Show us what you created! Send us pictures at youthservices@balibrary.org.
Grades 3-8: Yarn Wall Hanging
Create a unique piece of art to add color and texture to your space. Register for the September Grades 3-8 Take-and-Make Kit here.
Show us what you created! Send us pictures at youthservices@balibrary.org.
Youth Services Assistant Librarian Alyssa -
August Take-and-Make Kits
Bring home a fun new project! Sign up from our Library Calendar and pick up a kit at the Youth Services desk or through our Parking Lot Pickup service between August 9-20.
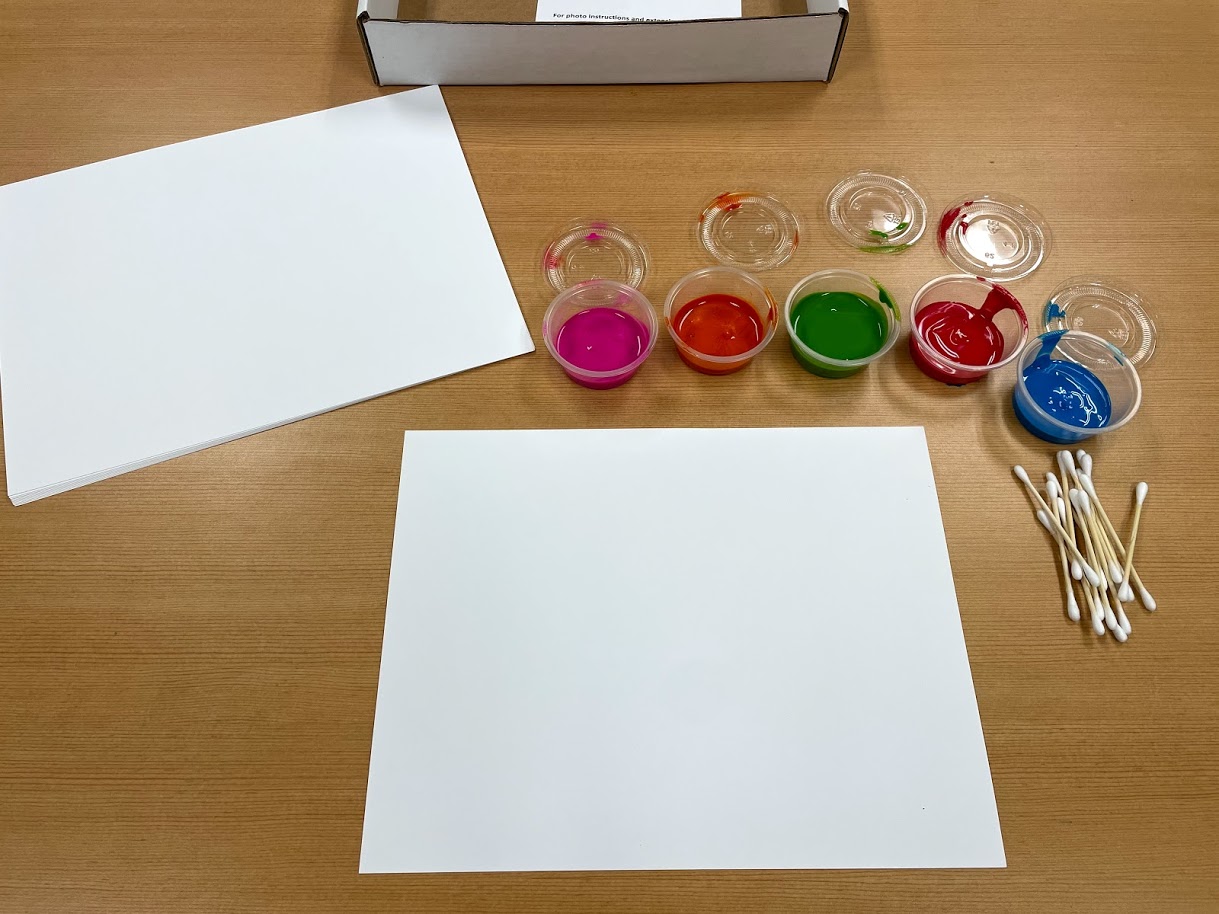
Toddler & PreK: Cotton Swab Painting
Use a cotton swab to dip, dot, and dash paint until your work of art is complete. Register for the August Toddler & PreK Take-and-Make Kit here.
Your kit contains:
- Cardstock
- Cotton swabs
- Five containers of paint
Directions:
1. Take all of your items out of the box.
2. Use a cotton swab to apply paint to a sheet of cardstock.
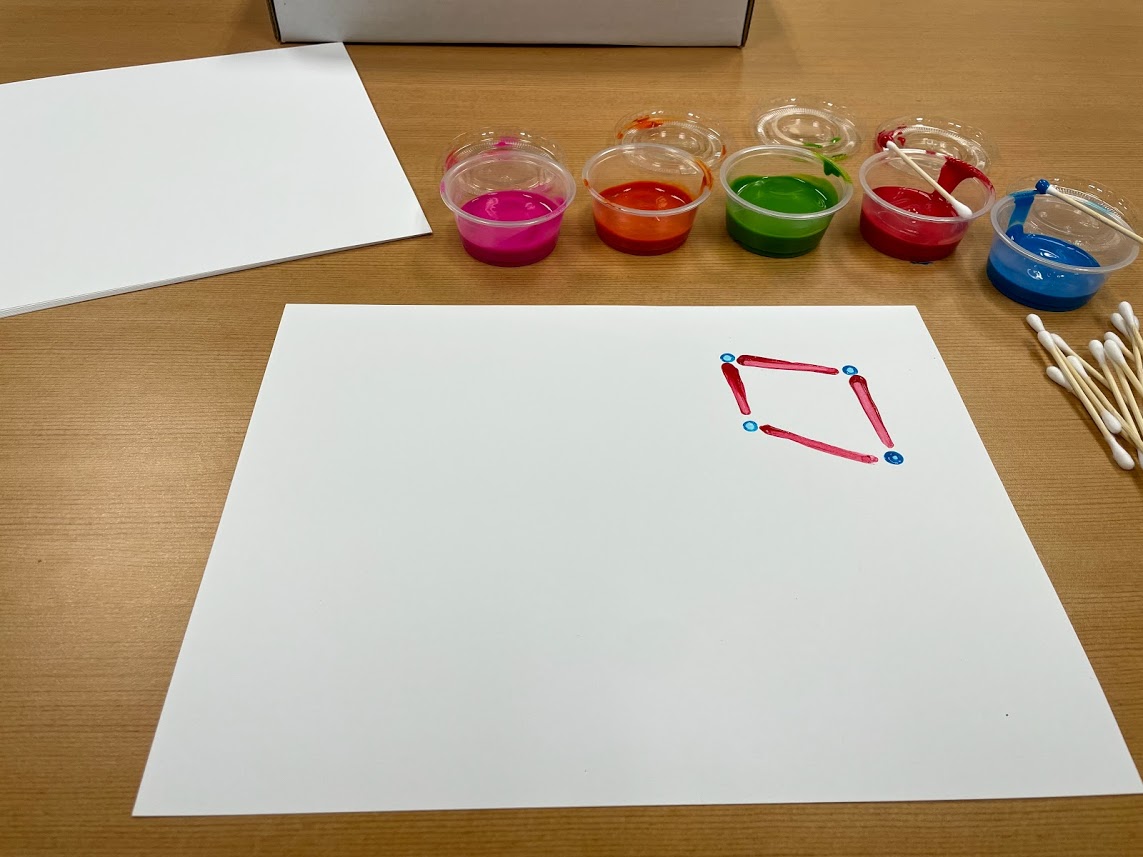
3. Let dry.
4. Enjoy your beautiful masterpiece!

Extension Questions/Discussion
- Talk to your child about the different colors of paint. What are they? Can they be mixed to create new colors? Do you see anything else in the room that is the same color?
- Experiment with different application techniques. Try dotting the paint, or dragging the swab across the paper. Does it feel different? Can you make the same shape, once using dots and once using dashes?
Show us what you created! Send us pictures at youthservices@balibrary.org.
Grades K-2: Shaving Cream Marble Painting
Use shaving cream and paint for a sensory art experience. Register for the August Grades K-2 Take-and-Make Kit here.
Directions:
1. Spray a layer of shaving cream into a shallow container or tray.
2. Using the pipettes, drip paint onto the shaving cream.
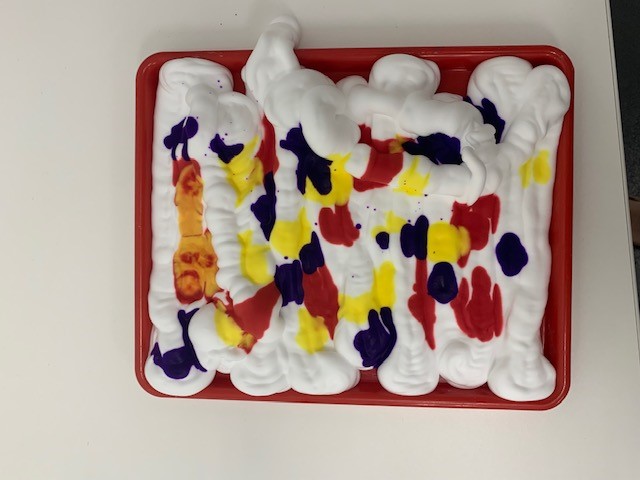
3. Swirl the colors together with a small popsicle stick.
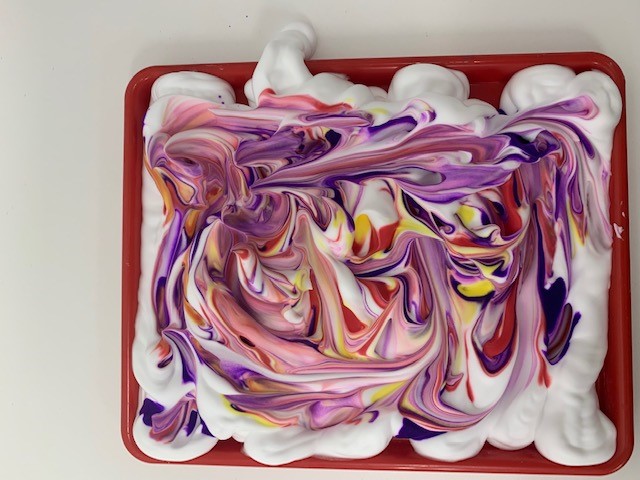
4. Press a piece of paper down onto the top of the shaving cream.
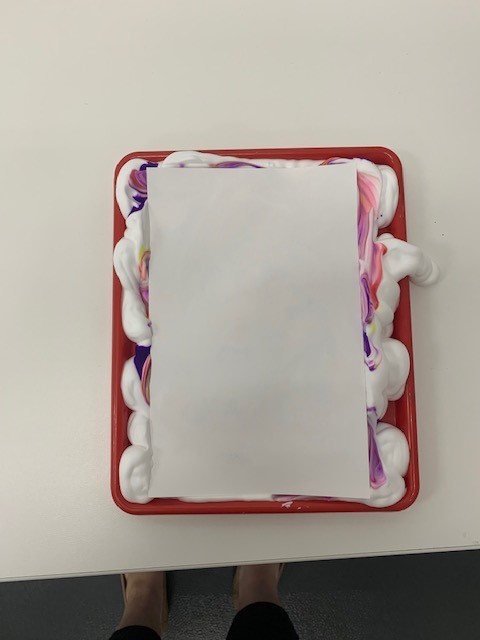
5. Lift paper up and scrape all of the shaving cream off with a large popsicle stick.
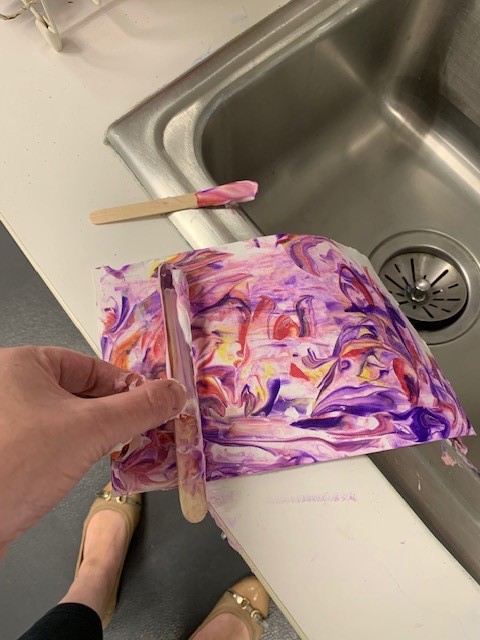
6. Repeat! You may not need to add a new layer of shaving cream every time.
Show us what you created! Send us pictures at youthservices@balibrary.org.
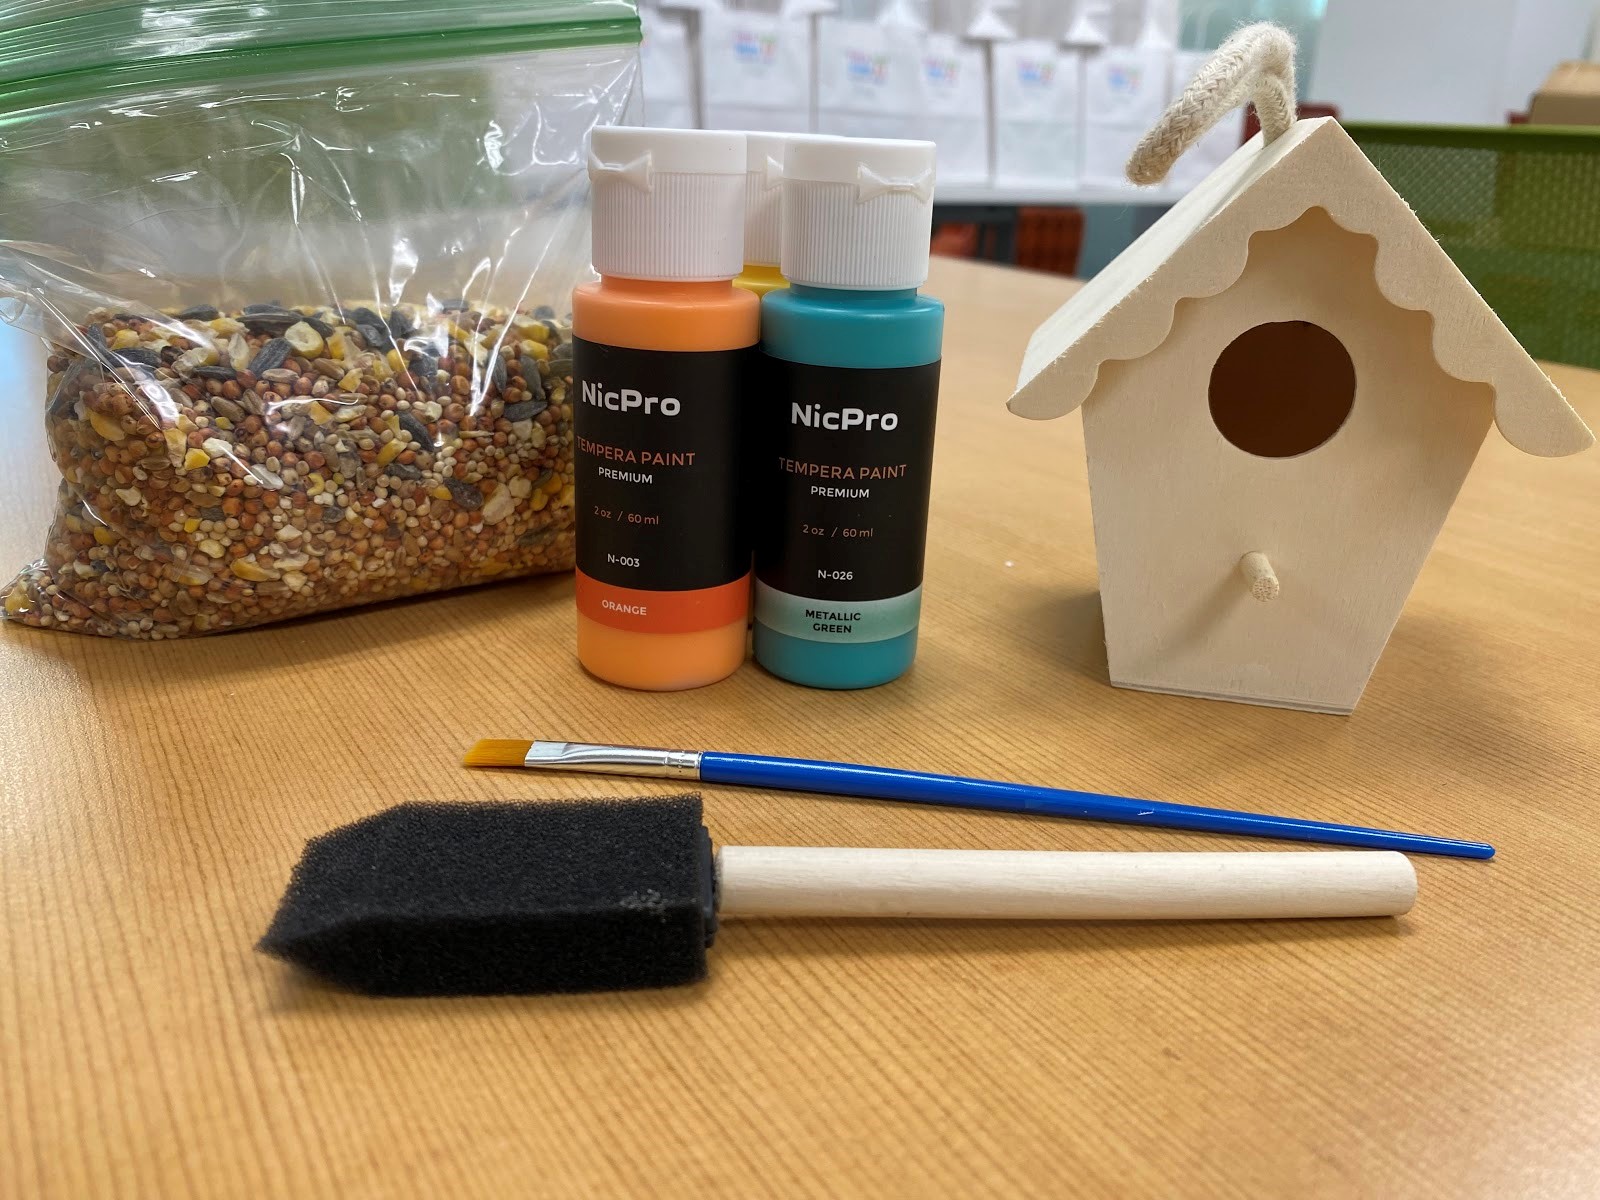
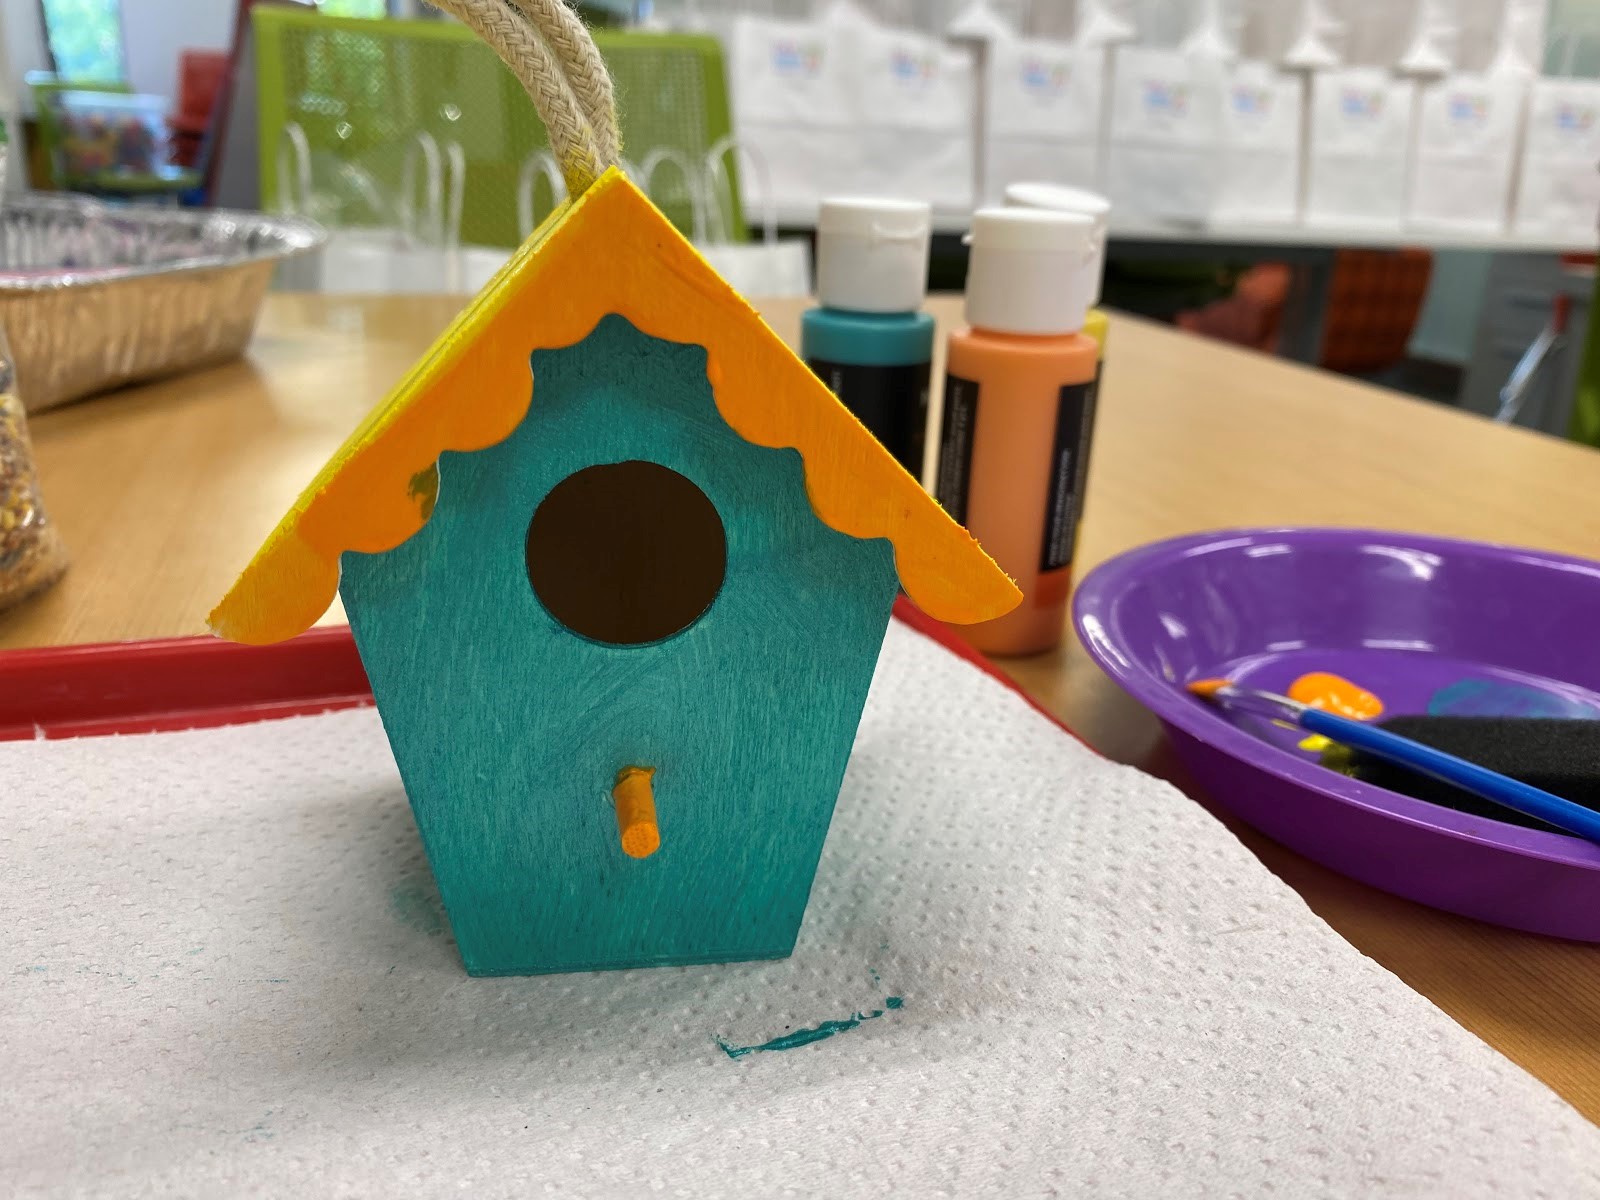
Grades 3-8: Birdhouse Painting
Paint a house for our tiny feathered friends, then fill it with birdseed and display it in your yard. Register for the August Grades 3-8 Take-and-Make Kit here.
Allergy Warning: The Birdseed in this kit is manufactured in a facility that handles major allergens including peanuts, tree nuts, wheat, fish, and soy products. Therefore this product may contain such allergens.
Your kit contains:
- 1 wooden birdhouse
- 3 bottles of acrylic paint
- 1 foam paintbrush
- 1 nylon hair paintbrush
- 1 bag of birdseed
Directions:
1. Find a good spot where you can get a little messy while painting your birdhouse.
2. Spend some time thinking about how you’d like to design your birdhouse.
3. Start painting! There’s no wrong or right way to paint your birdhouse. The foam brush will work well painting a larger surface, while the nylon hair brush will help you to paint smaller details, like a flower or sun.
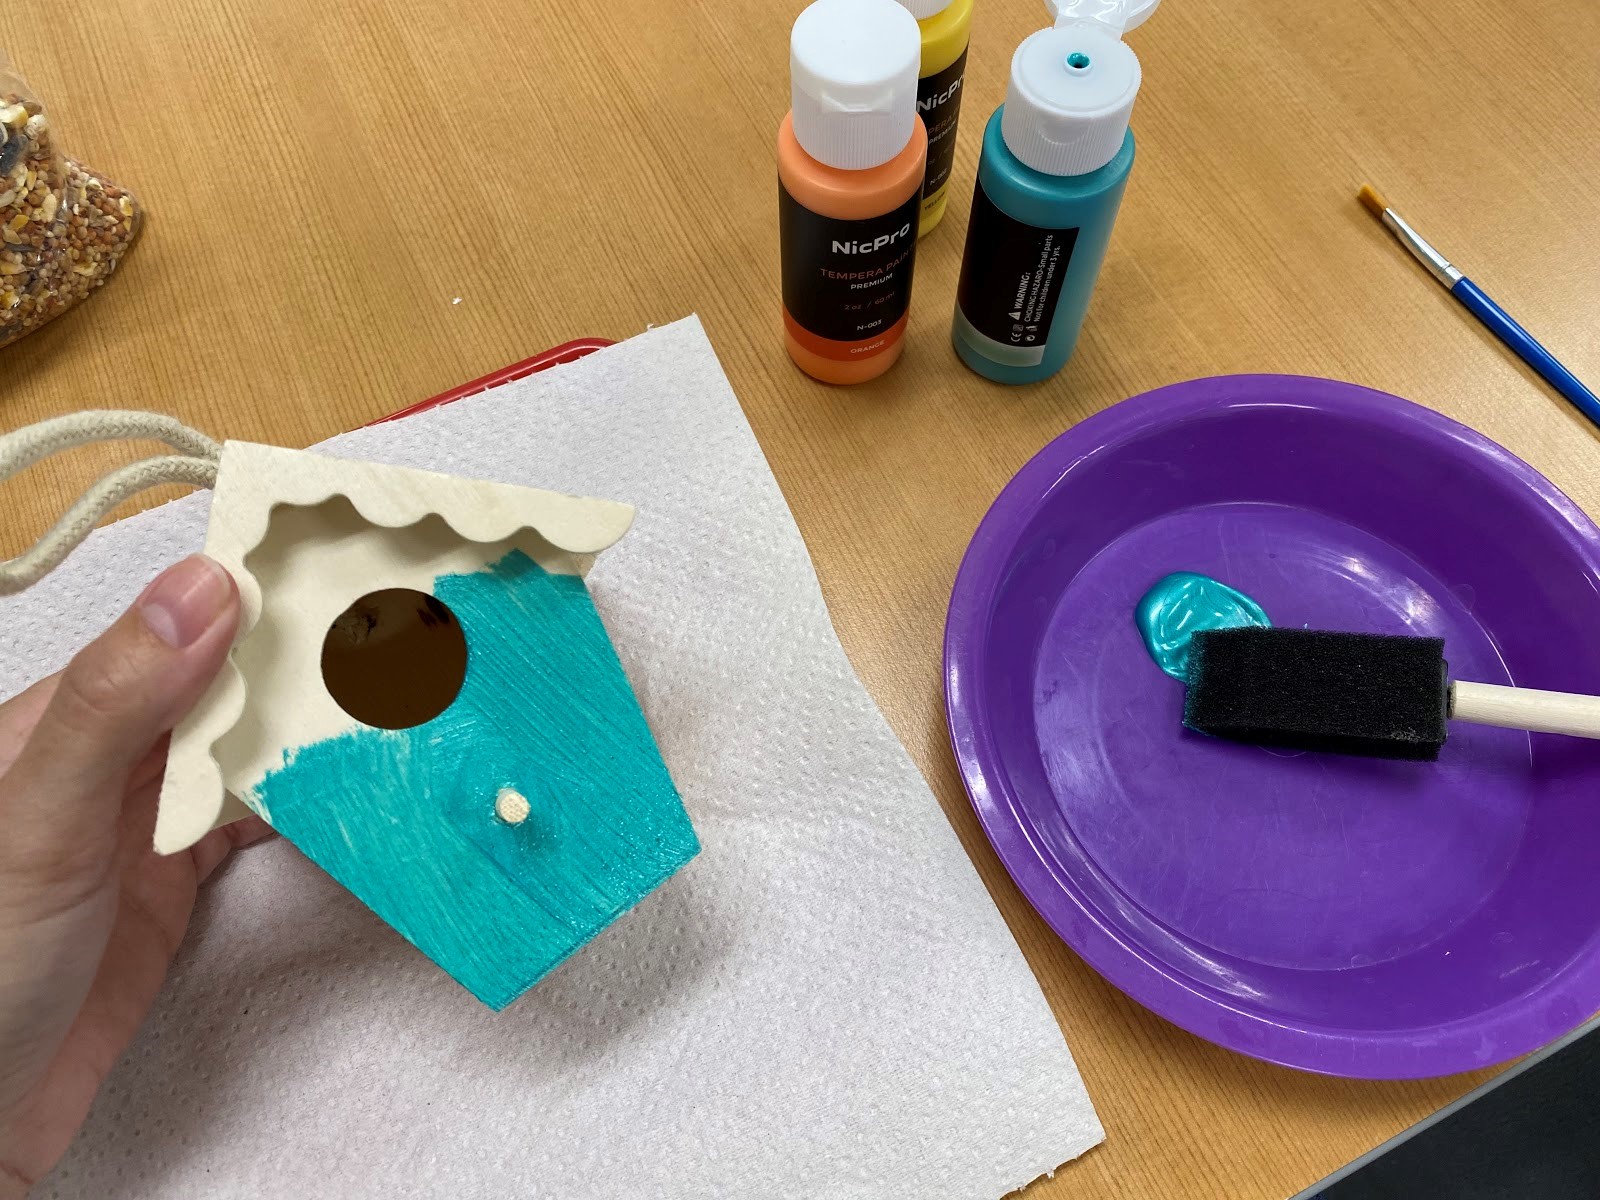
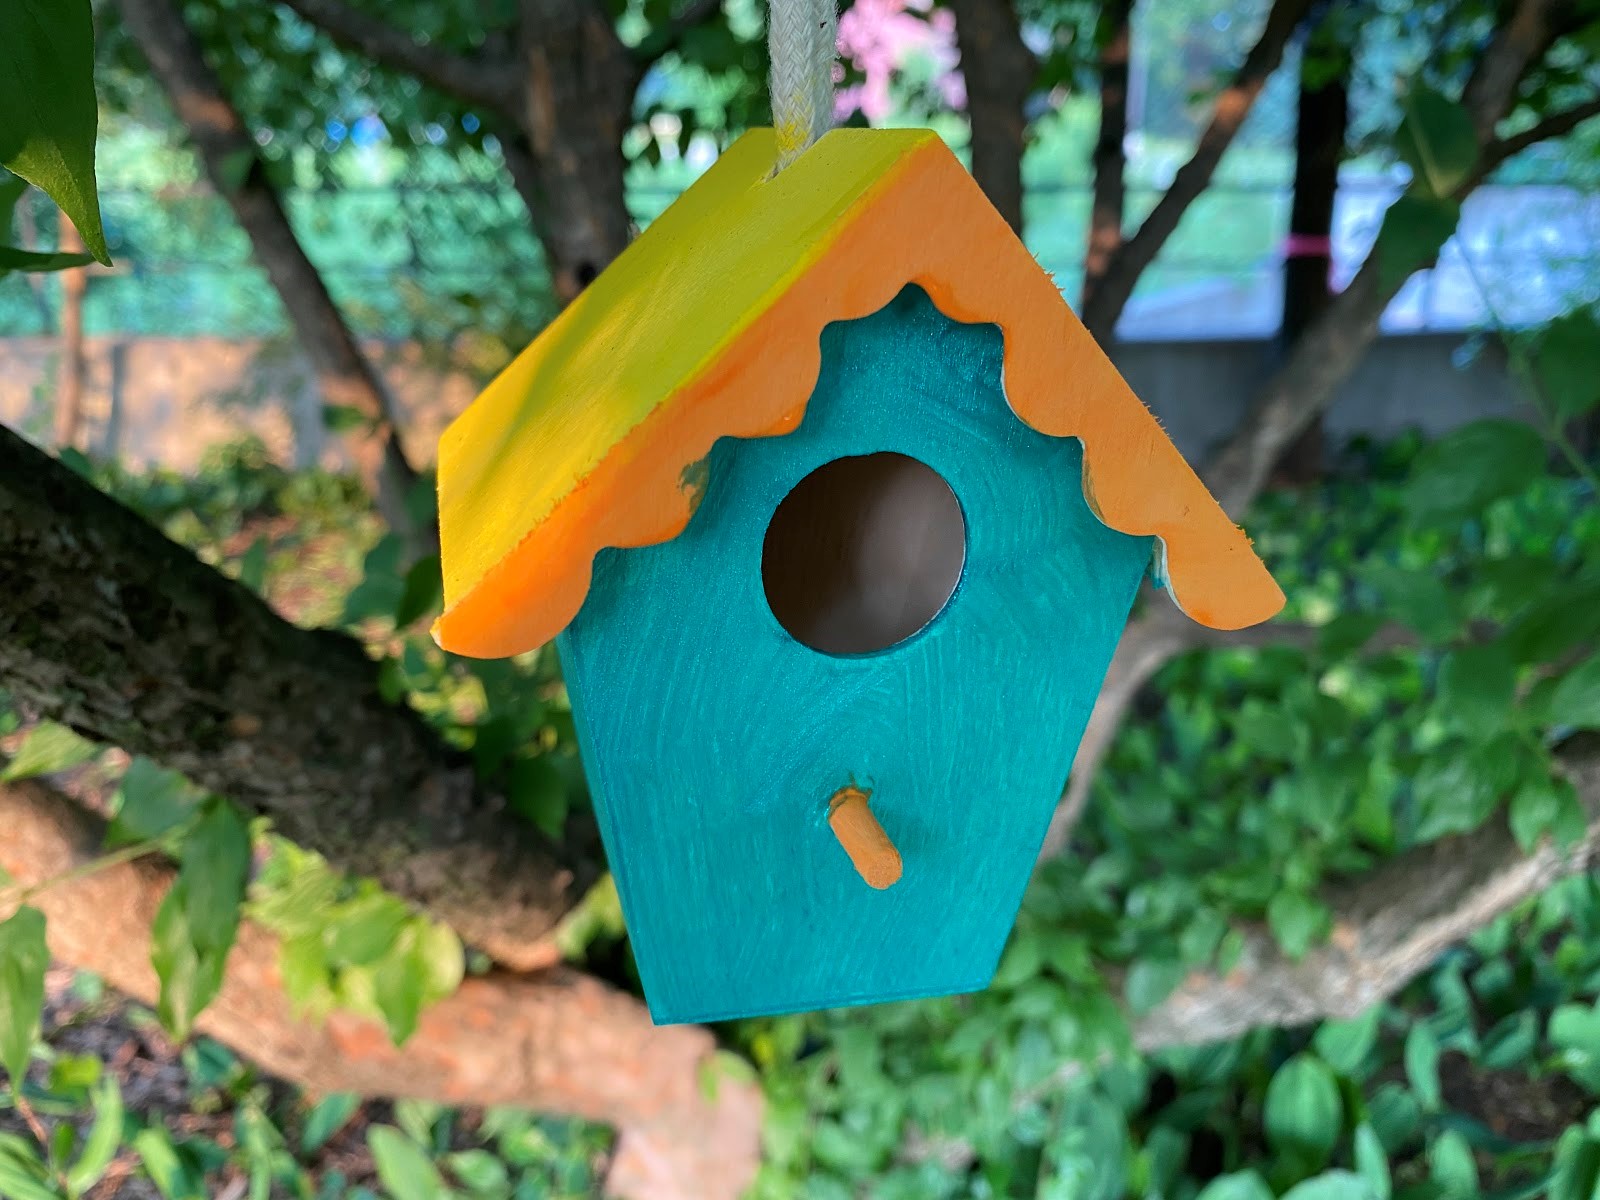
4. Once you’ve finished painting, let your birdhouse dry overnight.
5. Scoop some bird seed into your birdhouse, and find a good place to hang it outside.
6. Now you can admire the beauty of your birdhouse, while also doing some backyard birdwatching!
Bonus! All Ages Kit: Summer Reading Badge Display
Create a place to display and admire all of the badges you worked so hard to earn during Summer Reading. Register for the Bonus! All Ages Take-and-Make Kit here.
Show us what you created! Send us pictures at youthservices@balibrary.org.
Youth Services Assistant Librarian Alyssa -
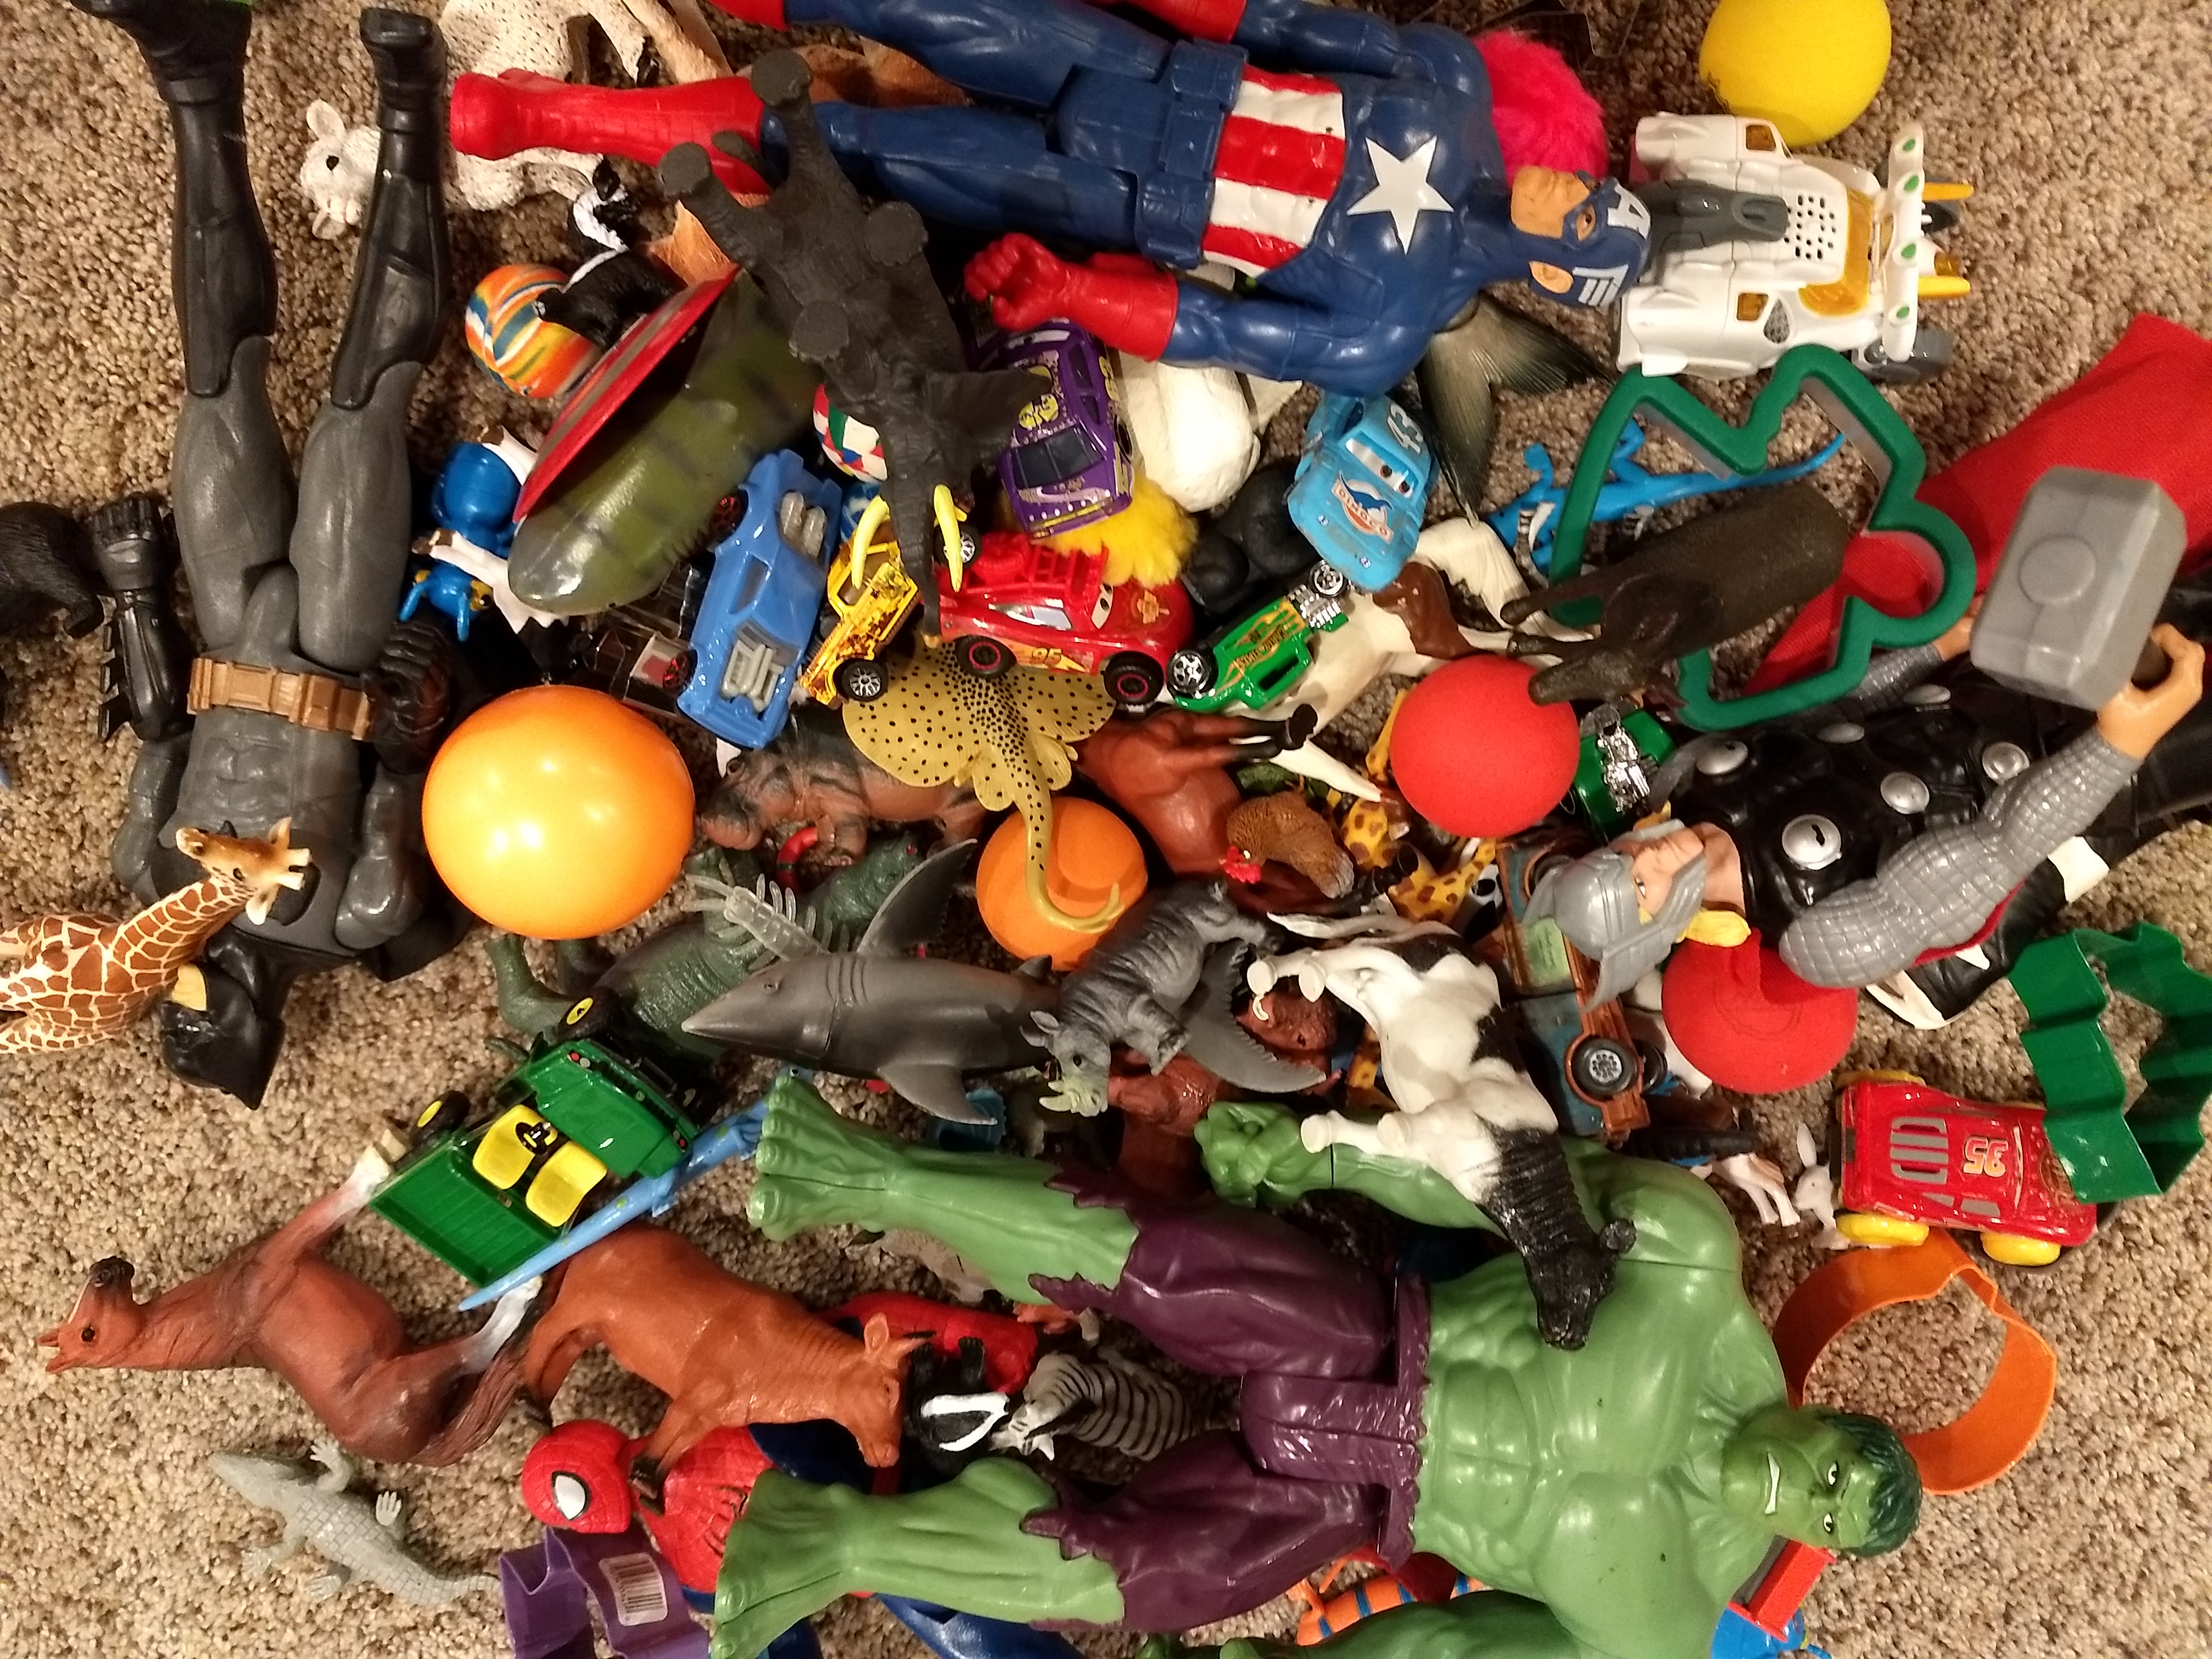
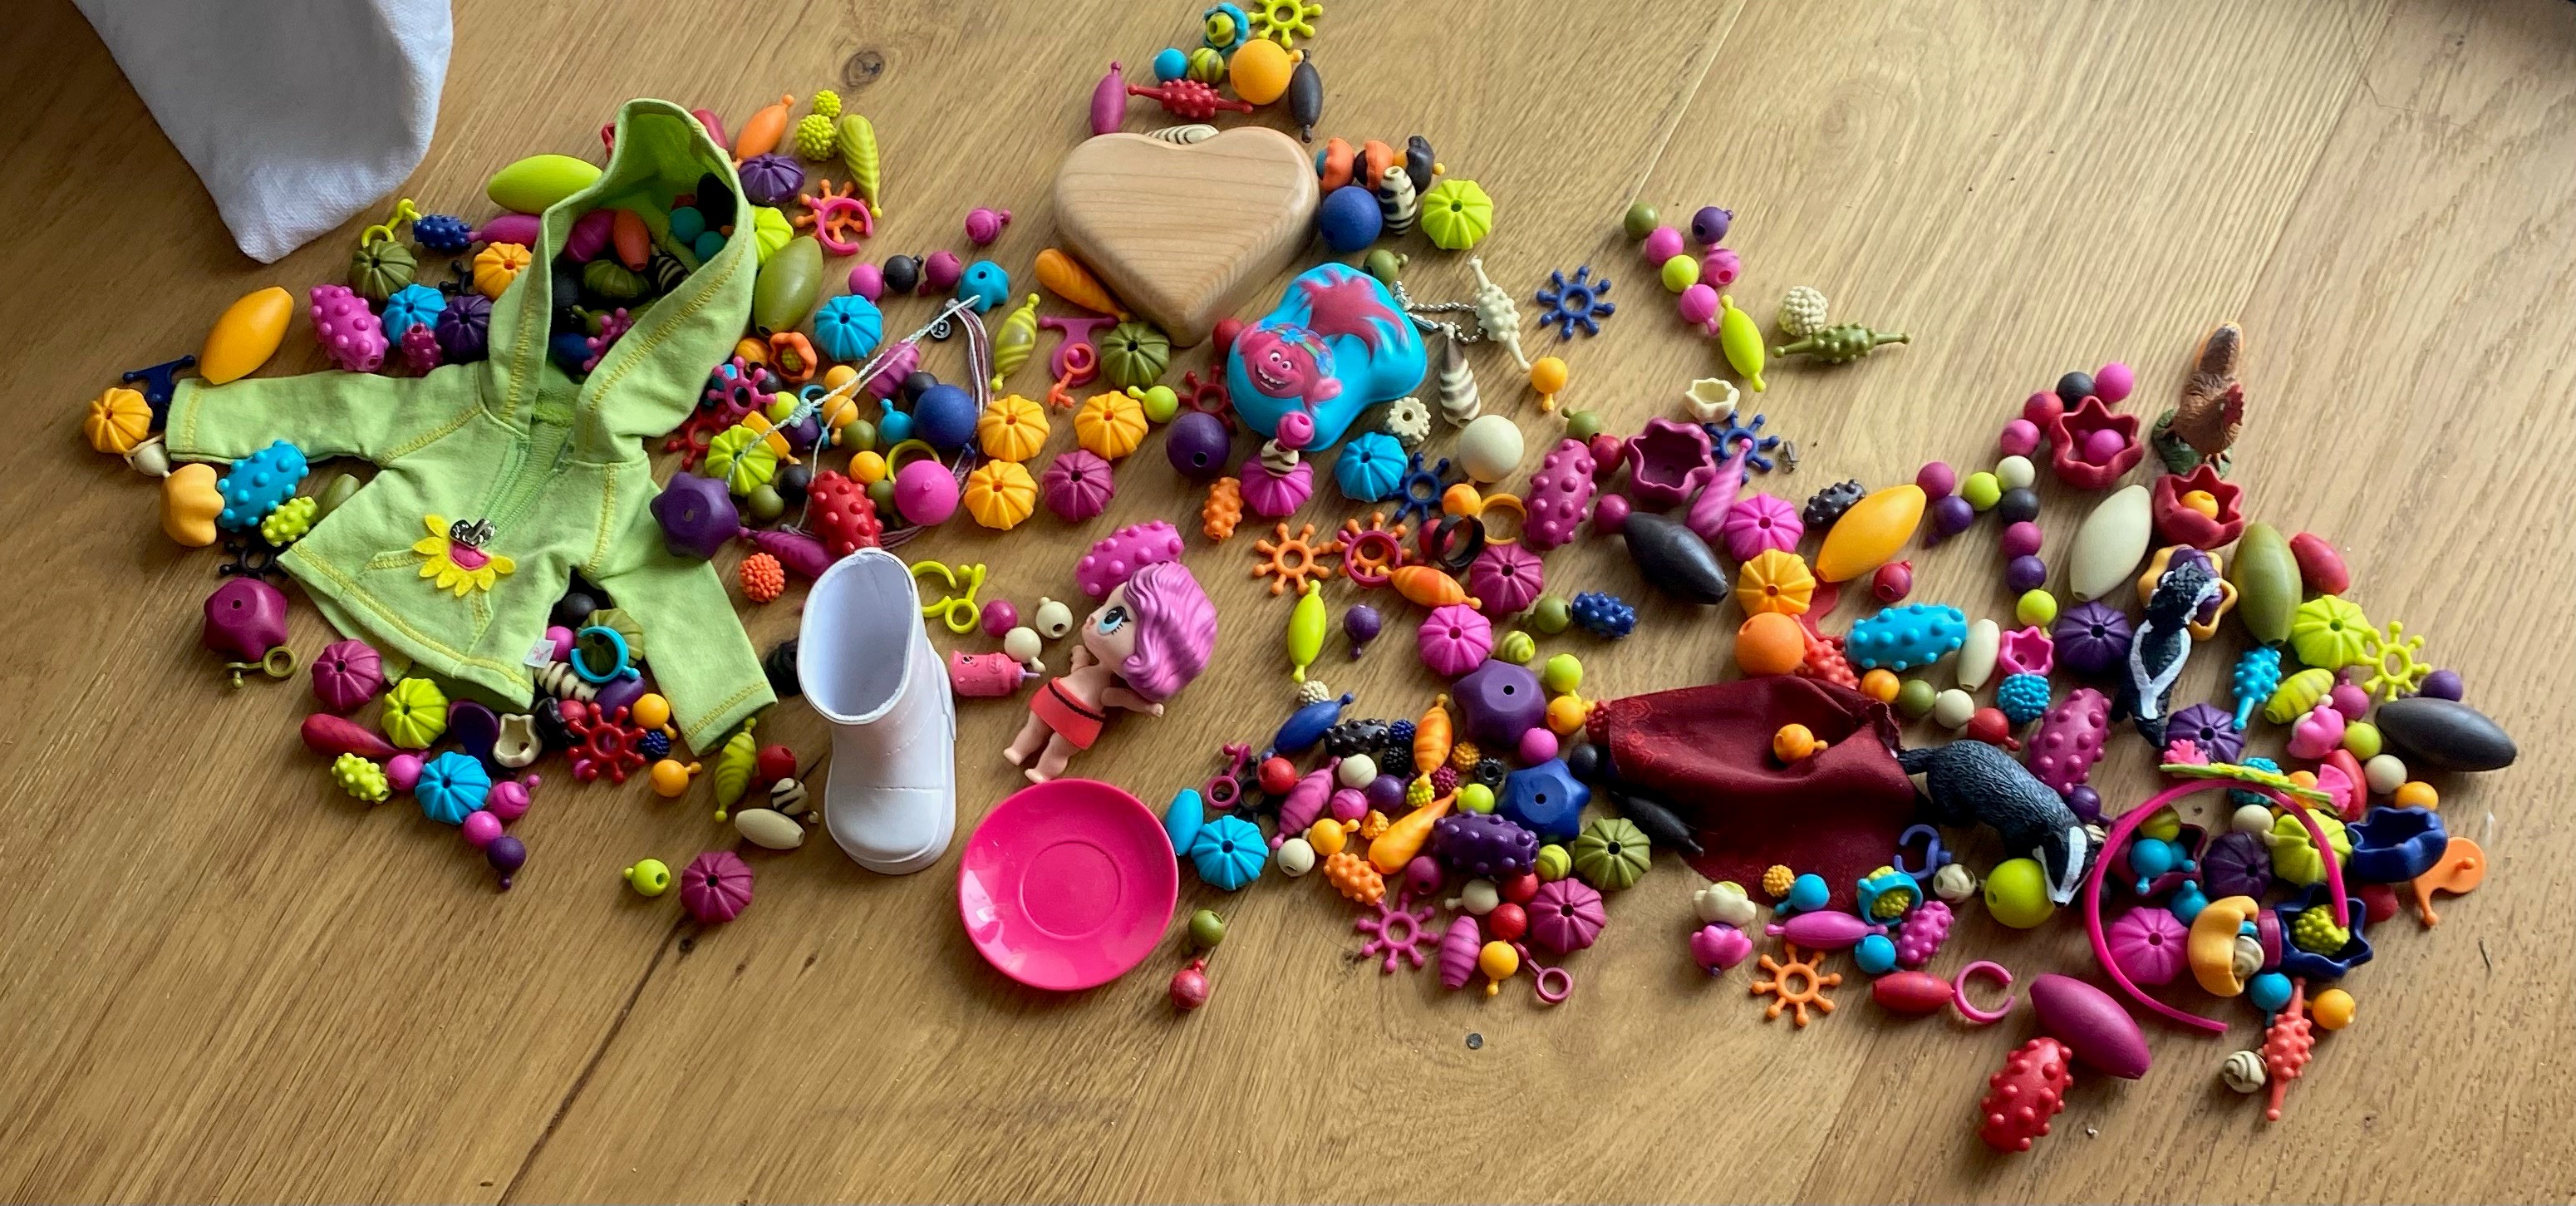
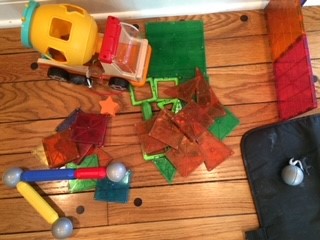
Seek-and-Find Photos from Kids
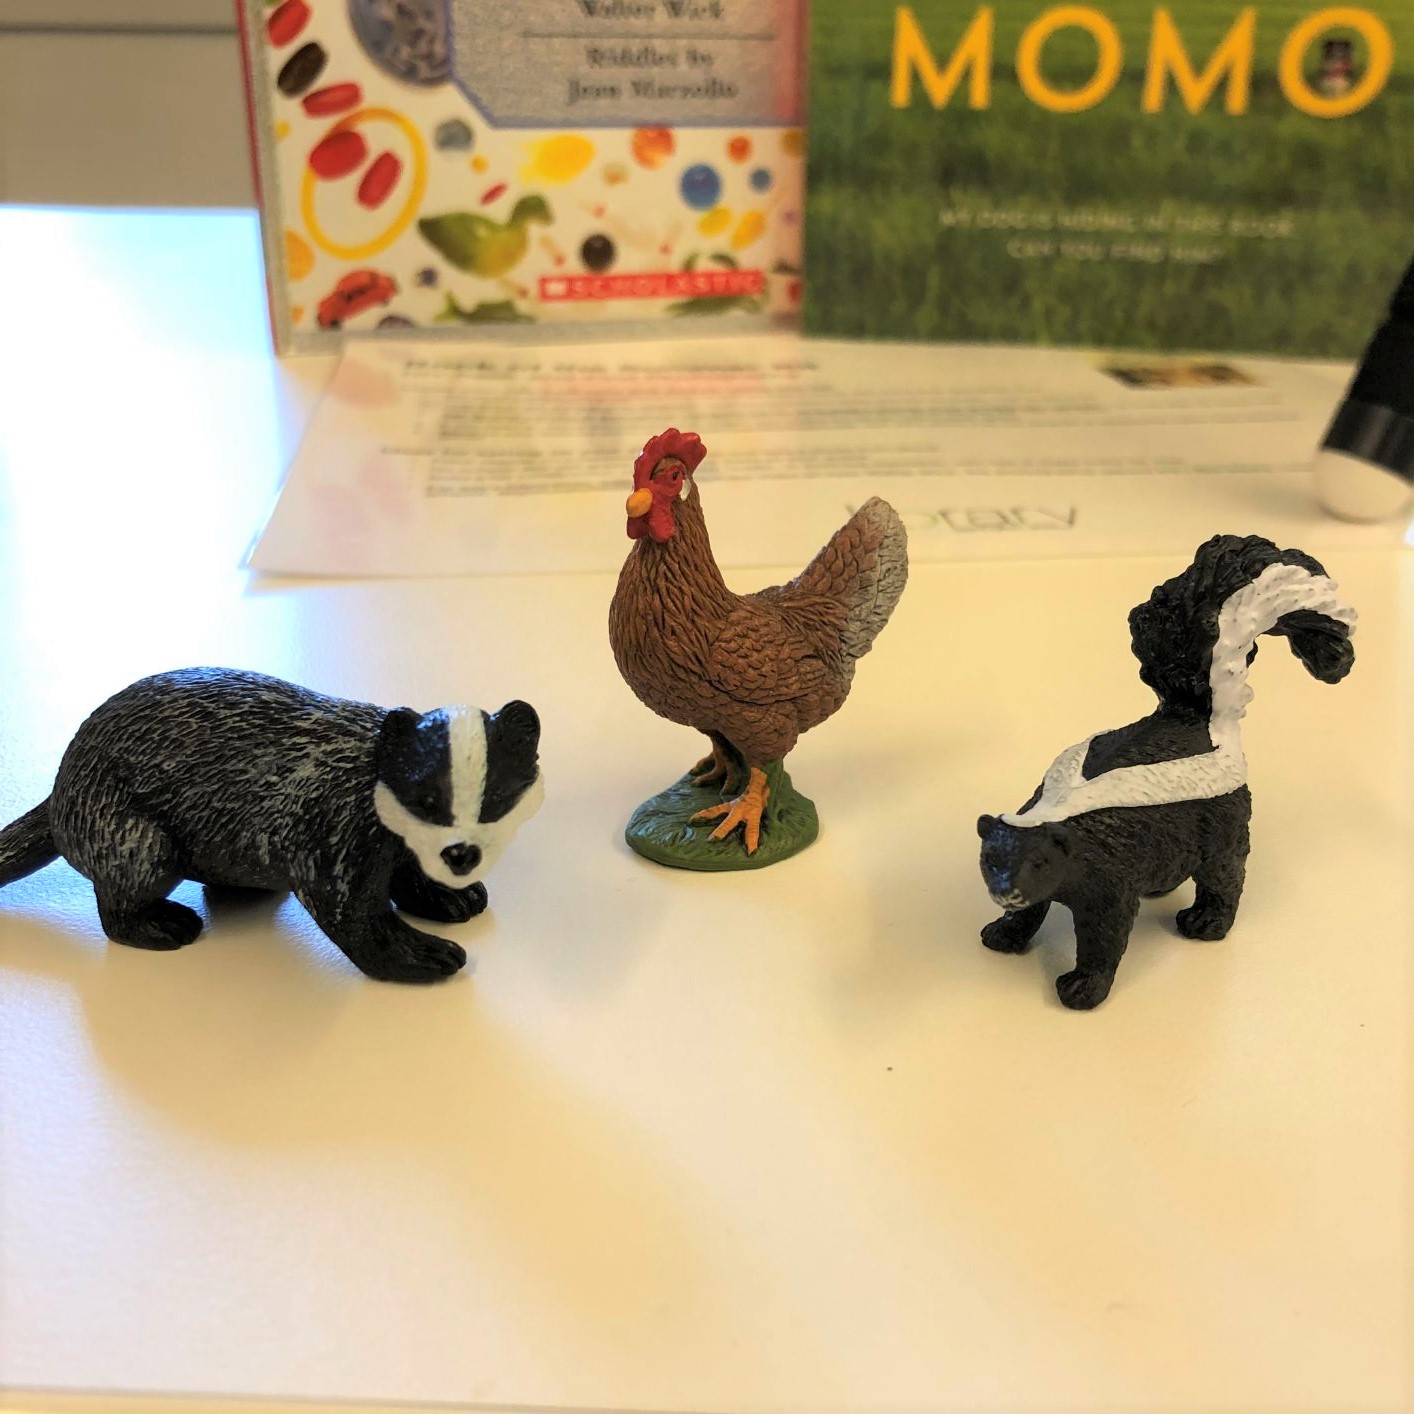
Thank you to everyone who has checked out a DIY Seek-and-Find Photography Kit, inspired by our Book of the Summer, Skunk and Badgerby Amy Timberlake. Here are some photos you all captured and shared. See if you can find Skunk, Badger, and one little chicken in each of these kid-created tableaus!
From Cooper:
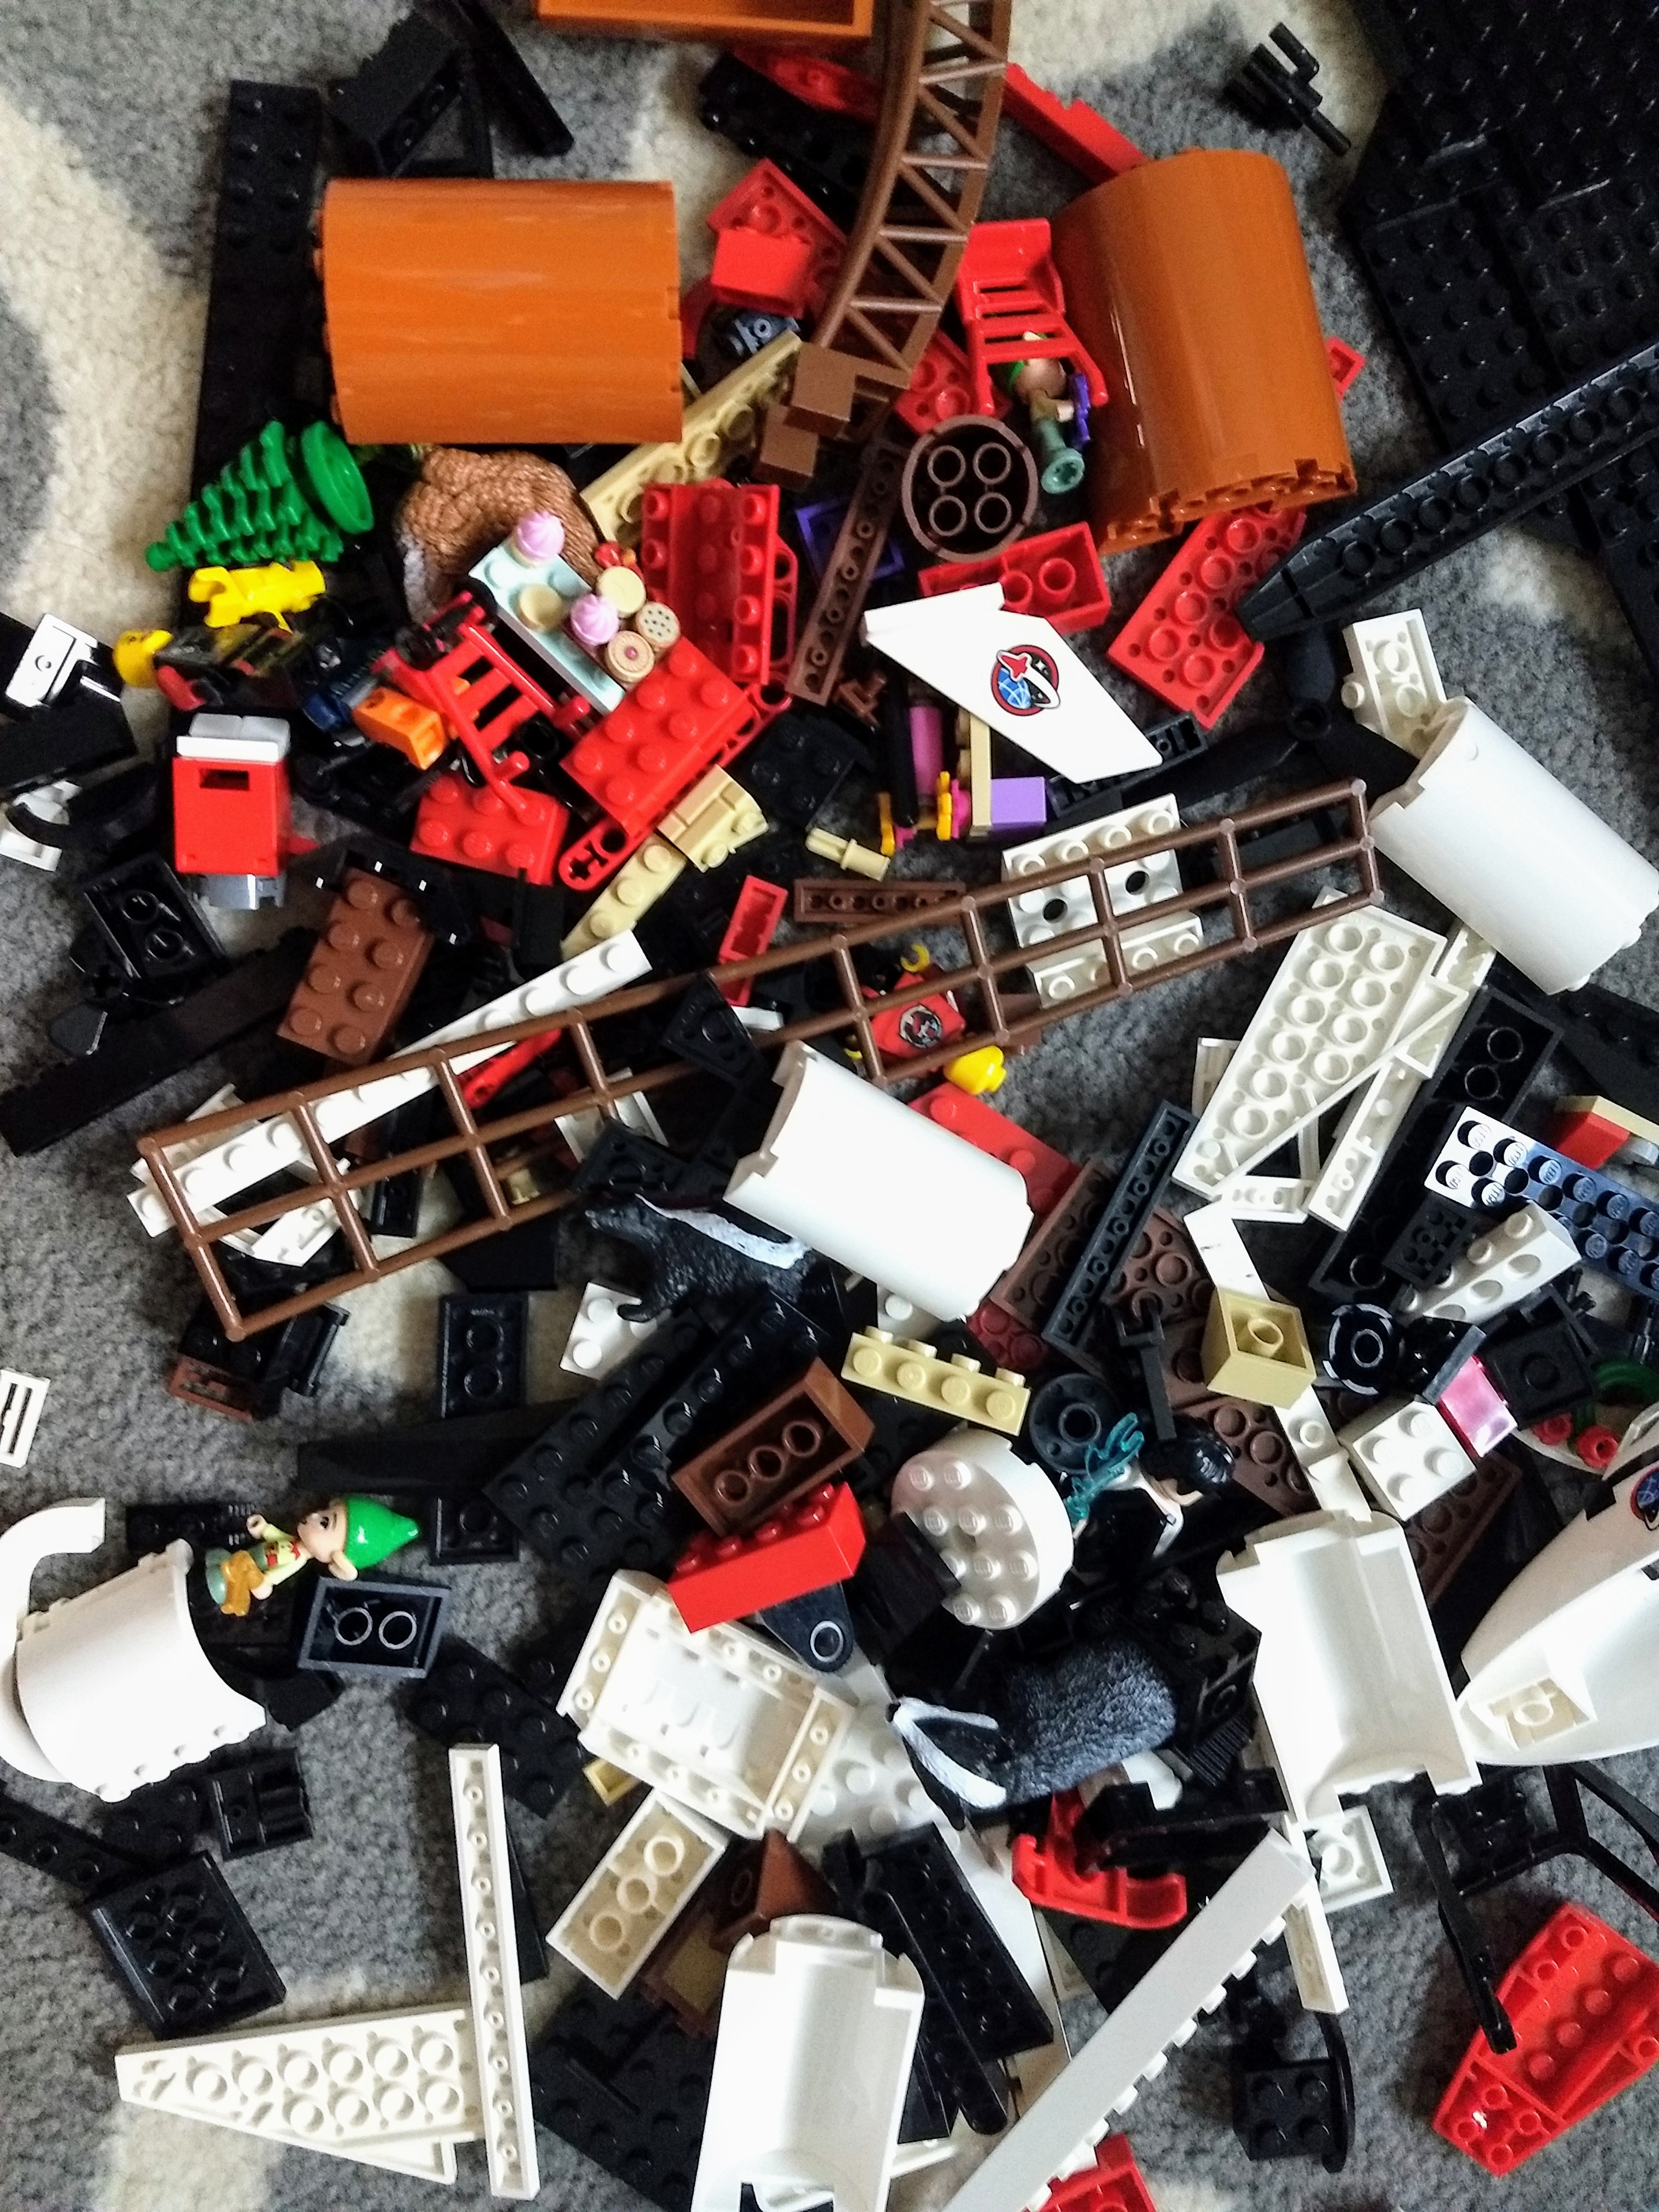
From Duncan:
From Lyla:
From Molly and Maddy:
Find activity ideas, discussion questions, and booklists on ourwebpage all about Skunk and Badger. You can also earn the Book of the Summer badge in ourSummer Reading program!
 Youth Services Librarian Allison
 -
July Take-and-Make Kits
Bring home a fun new project! Sign up from our Library Calendar and pick up a kit at the Youth Services desk or through our Parking Lot Pickup service between July 12-23.
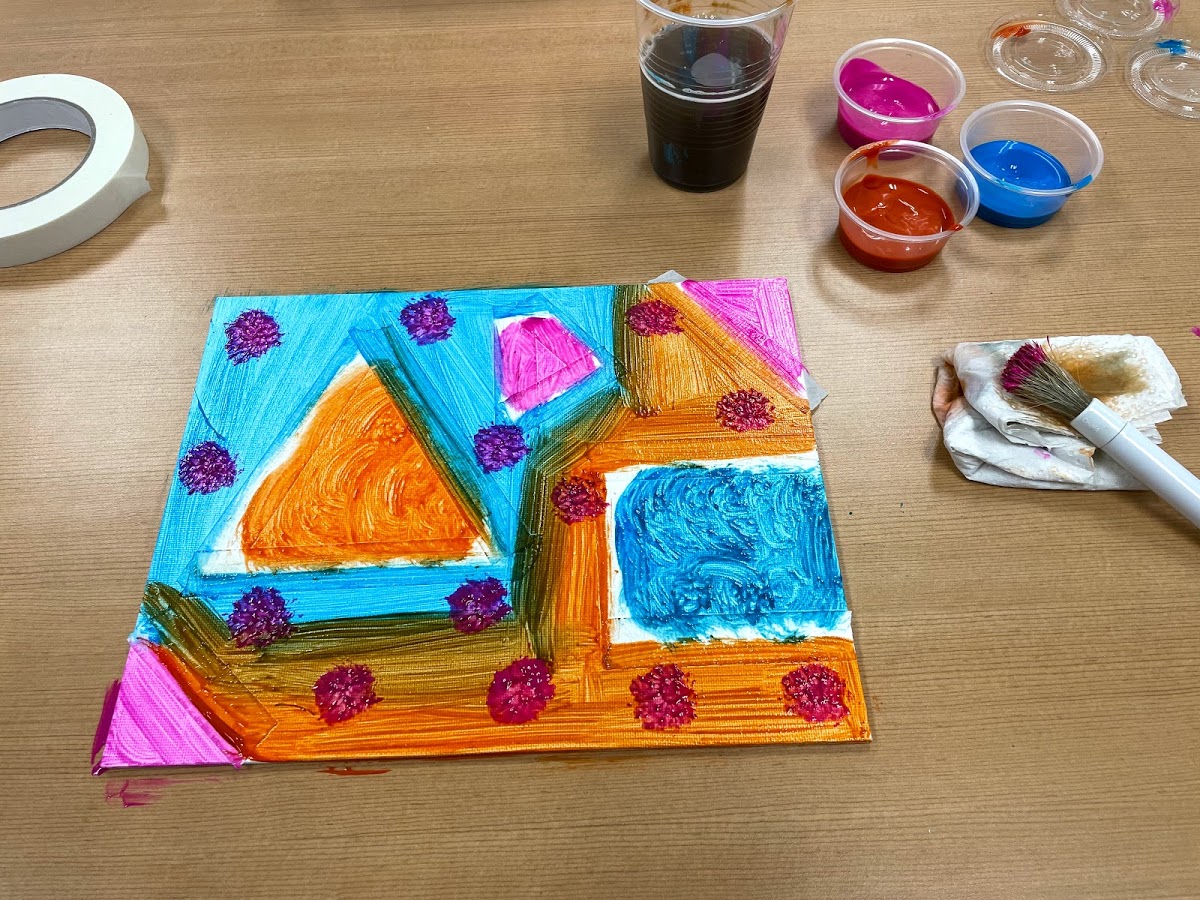
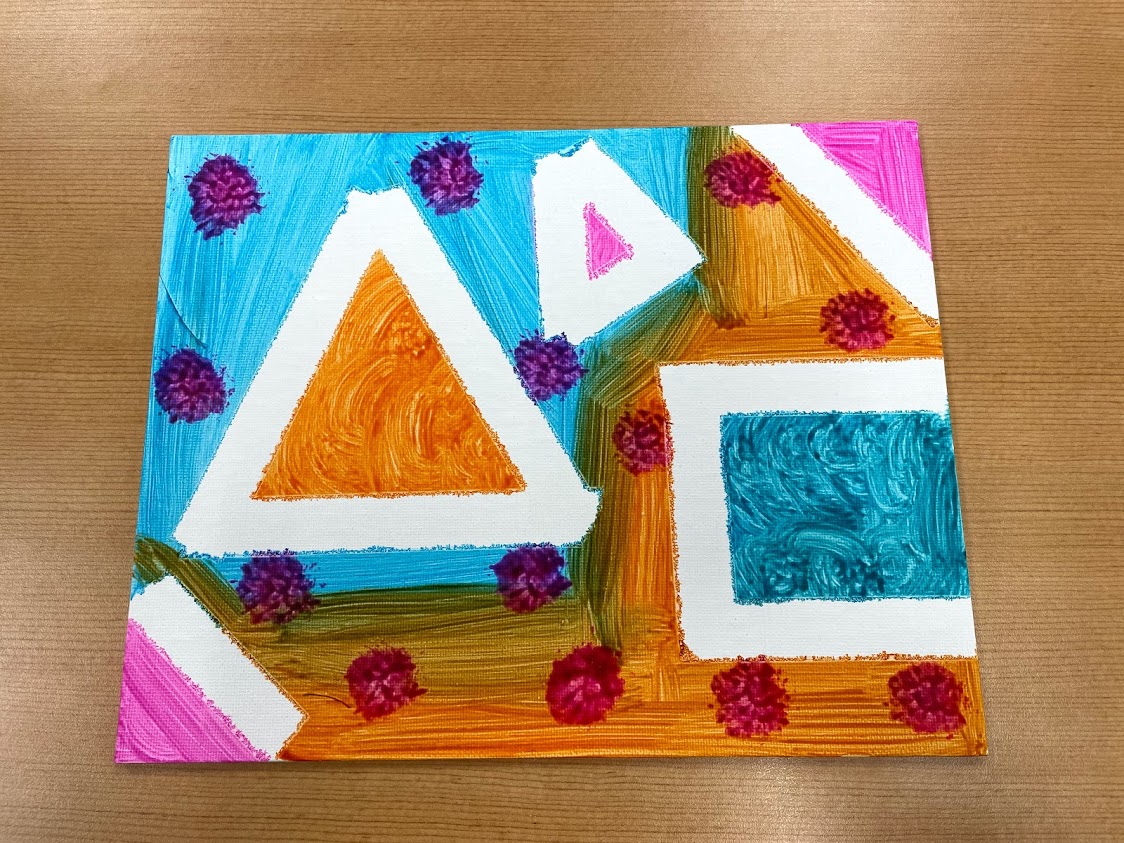
Toddler & PreK: Tape Resist Art
Use tape to create shapes on your canvas. Paint over it, then remove the tape to reveal your masterpiece. Register for the July Toddler & PreK Take-and-Make Kit here.
Your kit contains:
- one canvas
- one paint brush
- one roll of masking tape
- three containers of paint

You may also need a cup of water to rinse your brush and paper towels to wipe the brush off between colors.
Directions:
1. Take all of your items out of the box.
2. Remove the plastic from the canvas.
3. Create a shape, letter, or design of your choice with the masking tape on the canvas.
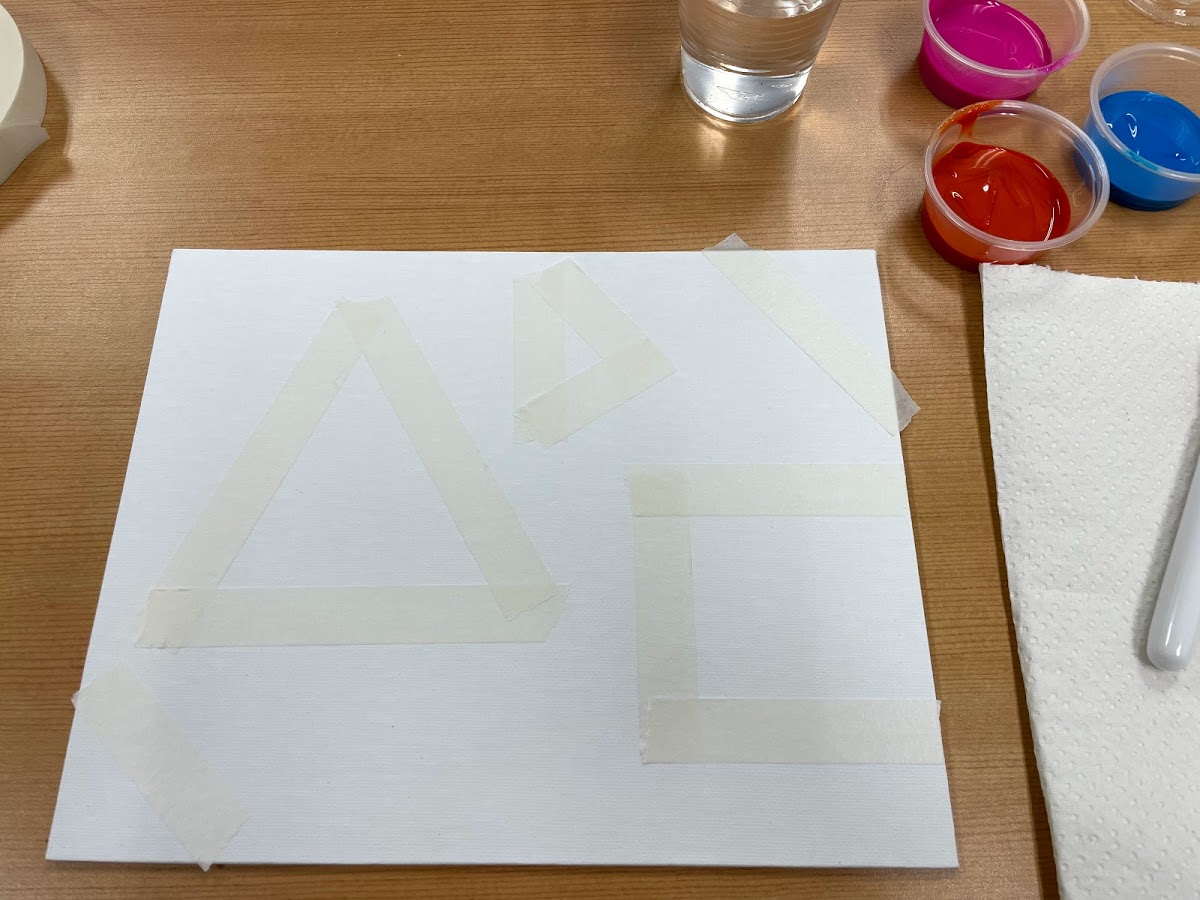
4. Use your brush to apply paint all over the canvas. Don’t worry about covering the masking tape.
5. Let dry.
6. Remove the masking tape from the dried canvas.
7. Enjoy your beautiful masterpiece!
Extension Questions/Discussion
- Talk to your child about the different shapes they can make with the tape. How many sides should the shape have? How many different shapes can you make?
- Ask your child if they can make the first letter of their name with the tape.
- Talk to your child about the different colors of paint. What are they? Can they be mixed to make new colors?
Show us what you created! Send us pictures at youthservices@balibrary.org.
Grades K-2: DIY Bubble Wand
Create your own bubble wand, then mix up some bubble solution for tons of fun. Register for the July Grades K-2 Take-and-Make Kit here.
Making your bubble solution:
- Pour 3 cups of water into a large container
- Pour the blue dish soap into the container. Slowly stir until the dish soap is mixed.
- Pour the corn syrup into the container and mix slowly. The bubble solution can be used immediately, but it will improve if it sits overnight.
Creating your bubble wands:
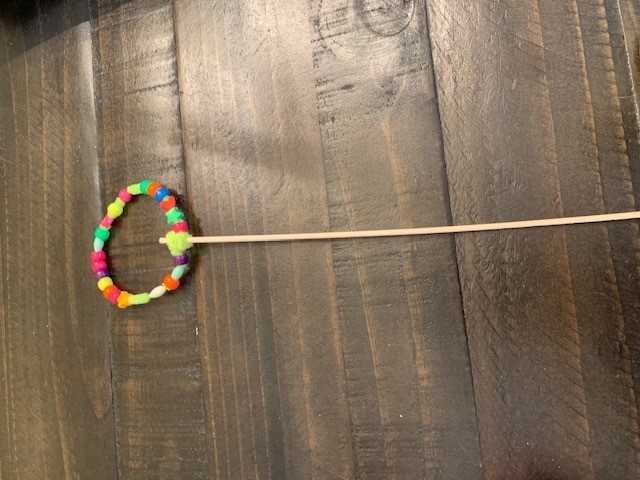
1. String beads on pipe cleaner.
2. Form pipe cleaner into a shape, and twist around dowel rod.
3. You may need to spread the beads around the pipe cleaner to distribute the weight.
4. Multiple pipe cleaners can be put on the dowel rods, if you desire.
5. Dip pipe cleaner into bubble solution and blow bubbles.
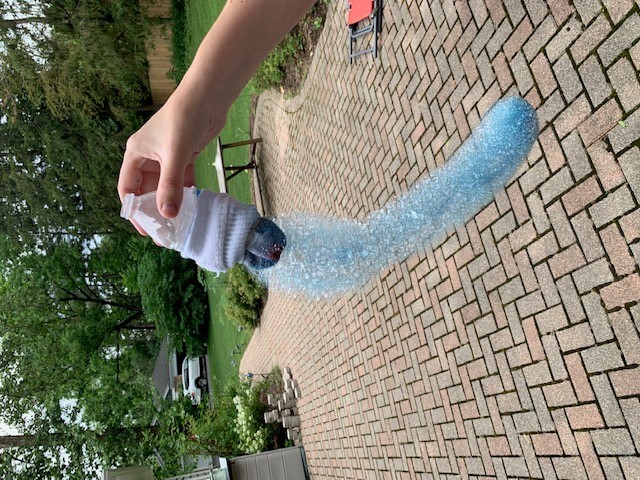
Bubble Snakes:
1. Place the sock over the bottom of the cut water bottle and wrap the rubber band around it. It’s okay if the bottle gets a little crunched.
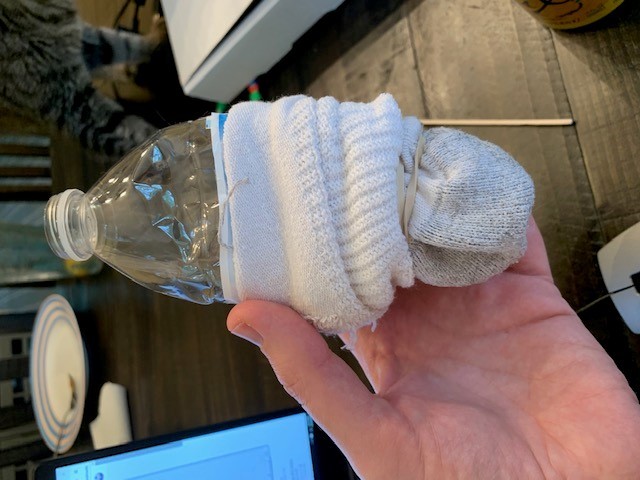
2. Squeeze food coloring onto the bottom of the sock. You can use multiple colors. The food coloring can stain clothing.
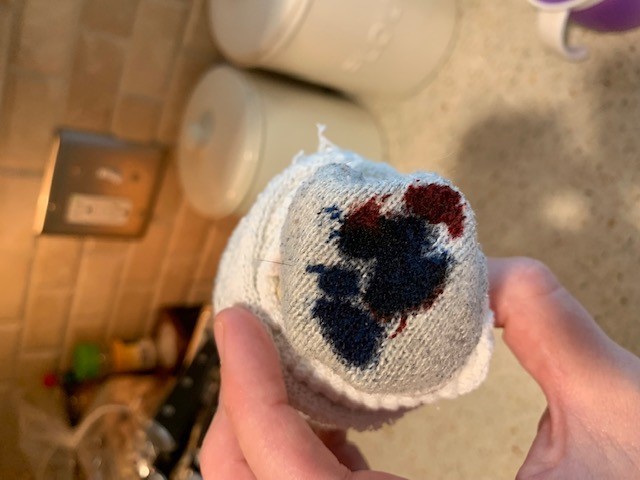
3. Dip the bottle with the sock into the bubble solution. Blow bubbles through the opening at the top of the bottle.

Show us what you created! Send us pictures at youthservices@balibrary.org.
Grades 3-8: Mini Zen Garden
Take a mindful moment as you design your mini Zen garden and enjoy the calm. Register for the July Grades 3-8 Take-and-Make Kit here.
Show us what you created! Send us pictures at youthservices@balibrary.org.
-
June Take-and-Make Kits
Bring home a fun new project! Sign up from our Library Calendar and pick up a kit at the Youth Services desk or through our Parking Lot Pickup service between June 14-25.
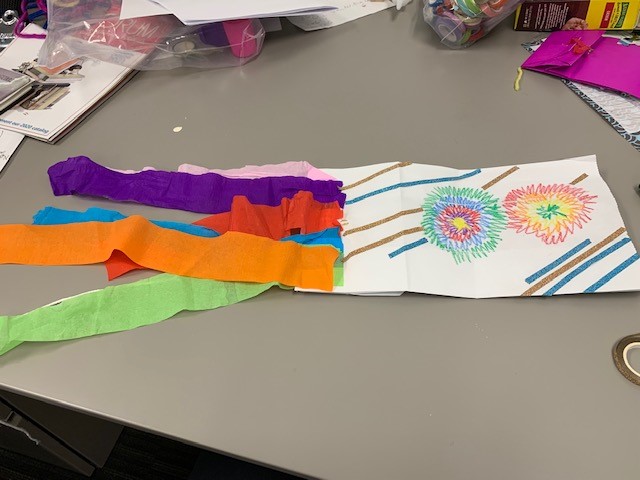
Toddler & PreK: Paper Bag Kites
Decorate a paper bag and watch it soar as a kite. Register for the June Toddler & PreK Take-and-Make Kit here.
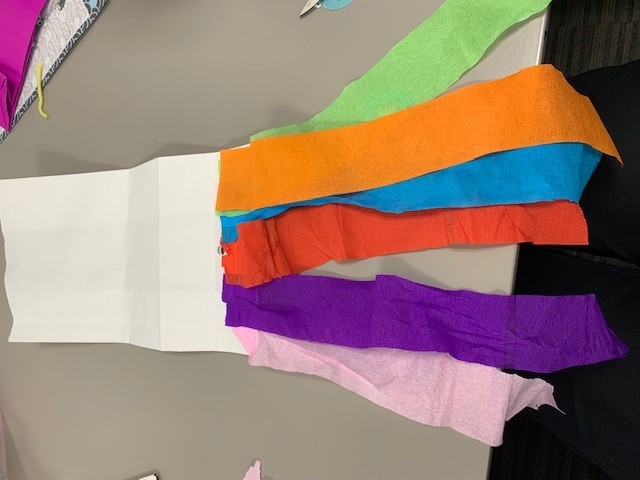
Instructions:
1. Decorate your paper bag with crayons and washi tape.
2. Glue 6 streamers to the bottom of your paper bag. You will need to overlap them to fit all 6 on.
3. Tie a piece of twine to the middle of one of the popsicle sticks.
4. Open the paper bag. Put the popsicle stick with the twine on it inside the bag and thread the string through the hole at the bottom of the bag. Your bag has two holes punched in it, but you only need to thread the string through the hole at the bottom of the bag.
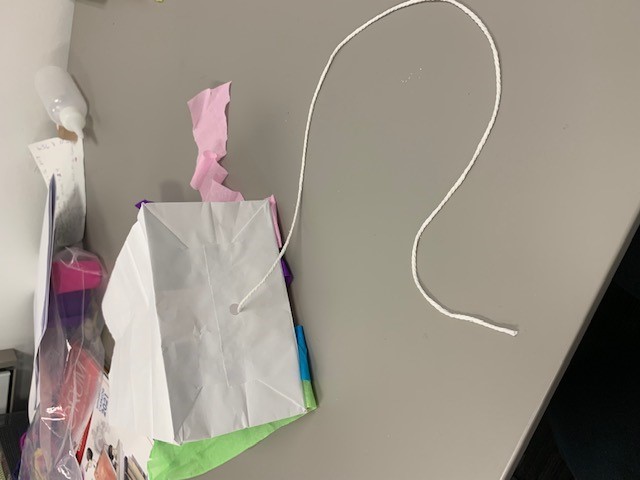
5. The string will be your kite string and the popsicle stick will keep it in place in the bag.
6. Fly your kite by holding on to the string and running. If the string is too long for your child, wrap it around their hand. Enjoy flying your kite!
Show us what you created! Send us pictures at youthservices@balibrary.org.
Grades K-2: Make Your Own Kinetic Sand
Mix together the ingredients to make moldable sand that won’t stick to your hands. Register for the June Grades K-2 Take-and-Make Kit here.
Show us what you created! Send us pictures at youthservices@balibrary.org.
Grades 3-8: No-Sew Pillows
Spruce up your space with a DIY pillow — no sewing skills required. Register for the June Grades 3-8 Take-and-Make Kit here.
Your kit contains:
- two squares of fleecy fabric
- one bag of stuffing
- one ring-shaped paper stencil
- one piece of chalk
- one roll of tape (optional)
You will also need one pair of very sharp scissors.
Instructions:
1. Lay out one square of fabric on a table or desk. Place the paper stencil on top of the fabric. Optionally, use the tape to hold the stencil in place.
2. Using the chalk, trace both the outside circle and the inside circle on the fabric. It's okay if your work isn't super neat.
3. Set the first square aside.
4. Lay out the second square of fabric, put the stencil on top, and trace the same two circles (outside and inside edges) on the fabric.
5. Using your sharp scissors, cut along just the outside (larger) chalk line on both of the fabric pieces. Leave the inside (smaller) chalk circle alone for now.
6. Layer the two fabric circles on top of each other, as exact as you can.
7. Cut slits from the outer edge of the fabric circle to the inside chalk line. Cut through both layers of fabric at once. You're making fringe strips, about 1/2-1 inch wide. Keep your scissors pointing towards the middle of the circle as you cut slits all the way around.
8. Don't separate the two layers!
9. Take the top and bottom layers of one set of fringe, and tie a double knot, connecting the front and back of the pillow.
10. Continue to tie knots around the circular pillow.
11. Leave a few inches untied, enough space you can put your hand in the pillow.
12. Stuff the pillow with stuffing, as much or as little as you'd like.
13. Finish tying the fringe strips all the way around the pillow.
14. Trim any fringe if it looks too long or uneven.
Show us what you created! Send us pictures at youthservices@balibrary.org.
-
4 Simple Science Experiments You Can Do With Your Toddler or Preschooler
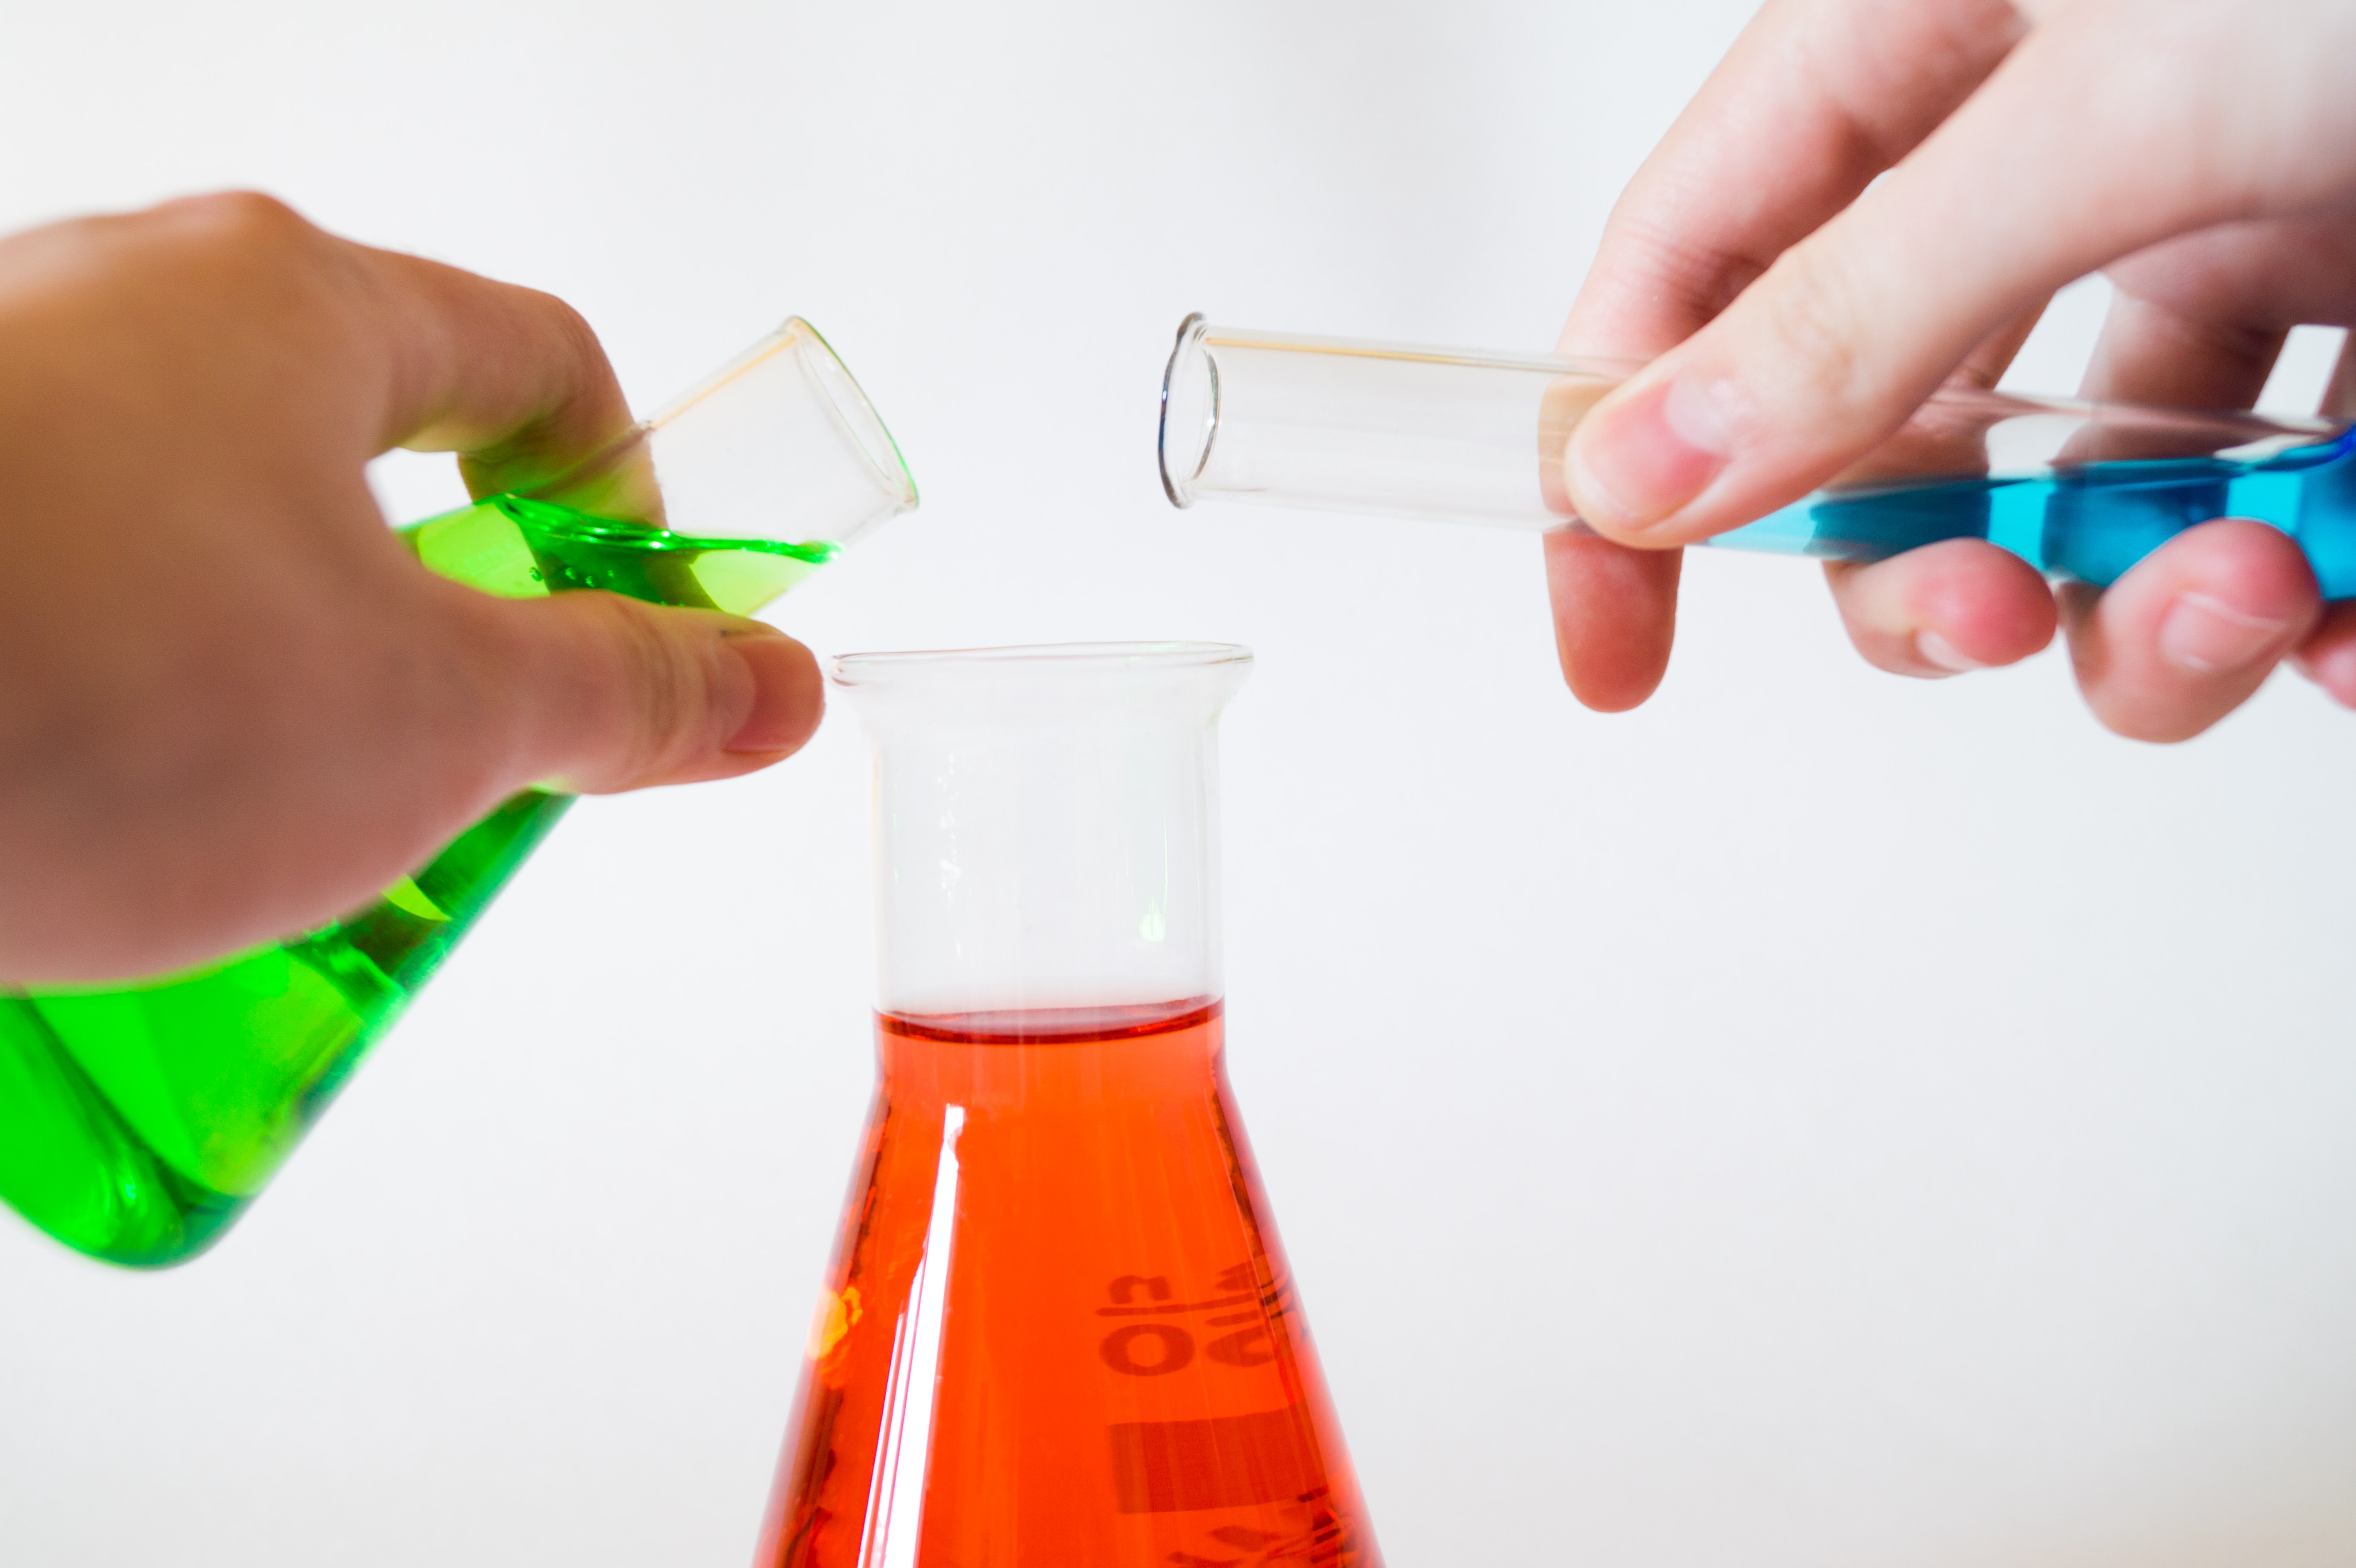
Photo by Alex Kondratiev on Unsplash
Toddlers and preschoolers love to explore the world. Here are 4 simple science experiments you can do together that will ignite your toddler or preschooler's curiosity.
Sink or Float
Materials
- Container to hold water. A large bowl or plastic bin works nicely.
- Toys and other household objects such as balls, cups, coins, sponges, and silverware.
- Pencil and paper.
Start by filling your container with water. Show your child an example of an item that floats, and an item that sinks. Before your child drops an item into the container, ask them if they think the item will sink or float. Record your prediction on your piece of paper, and see if they were right.
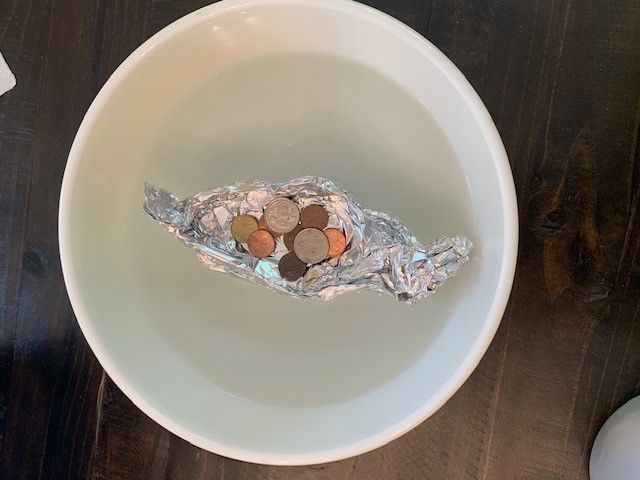
Boat Engineering
Materials
- Container to hold water.
- Tin foil or other household recyclables such as straws, egg cartons, and cardboard.
- Weights such as coins, washers, Legos, or small wooden blocks.
- Tape (optional)
Create a boat out of tinfoil or other household items such as straws, egg cartons, or cardboard. If you need inspiration, look at pictures of boats together. A tin foil boat will be the quickest way to make a boat.
Fill your container with water. Place your boat in the container. Add weight to your boat using items such as coins, washers, small blocks, or Legos. See how much weight your boat can hold before it sinks! Once your boat sinks, see if you and your child can build another boat that will hold more weight.
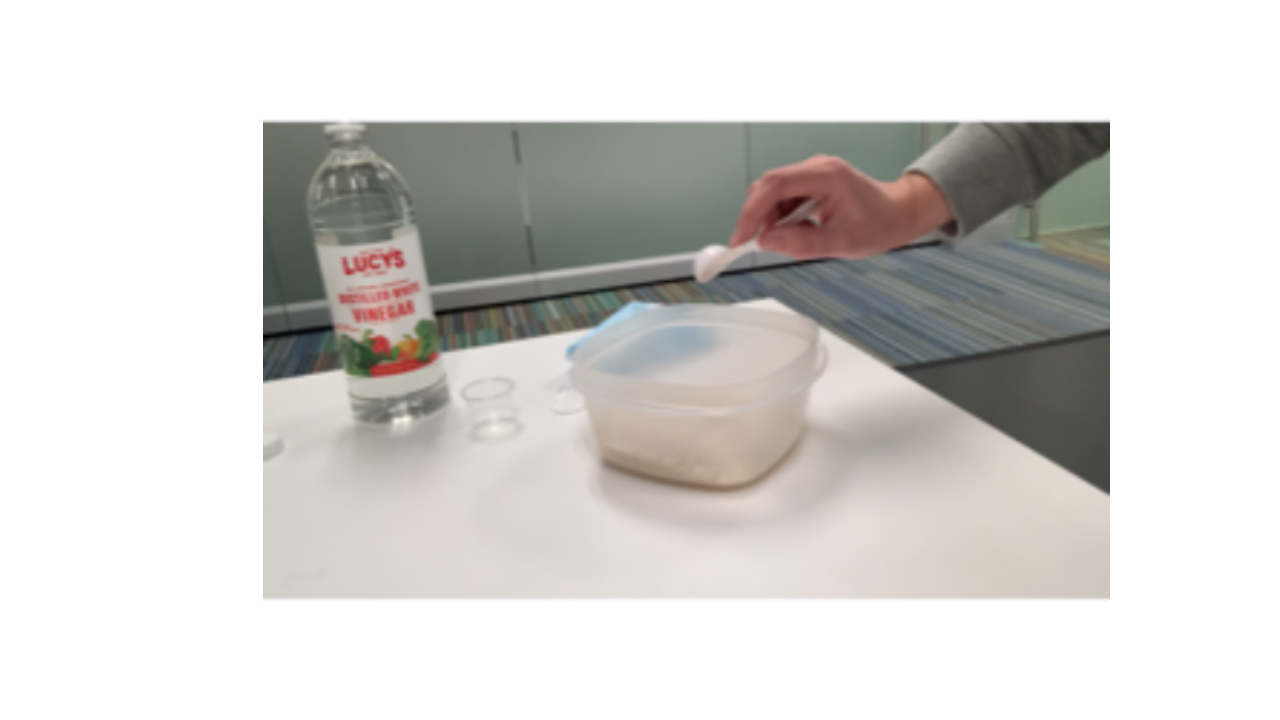
Baking Soda and Vinegar Chemical Reactions
Materials
- Baking soda.
- Vinegar.
- Food coloring.
- Cups.
- Pan with sides, such as a casserole dish or disposable aluminum pan.
- Eyedropper or spoon.
There are many ways you can explore with baking soda and vinegar, but this is one of my favorites.
Start by pouring a thin layer of baking soda in your pan. You will want a deep pan with sides to contain the fizz from the baking soda and vinegar.
Pour a small amount of vinegar into your cups. The amount does not need to be precise, but 1/4 cup in each cup should be enough. Add one color of food coloring to each cup of vinegar. Mix to combine.
Fill an eyedropper or spoon with the colored vinegar, and drip it into the pan. Watch the color appear on the baking soda, and it fizz as the baking soda and vinegar combine. Enjoy the fizzing, and see what colors you can make!
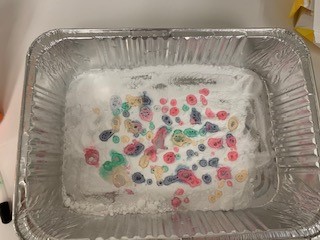
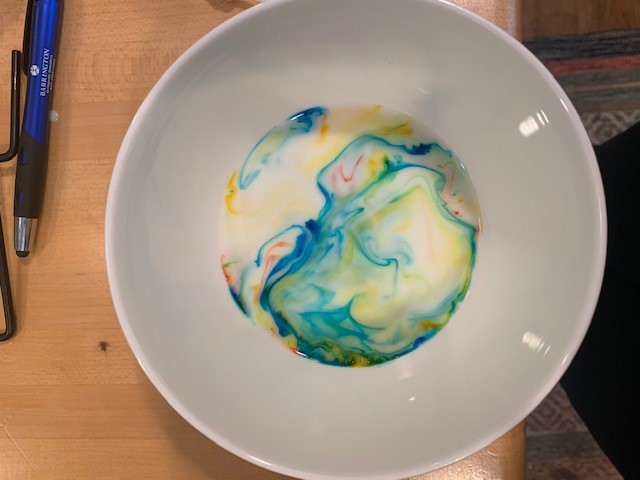
Color Mixing with Magic Milk
Materials- 2% or Whole Milk.
- Bowl.
- Dish soap.
- Cotton swab.
- Small cup.
- Food coloring.
Pour some milk into a bowl. The milk should be either 2% or Whole Milk. Add several drops of food coloring to the milk.
Pour a small amount of dish soap into a small cup. Dip your cotton swab into the cup of dish soap. Touch the cotton swab with the dish soap on it to the milk. Once the dish soap touches the milk, you should see the colors spread out from each other. You can dip the cotton swab in the dish soap again and touch it to a different spot on the milk.
Looking for more experiments to do with your toddler or preschooler? Here are some websites with more ideas.
Youth Services Librarian Ann - Container to hold water. A large bowl or plastic bin works nicely.
-
May Take-and-Make Kits
Bring home a fun new project! Sign up from our Library Calendar and pick up a kit at the Youth Services desk or through our Parking Lot Pickup service between April 12-23.
Toddler & PreK: Flower Pot Painting
Paint a flower pot, plant some seeds, then watch as they grow! Register for the May Toddler & PreK Take-and-Make Kit here.
Show us what you created! Send us pictures at youthservices@balibrary.org.
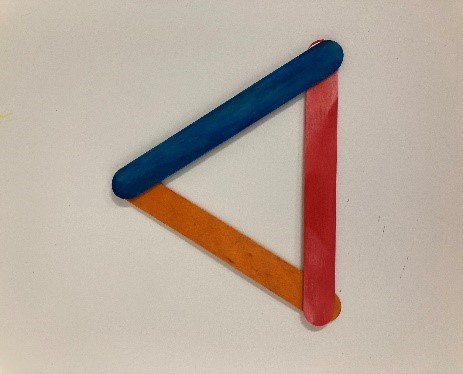
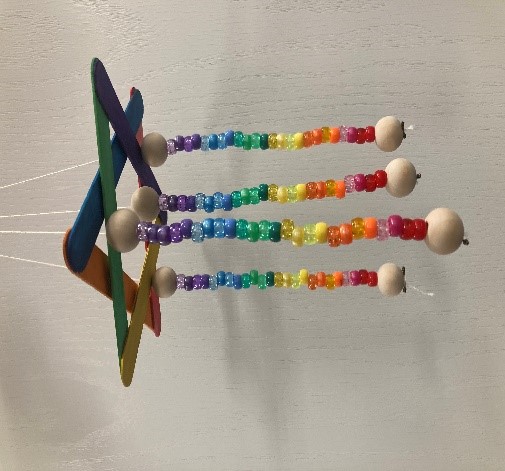
Grades K-2: Beaded Wind Chime
String colored beads and then enjoy watching your chime blow in the breeze. Register for the May Grades K-2 Take-and-Make Kit here.
Your Kit Contains:
- 96 beads 24 colors, 4 of each color
- 6 colorful jumbo craft sticks
- 1 Tacky glue stick
- 4 twenty inch pieces of string
- 1 plastic container with 5 jewelry clasp
1. Glue the craft sticks into two triangles. Place and glue the two triangles on top of each other to form a star.

2. Tie a string around one of the jewelry clasps.
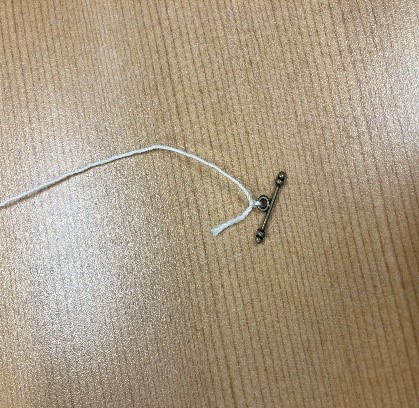
3. Start and end with a large bead on each string. Start stringing smaller beads in desired pattern, (repeat four times).
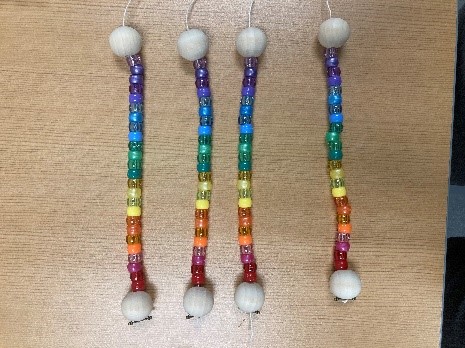
4. Thread three strands, one through each hole on the star. Put the fourth strand up through the middle and gather all four strand ends together. The star will sit on the big beads, adjust the strands until it is hanging evenly.
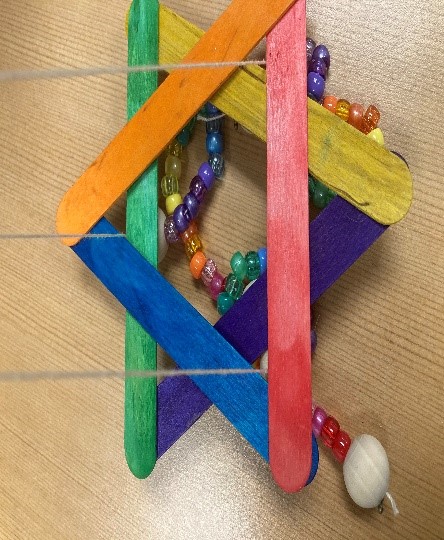
5. Tie all four strands on the circular jewelry clasp.
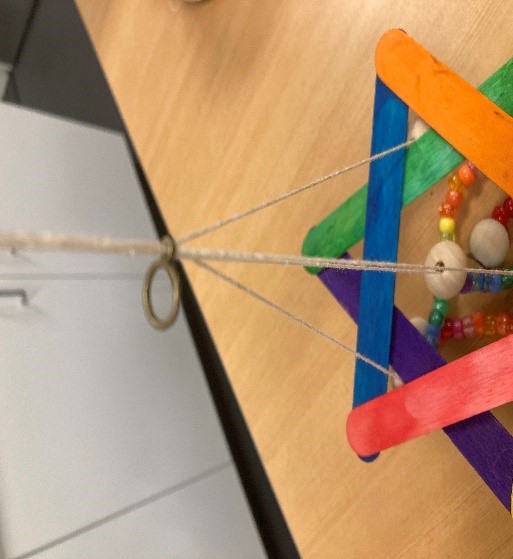
6. Hang and enjoy!
Show us what you created! Send us pictures at youthservices@balibrary.org.
Grades 3-8: Sharpie Art Coasters
Use permanent markers and rubbing alcohol to create a blended-ink masterpiece where you can set your drink. Register for the May Grades 3-8 Take-and-Make Kit here.
Your kit contains:
- 2 ceramic tiles
- 3 Sharpie pens
- 1 pipette
- 1 strip of black felt
- 1 container of rubbing alcohol
- 1 empty cup
1. Color a coaster with the Sharpies. Don’t stress about getting this perfect—the end result will look very different!
2. Place the coaster in a shallow plastic or foil container, resting on the empty plastic cup.
3. Carefully use the pipette to drip a small amount of rubbing alcohol over the coaster. You can gently tip the coaster so the liquid moves and the colors start to bleed and blend.
4. Let dry completely (about 1-2 hours).
5. Cut the felt into small squares, remove the backing, and stick on the underside of your coaster.
Show us what you created! Send us pictures at youthservices@balibrary.org.
-
5 Kid-Friendly Cookbooks for the Aspiring Chef
Want to make a tasty snack? Looking to hone your cooking skills? Trying to earn a Michelin star for your world-famous kitchen? Grab one of these cookbooks off the shelf and find some inspiration.
The following cookbooks, and others, are available at the Barrington Area Library.
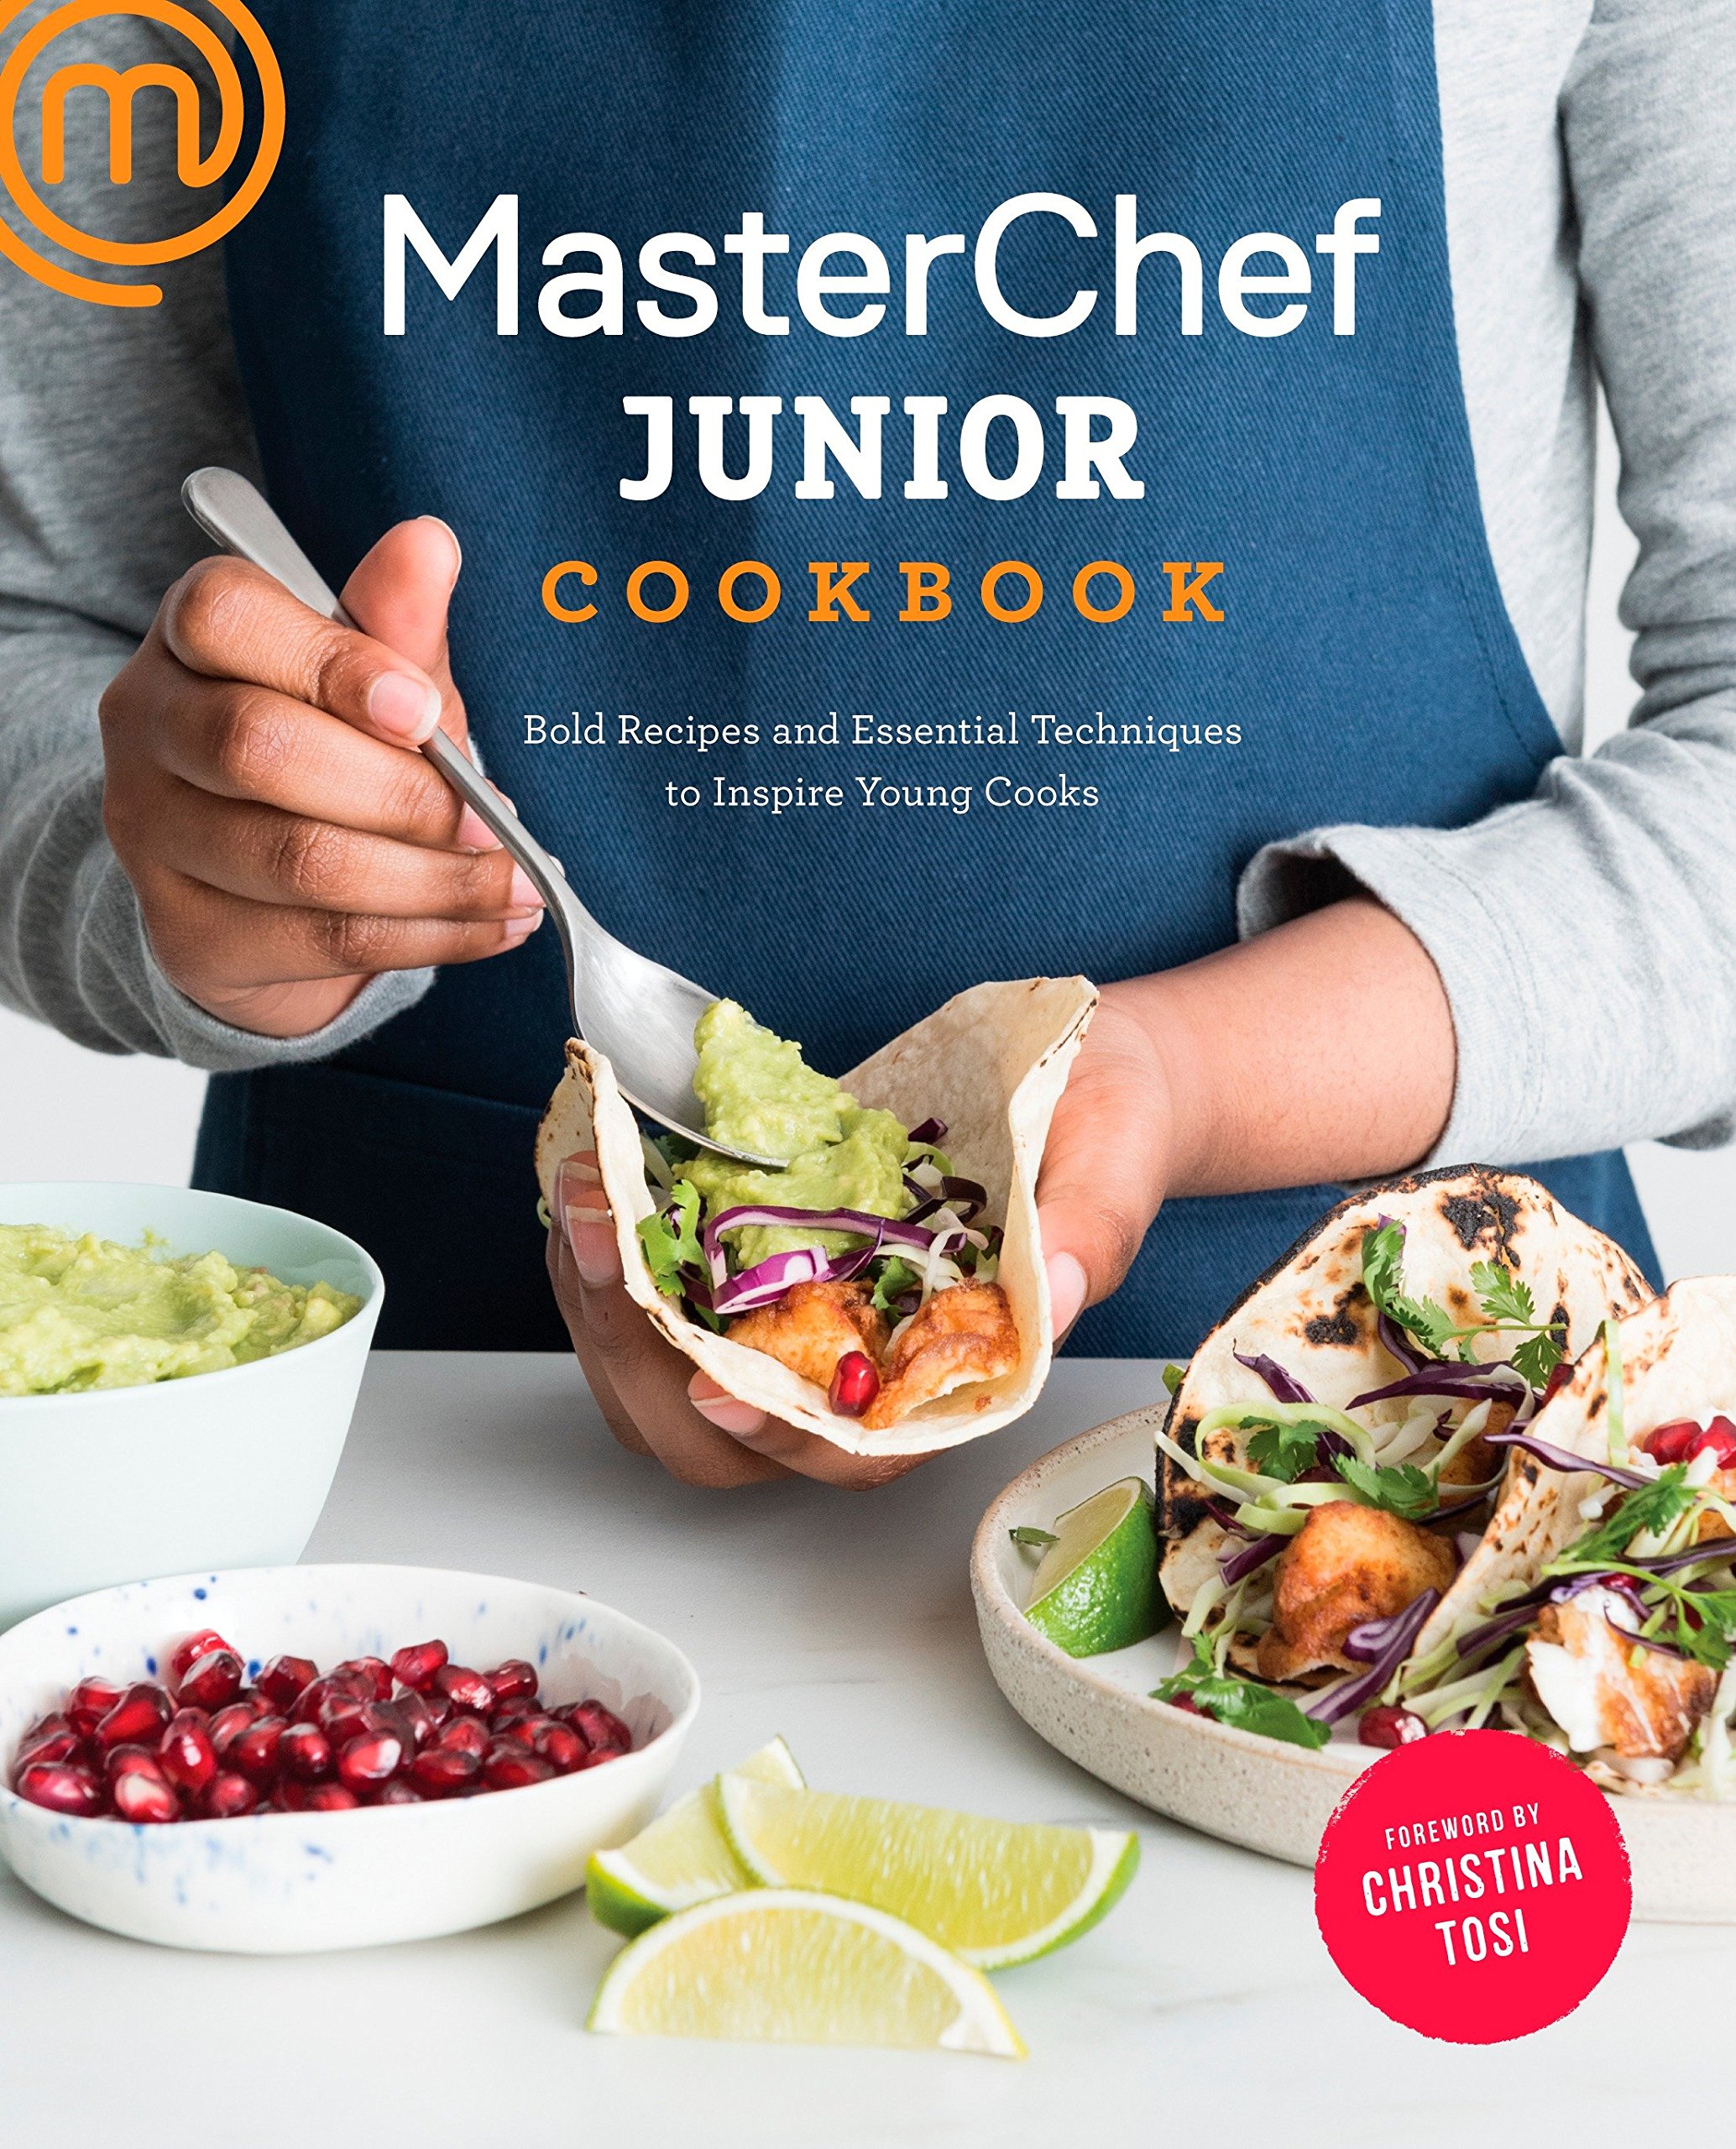
MasterChef Junior Cookbook: Bold Recipes and Essential Techniques to Inspire Young Cooks
Inspired by the hit cooking competition, theMasterChef Junior Cookbook features exciting, ambitious -- but approachable recipes. This cookbook doesn’t just inspire, it teaches: kids will gain essential skills for everyday use, as well as become more confident and comfortable as they move from dish to dish. Covers a wide variety of dishes, from salads to marshmallow cupcakes.
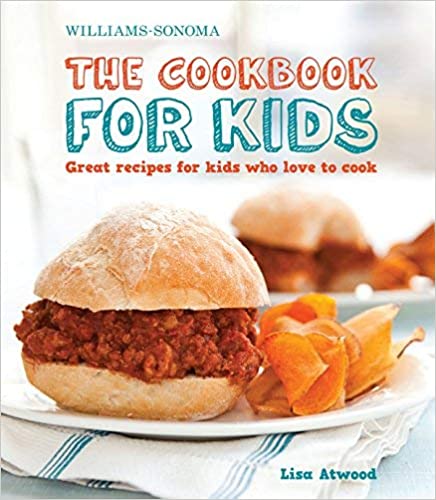
The Cookbook for Kids: Great Recipes for Kids Who Love to Cook
Lisa Atwood
Featuring over 60 kid-friendly recipes,The Cookbook for Kids certainly lives up to its name. Young chefs can prepare their own lunches, serve themselves a delicious breakfast, craft some snacks for a lazy afternoon, or (of course) whip up a tasty dessert. Recipes are arranged in an approachable format and include tips and tricks to help the cook develop good habits.
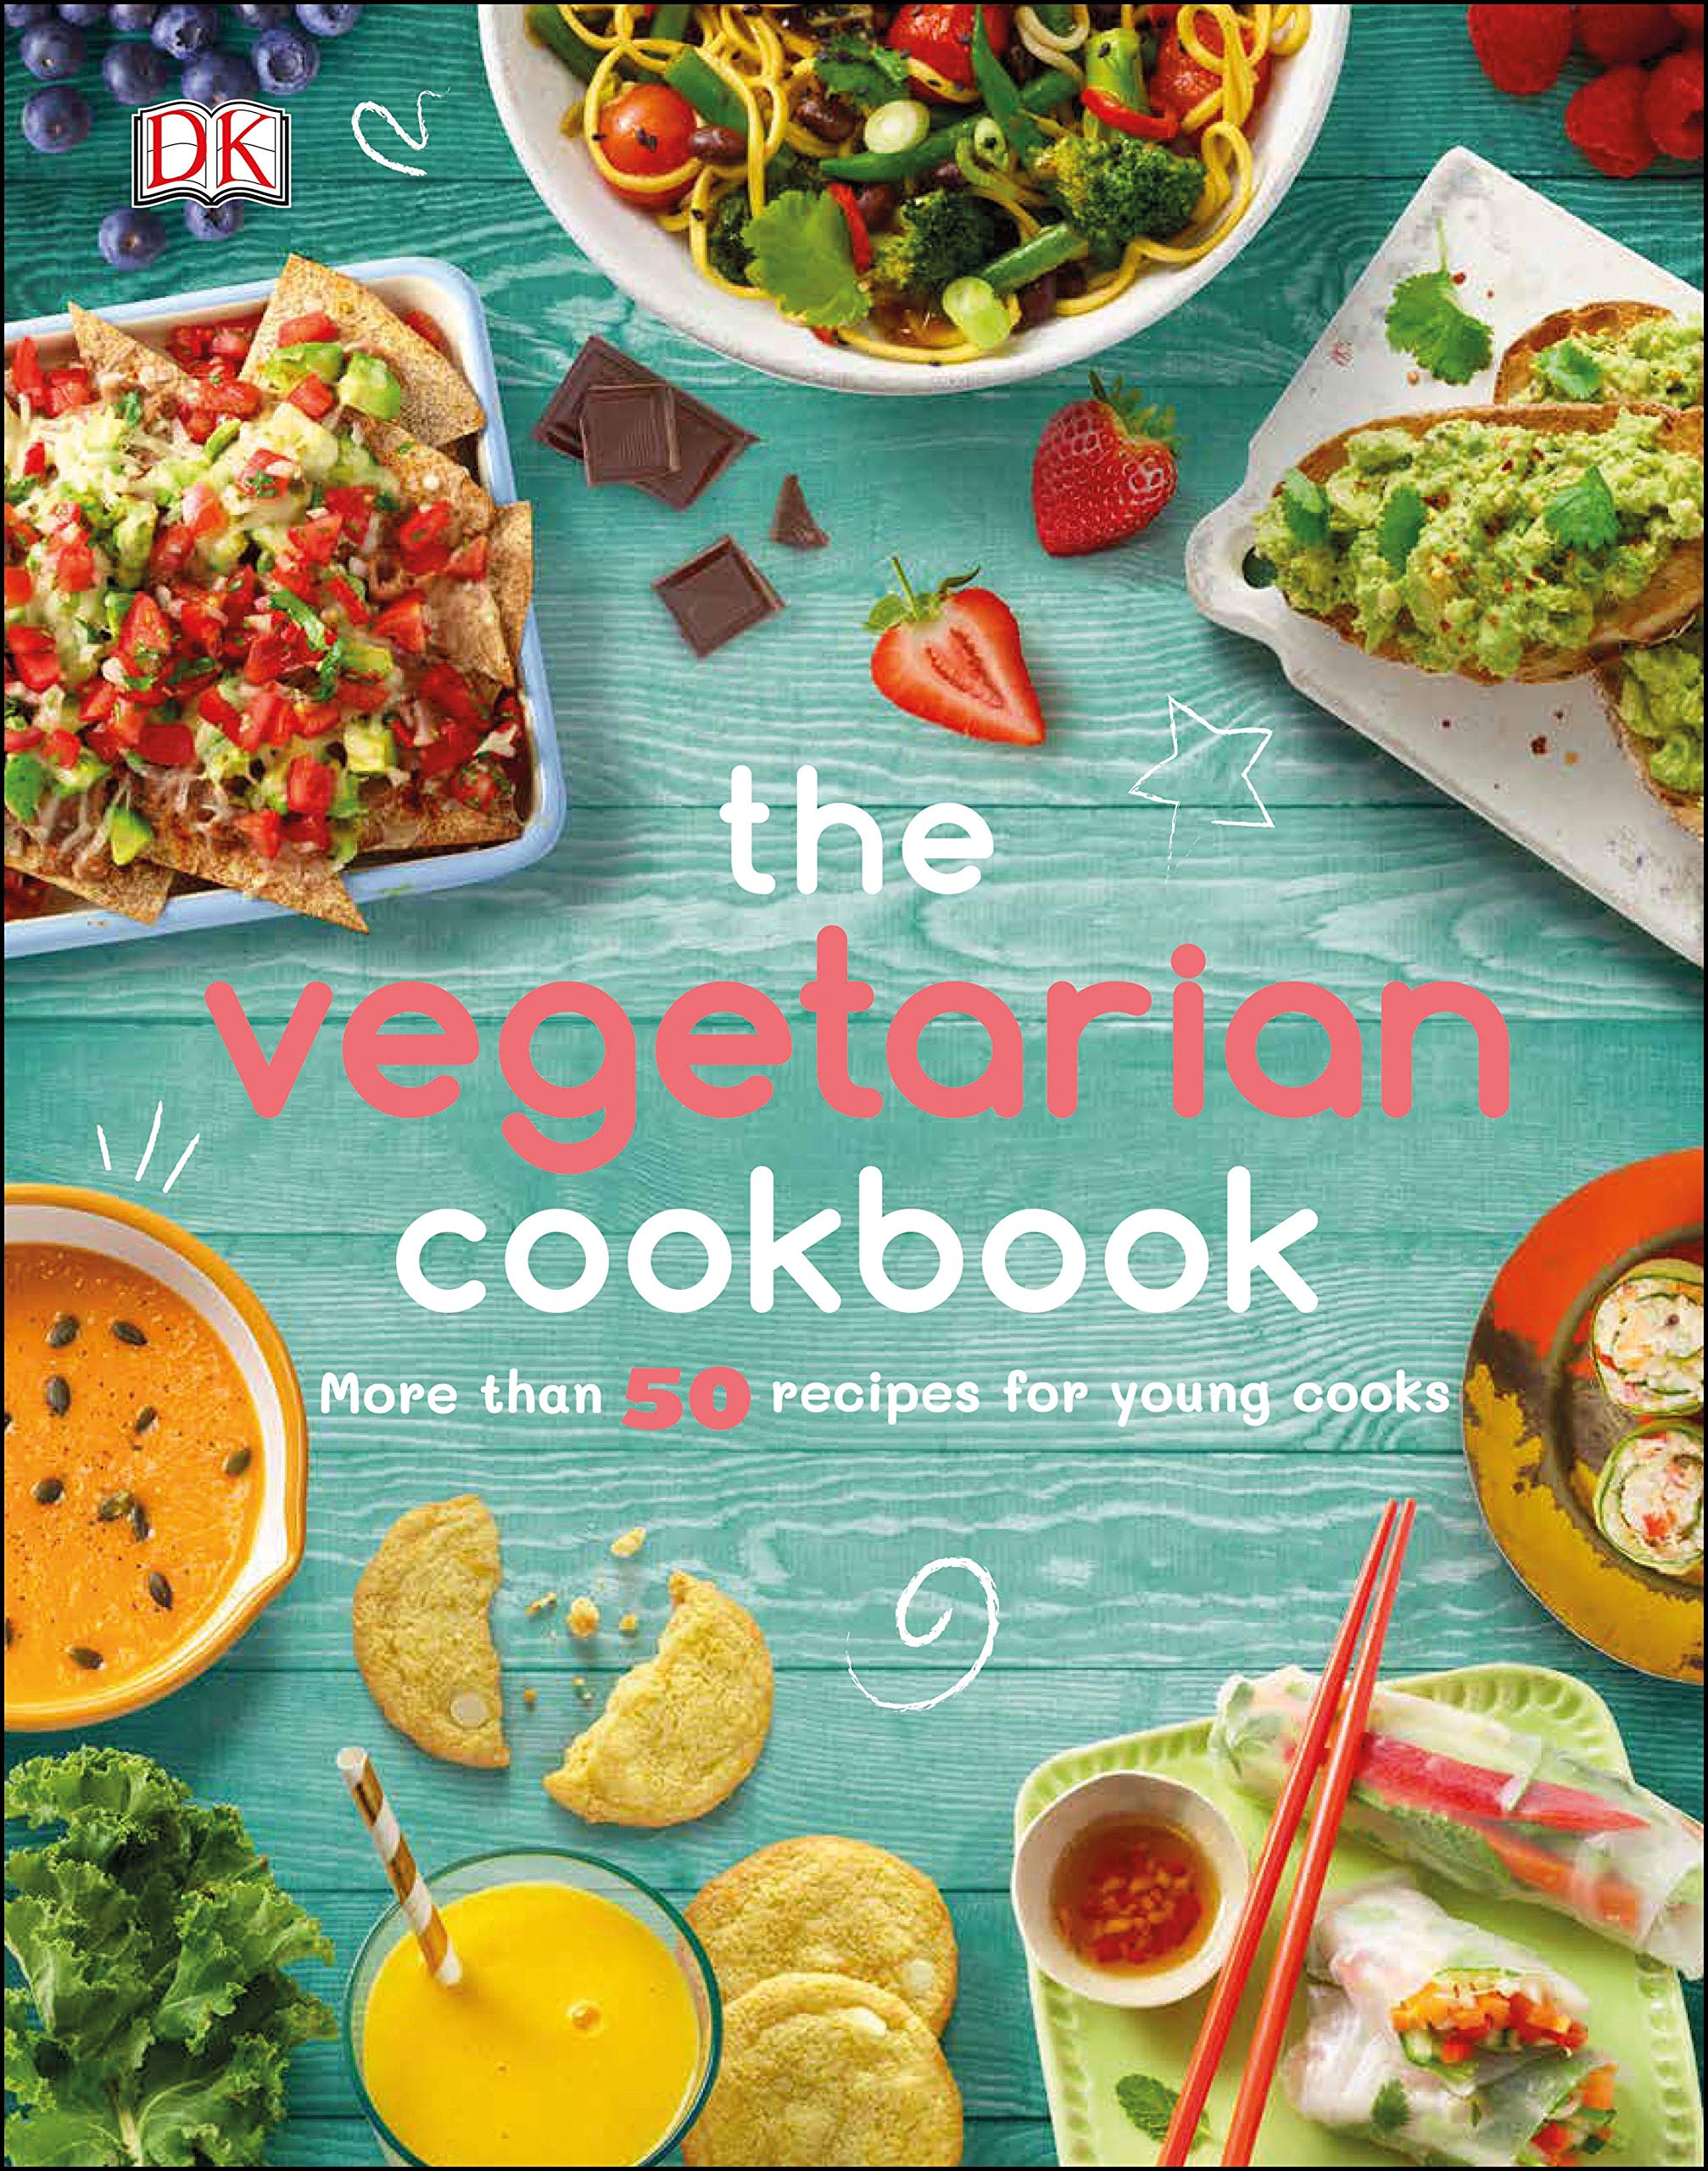
The Vegetarian Cookbook
Easy and inviting for vegetarians and omnivores alike, The Vegetarian Cookbook introduces kids to delicious plant-based recipes. Learn how to make meatless treats like avocado toast, veggie quesadillas, falafel, sweet potato lasagna… just make sure to finish it off with a delicious key lime pie or beet brownie!
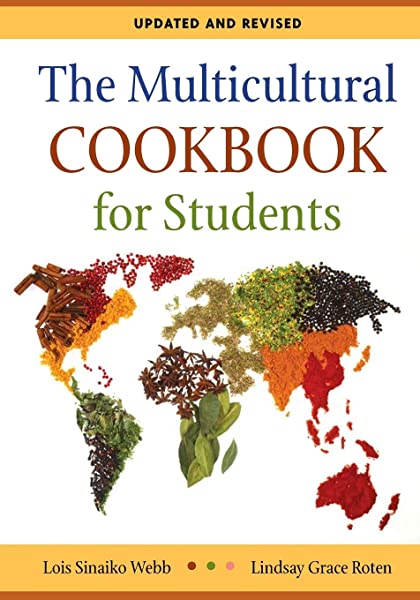
The Multicultural Cookbook for Students
Lois Sinaiko Webb and Lindsay Grace Roten
Kids can broaden their culinary -- and cultural -- boundaries with this wonderful cookbook. Take a trip around the world, discovering recipes from Tunisia, Madagascar, Indonesia, Vietnam, New Zealand, and many,many other countries and cultures. In addition to the recipe(s), kids will learn about the culture and food philosophies of each represented country. Recipes vary in difficulty, from easy to advanced.
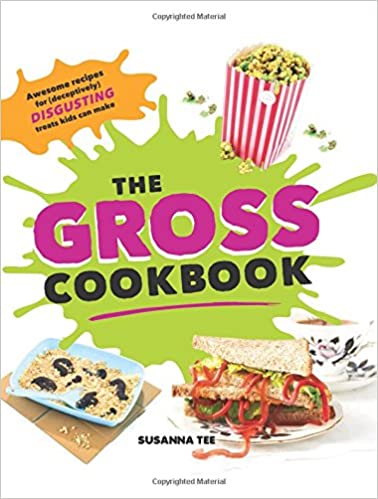
The Gross Cookbook: Awesome Recipes for (Deceptively) Disgusting Treats Kids Can Make
Susanna Tee
Sure, these recipes don’t look or soundappetizing, but that’s half the fun! Your family’s mouths will water when you serve them some chewy cockroaches, wasp crackers, and chewy caterpillars. Or, if they’re feeling picky, whip up some deep fried rattlesnake or human brain! These hilarious, nauseating -- and delicious -- dishes will entertain cook and patron alike.
Tip: Want personalized reading suggestions? Fill outthis form and you’ll receive a customized list direct to your inbox!
Youth Services Librarian Chris