Bring home a fun new project! Sign up from our Library Calendar and pick up a kit at the Youth Services desk or through our Parking Lot Pickup service between April 18-May 1.
Toddler & PreK: Bubble Wrap Stomp Painting
Be ready to get messy with this active art technique. Register for the April/May Toddler & PreK Take-and-Make Kit here.
This activity would be best done outdoors, it can be messy! Use caution when stomping on the paper, it can get slippery. Alternatively, you can use your hands to press the bubble wrap, instead of stomping.
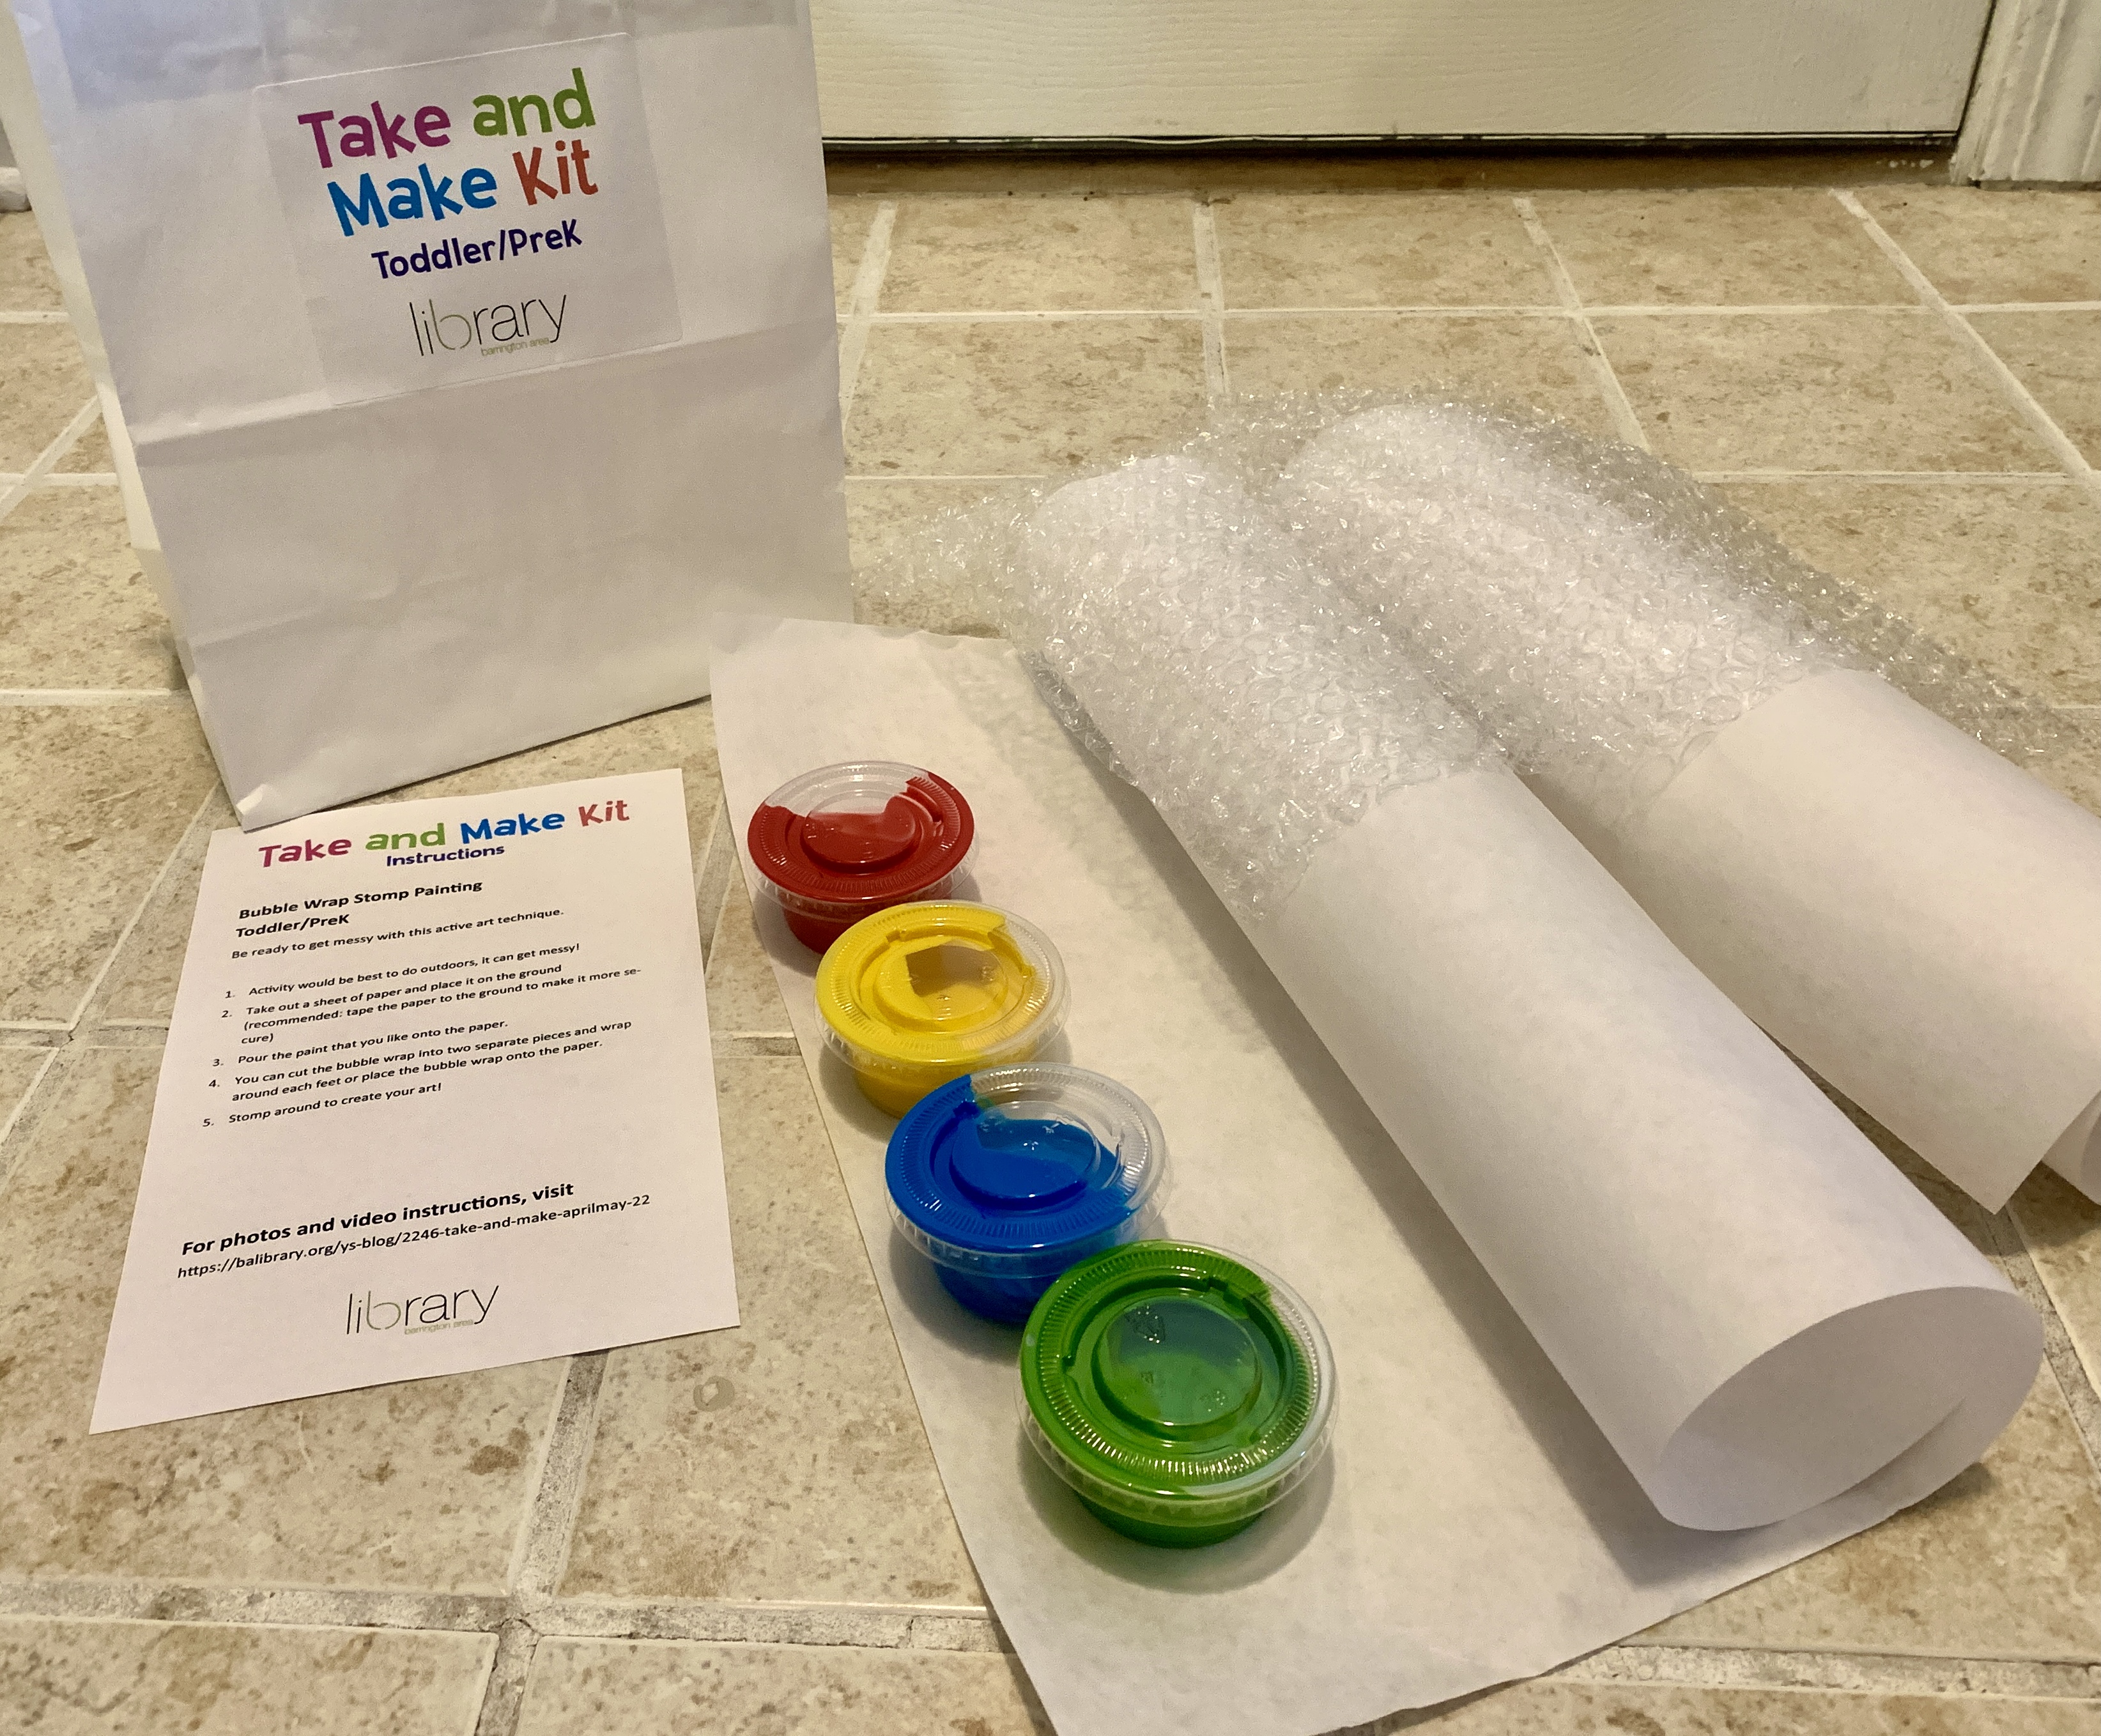
The kit includes: 2 large pieces of paper, 1 bubble wrap, 4 different types of washable tempura paint.
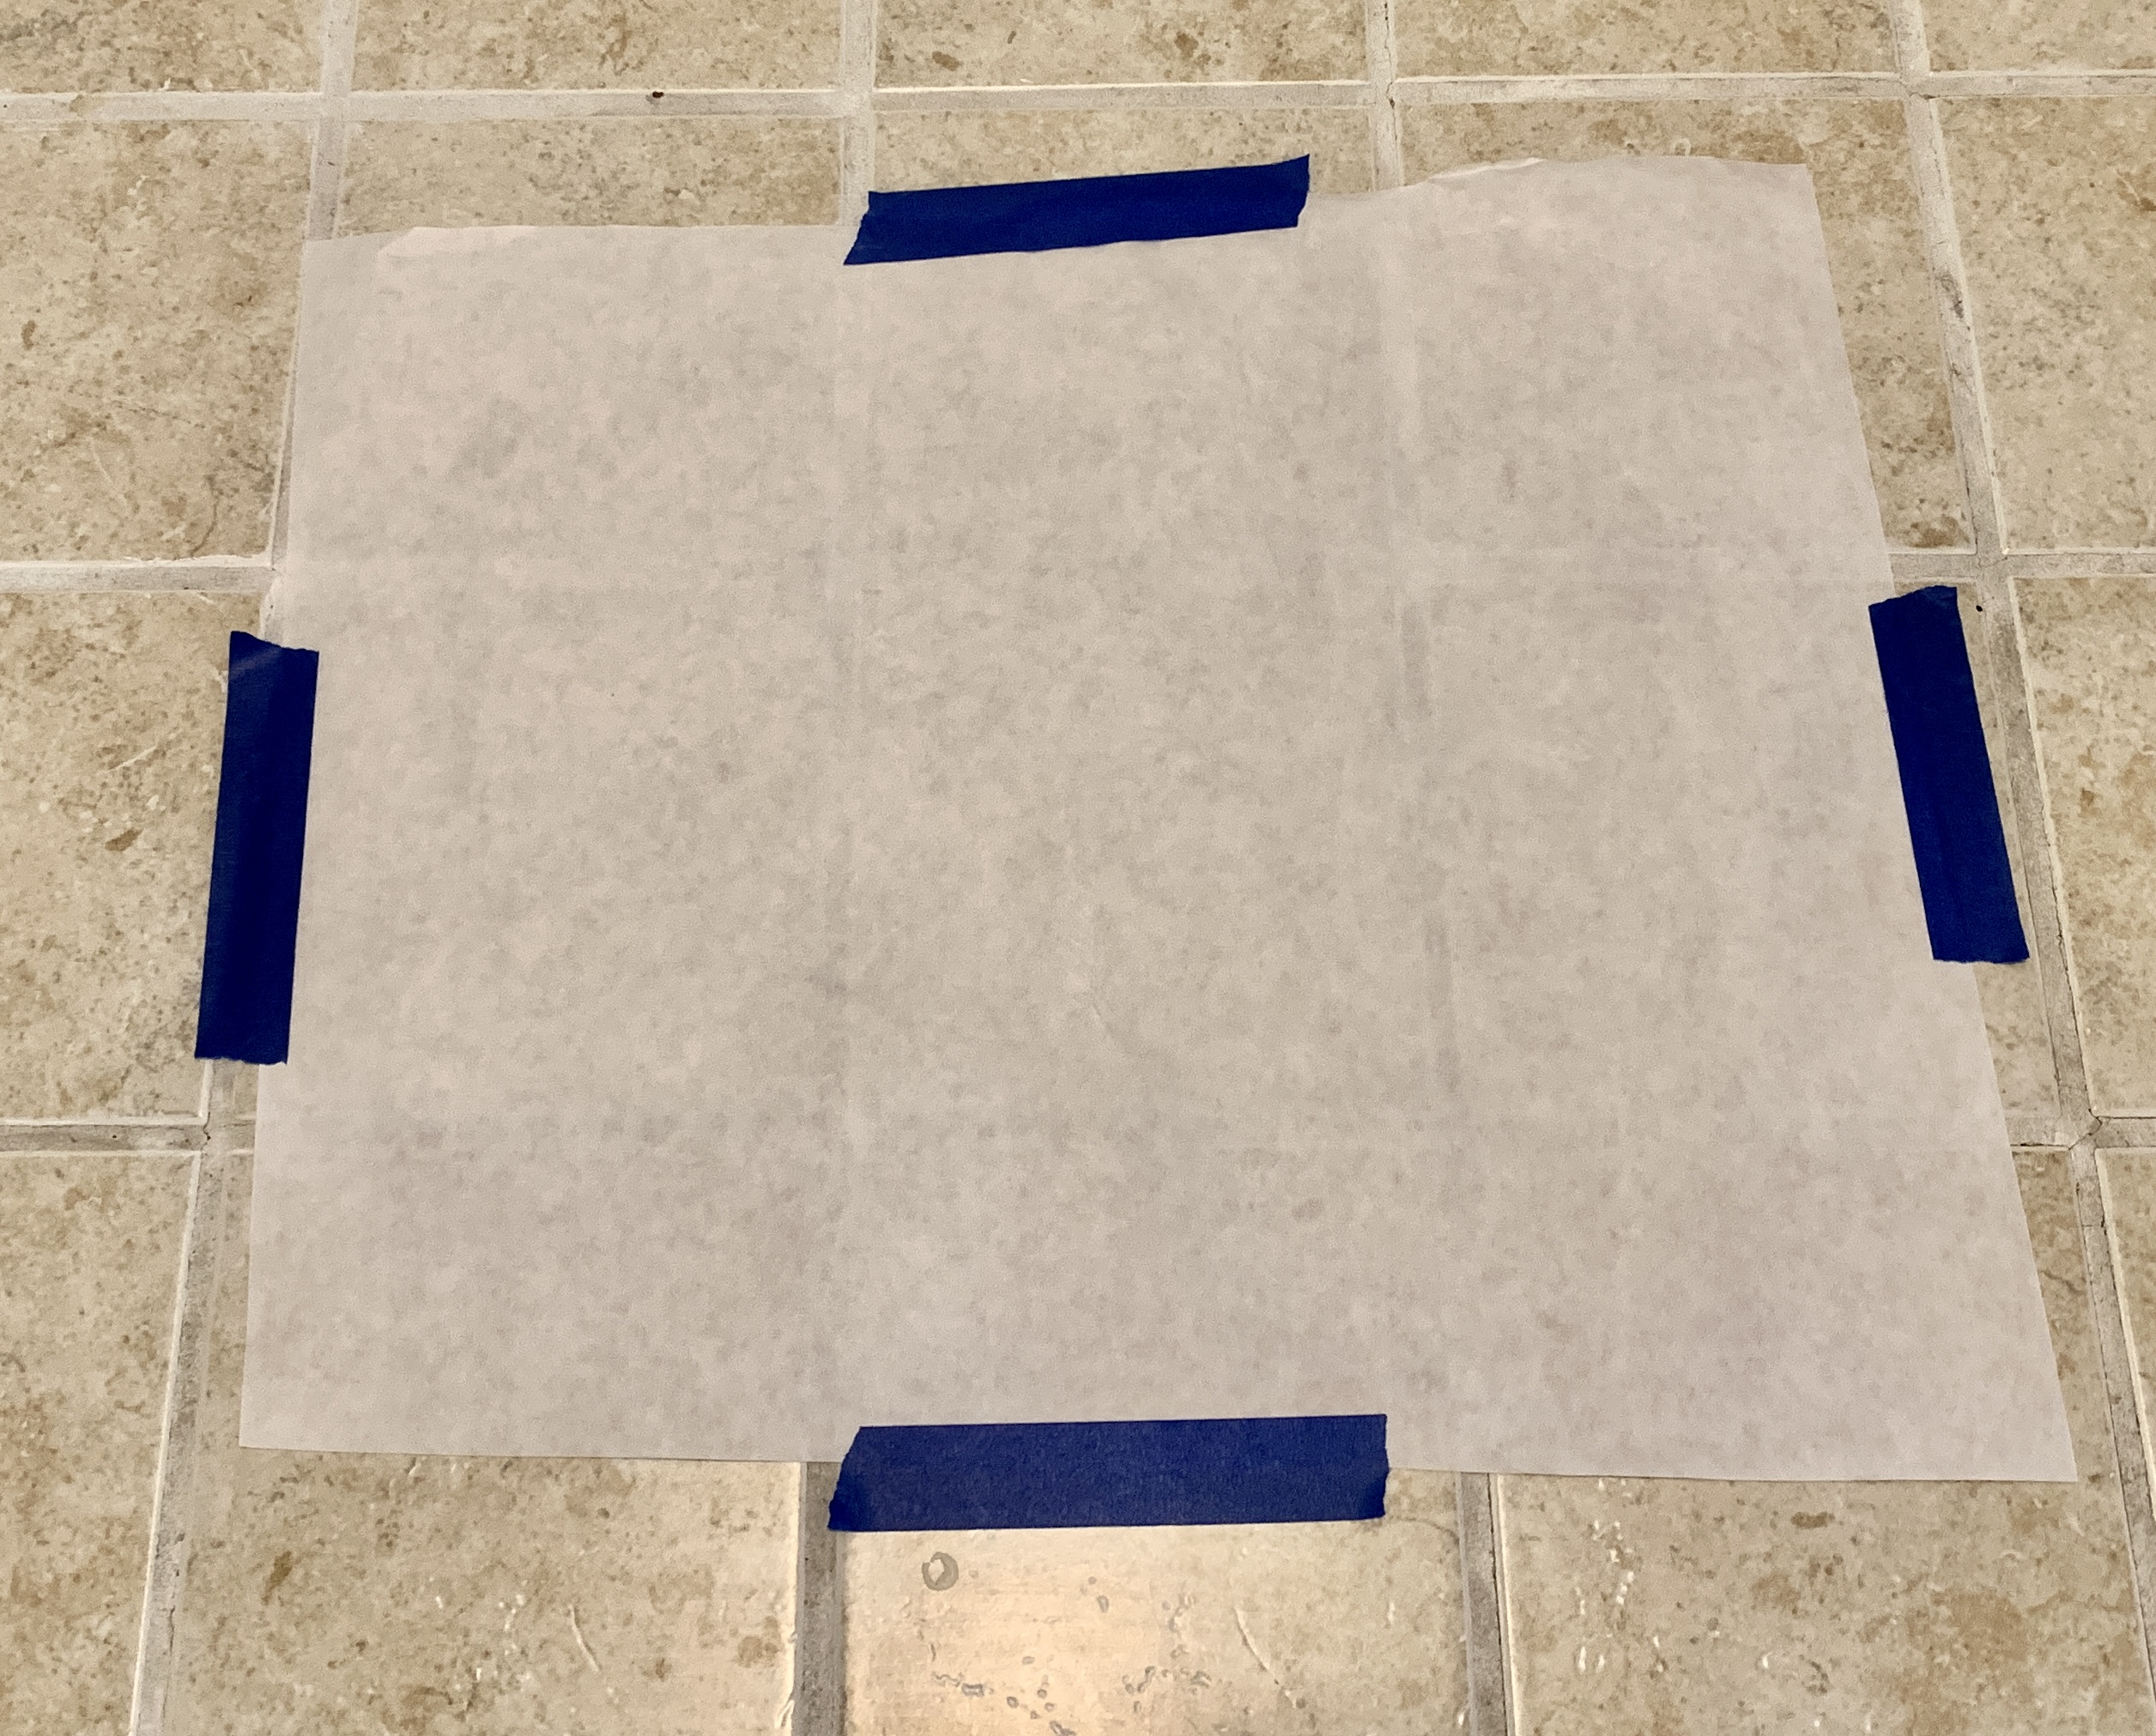
Tape the paper down for extra security.
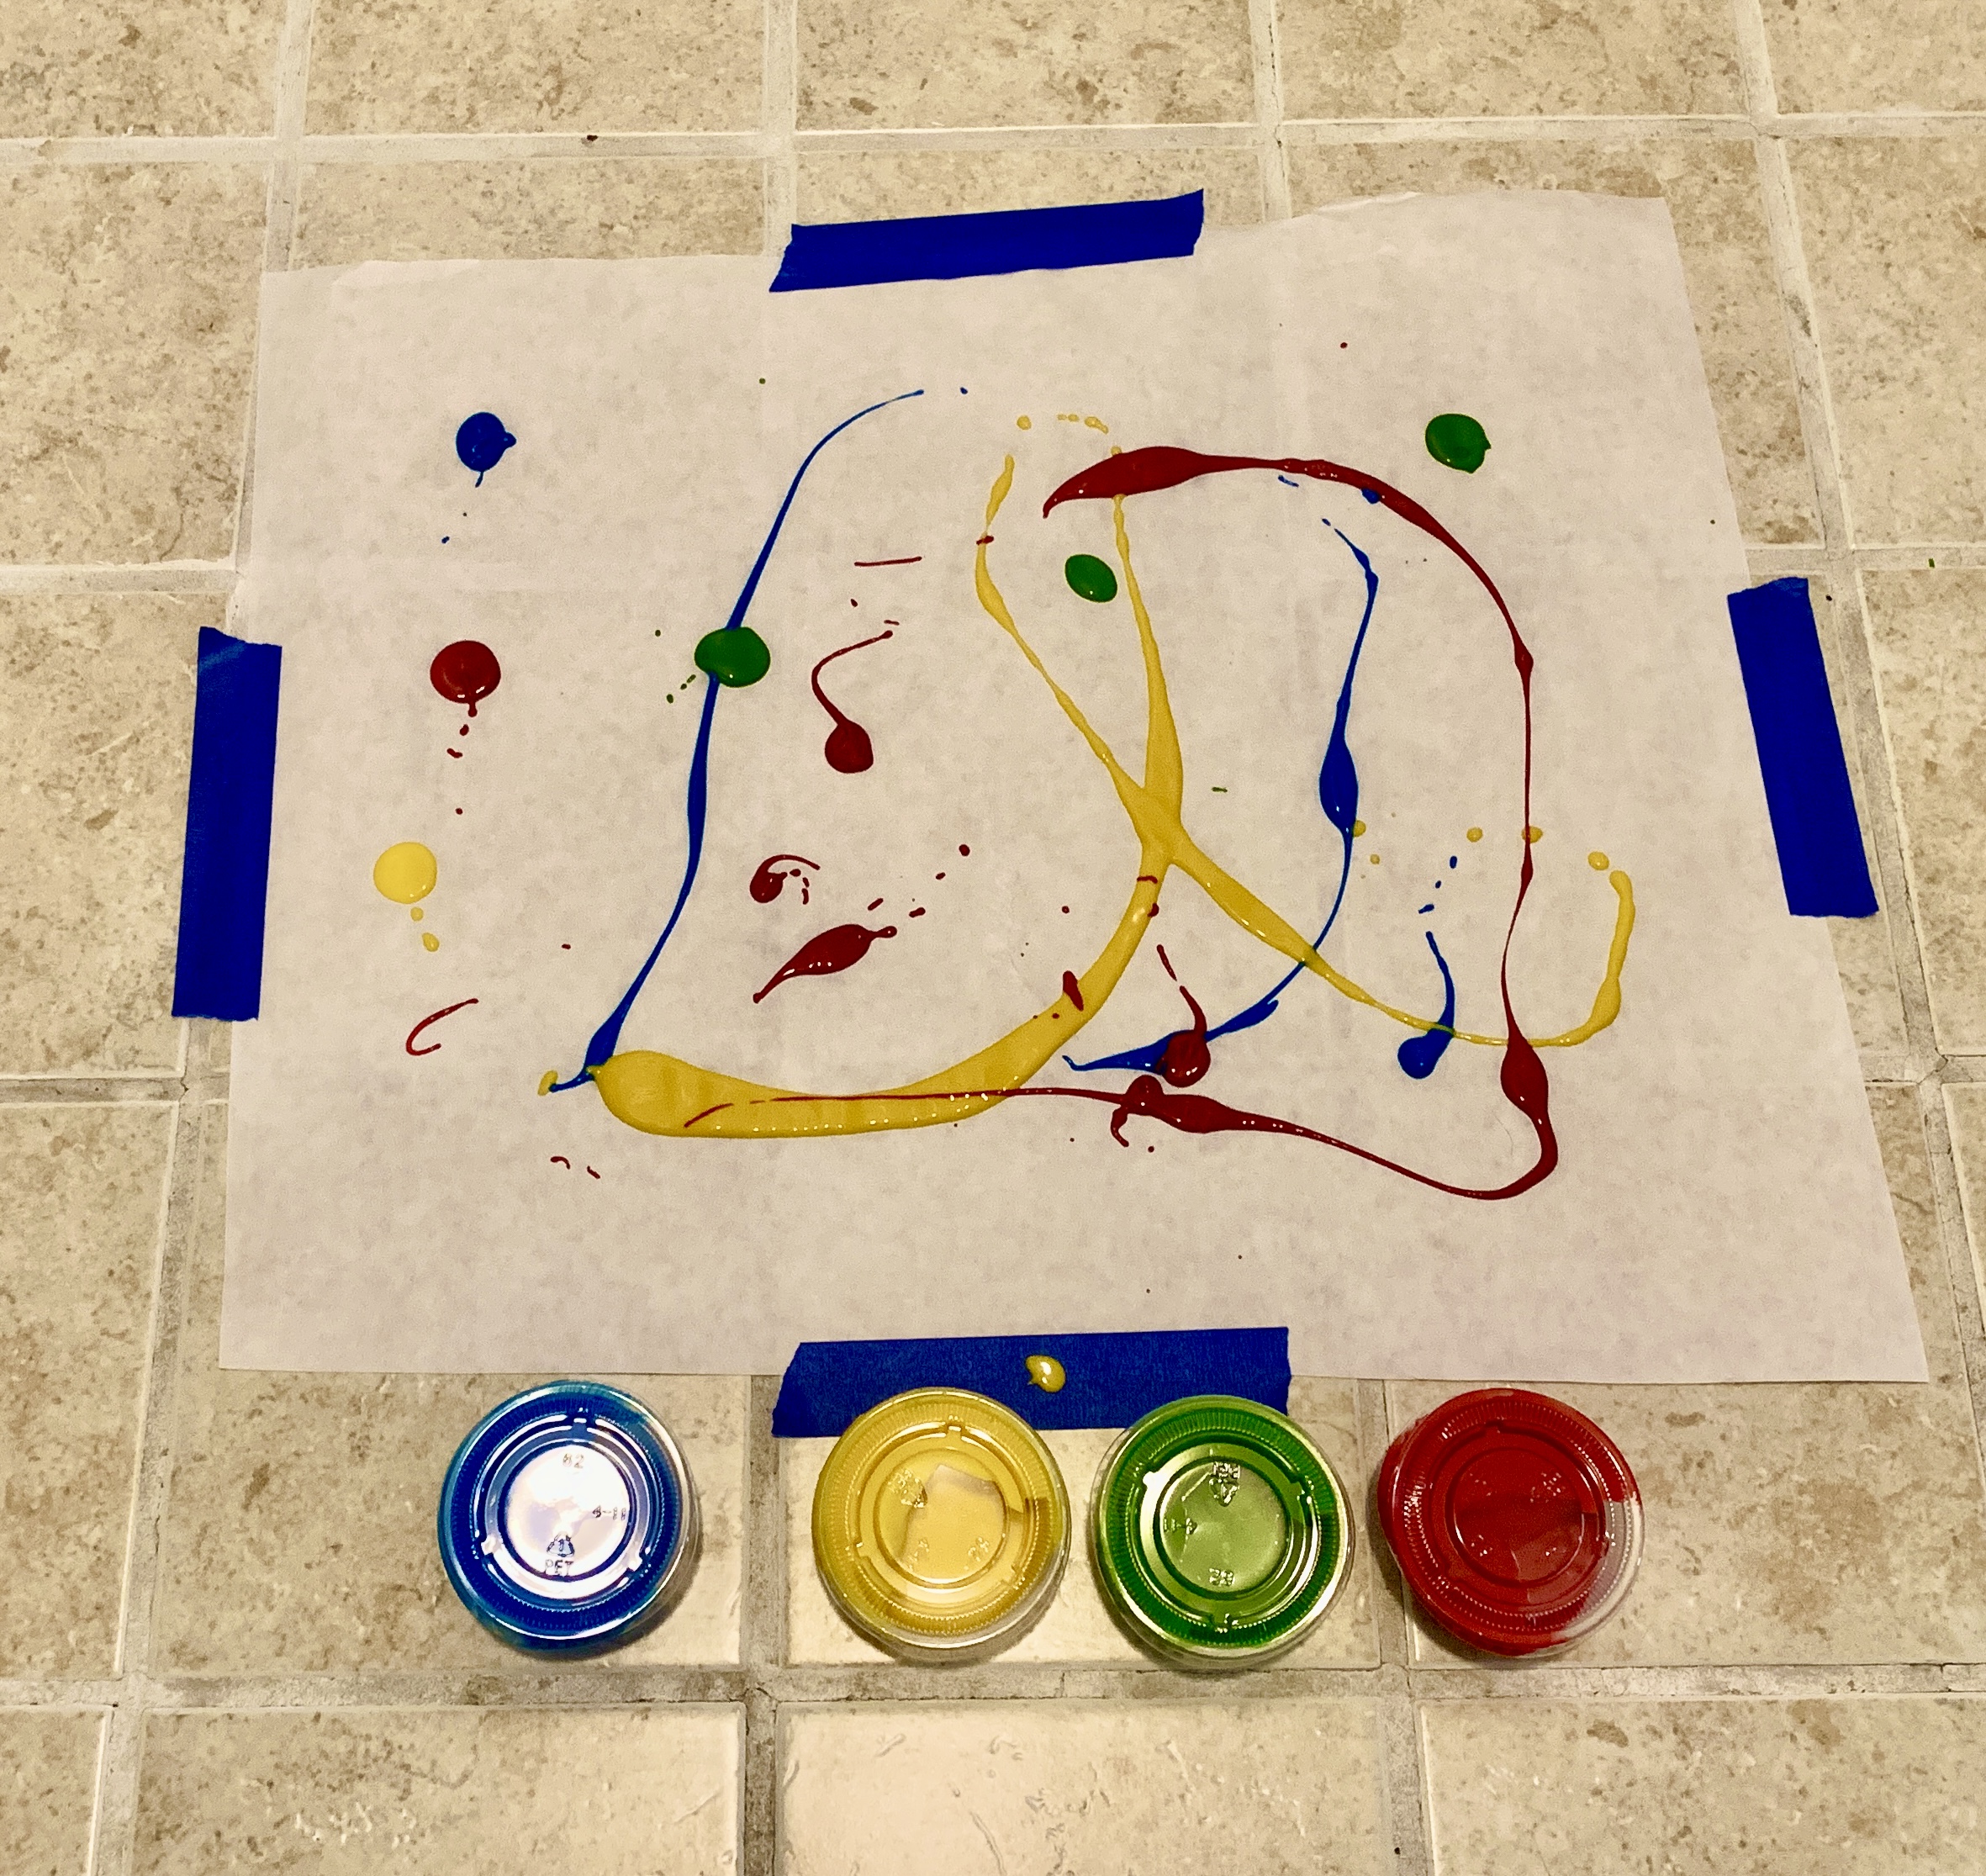
Pour the paint that you like onto the paper.
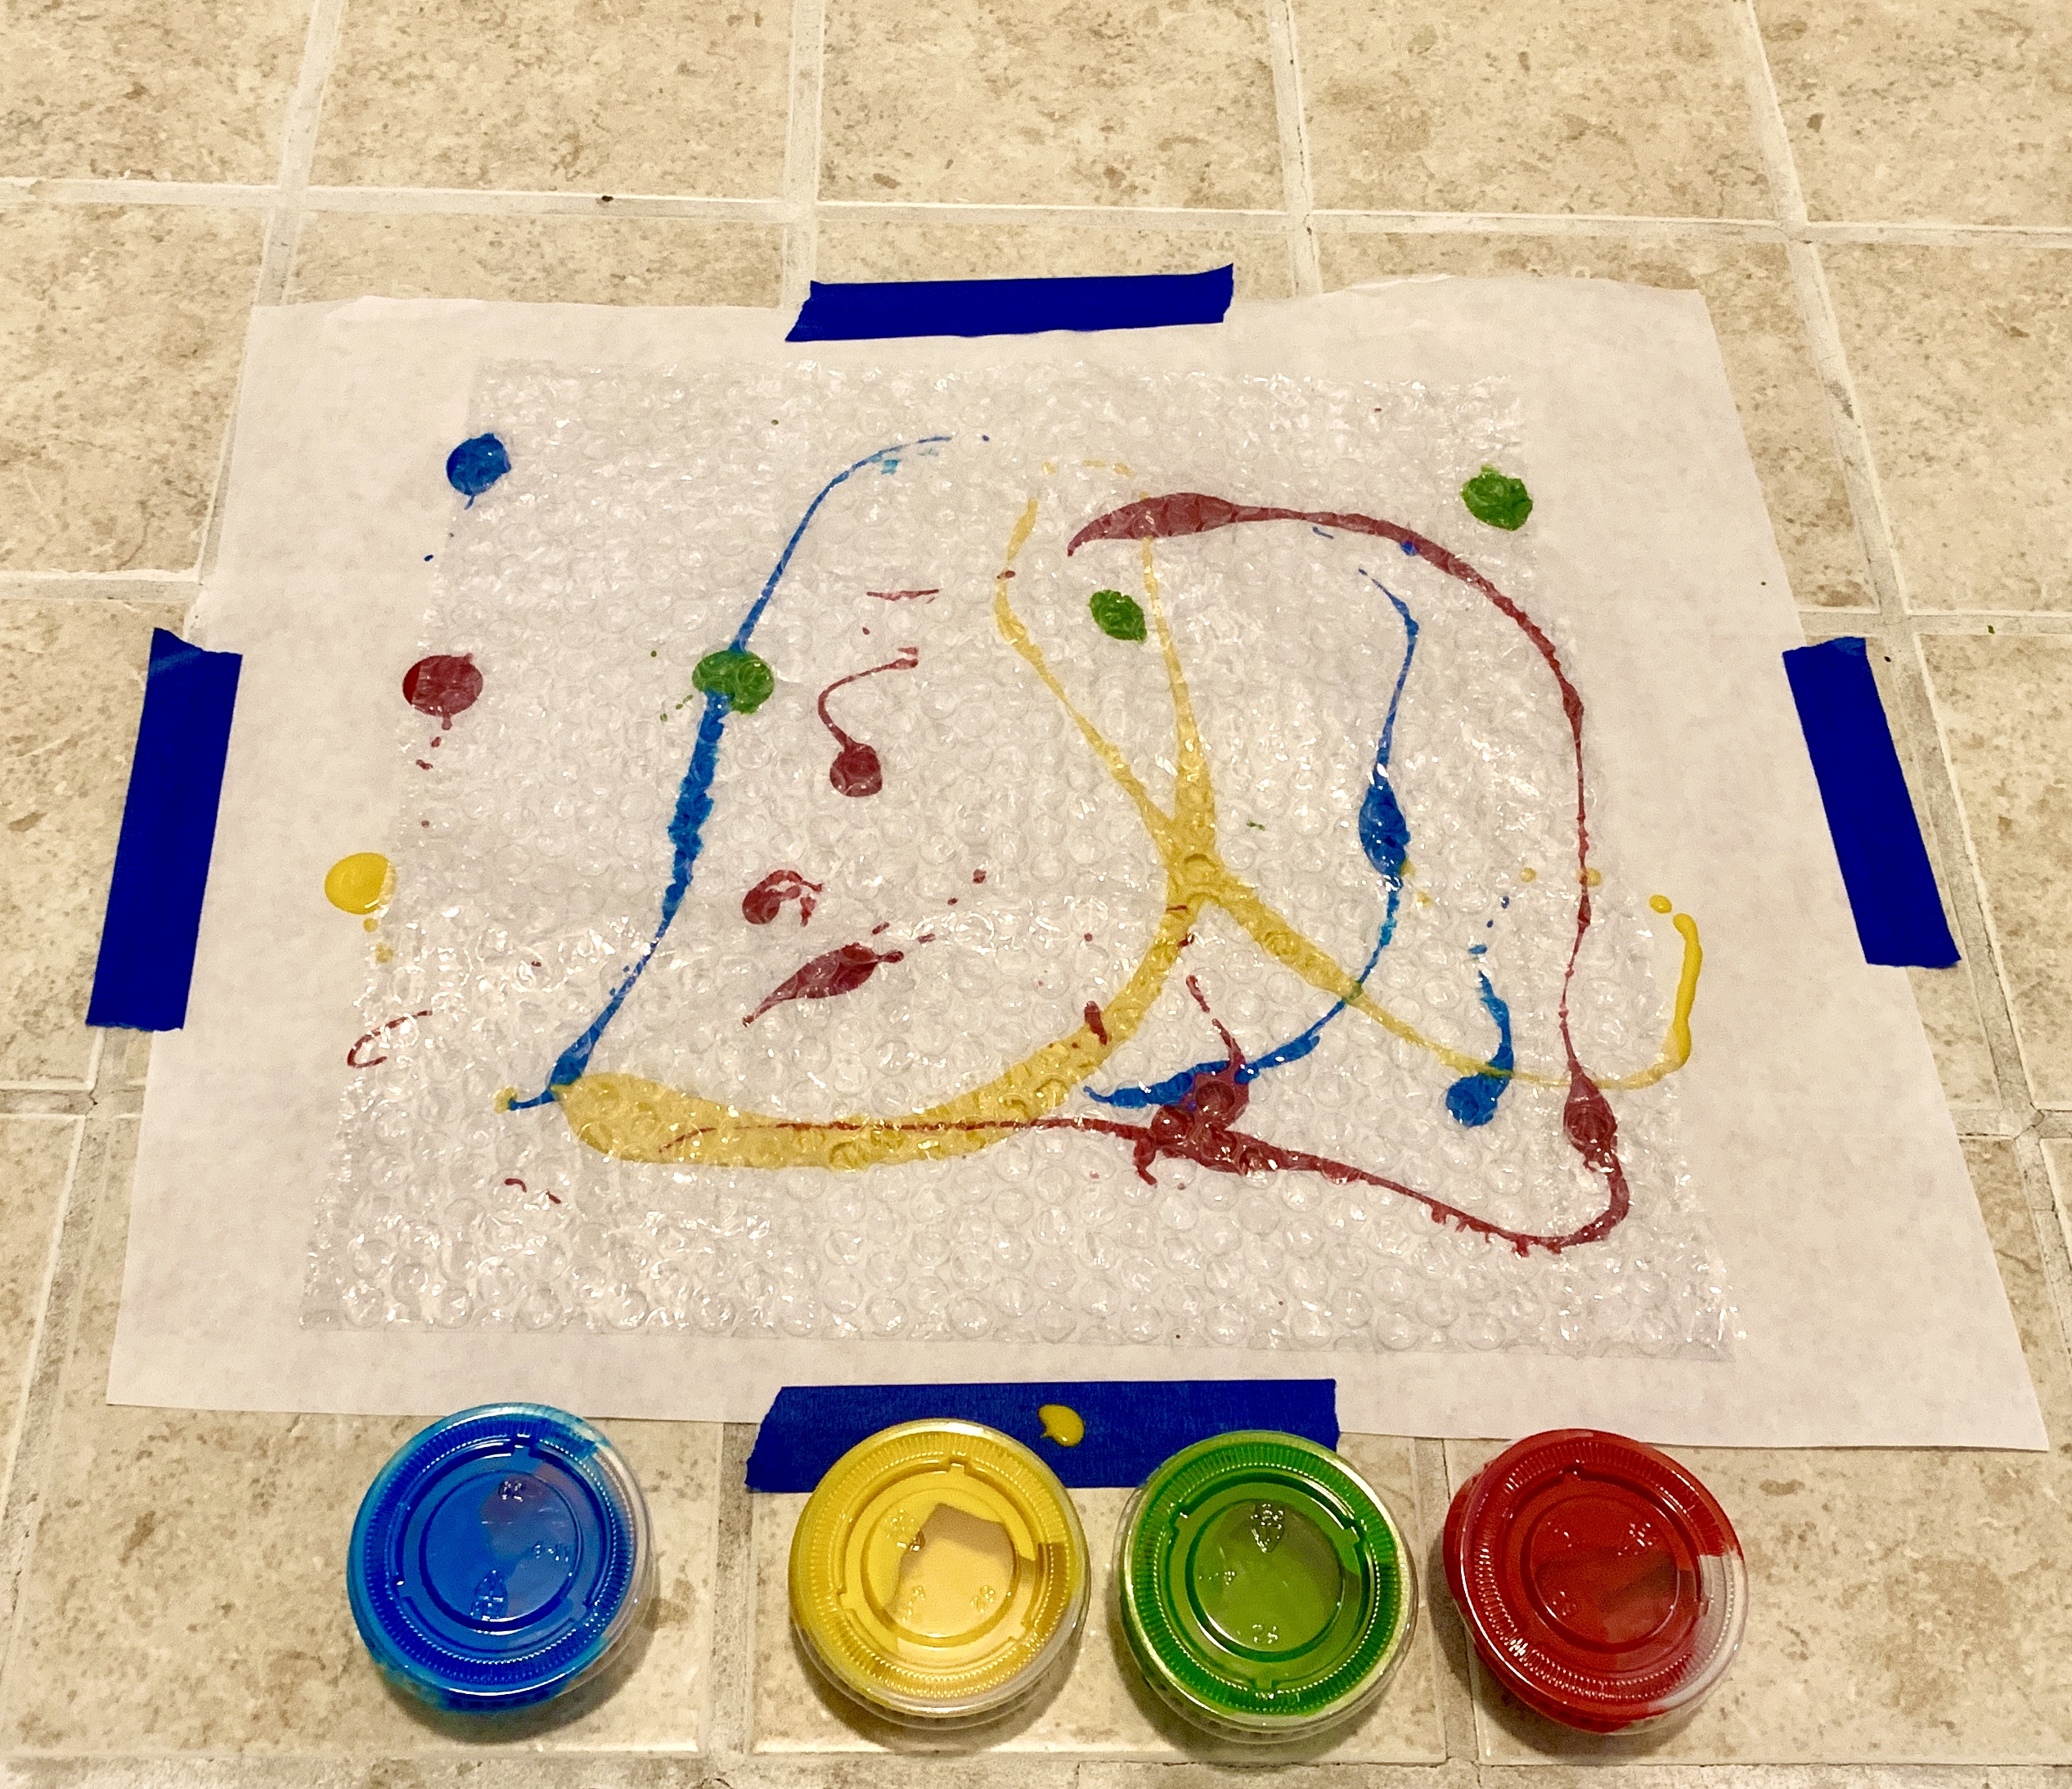
You can cut the bubble wrap in half and wrap it onto your feet, or you can just simply place the bubble wrap onto the paper.

Stomp around to create your art! Remember to use caution when stomping on the paper because it can get slippery. Alternatively, you can use your hands to press the bubble wrap, instead of stomping.
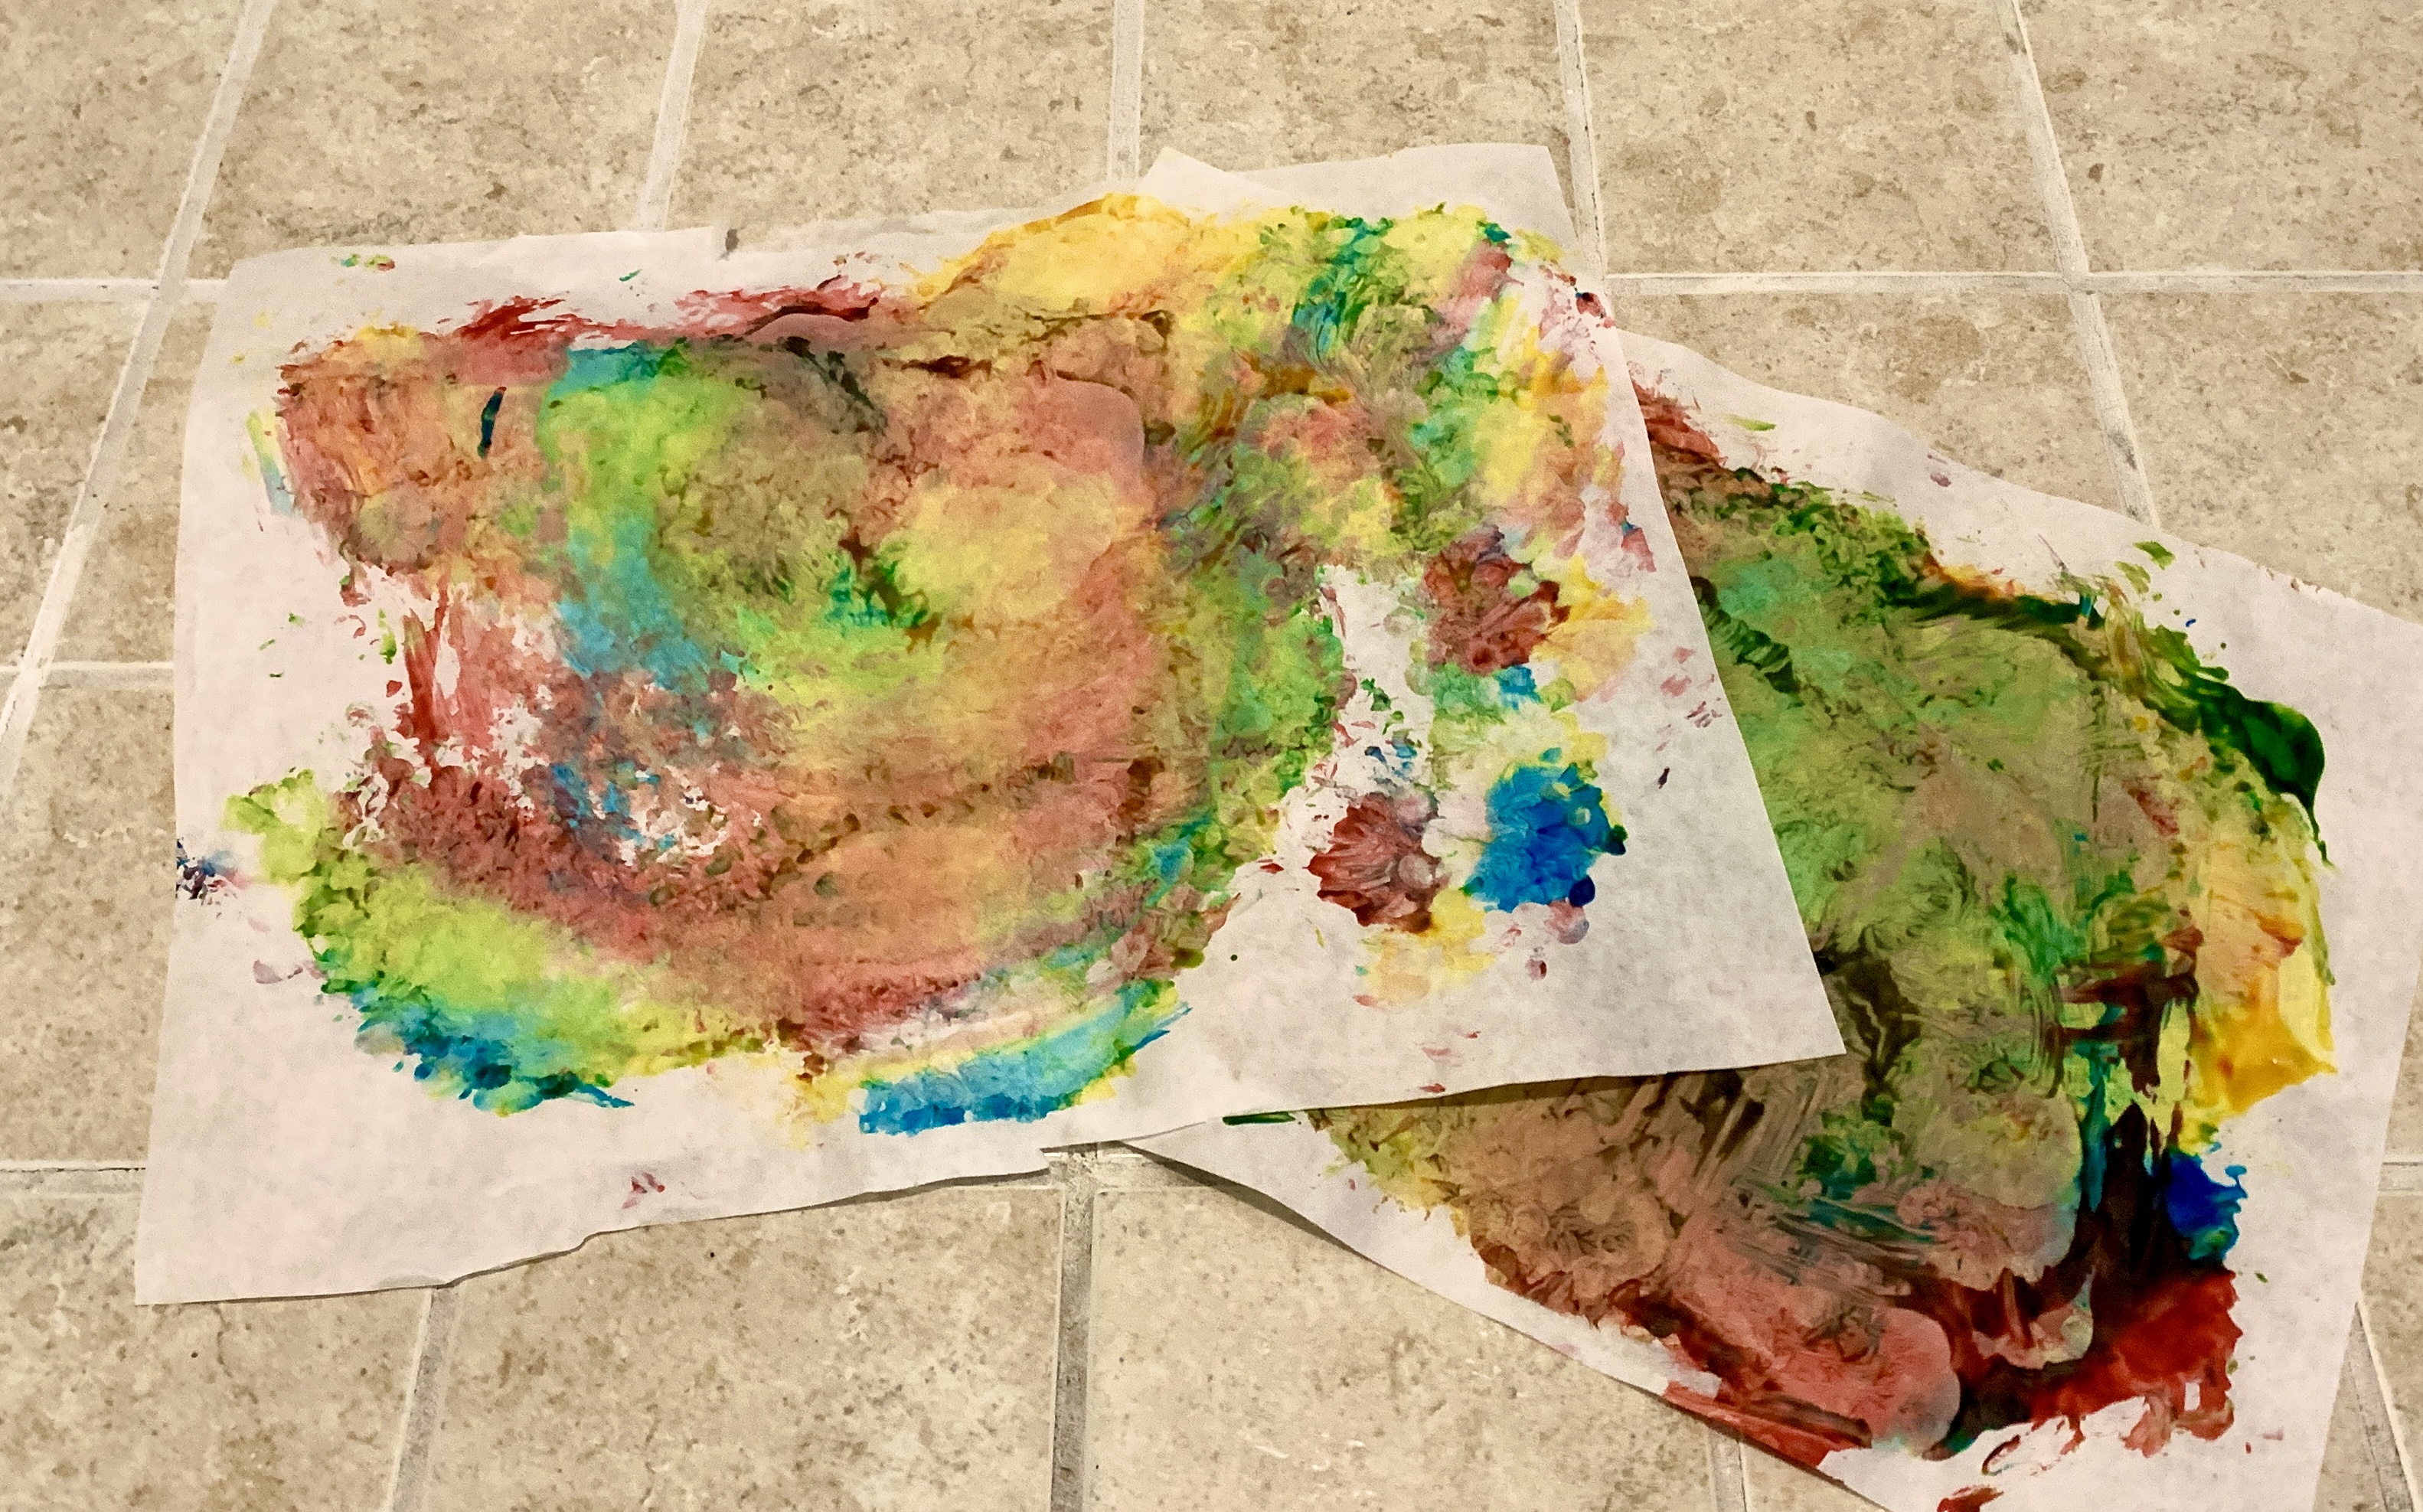
Show us what you created! Send us pictures at youthservices@balibrary.org.
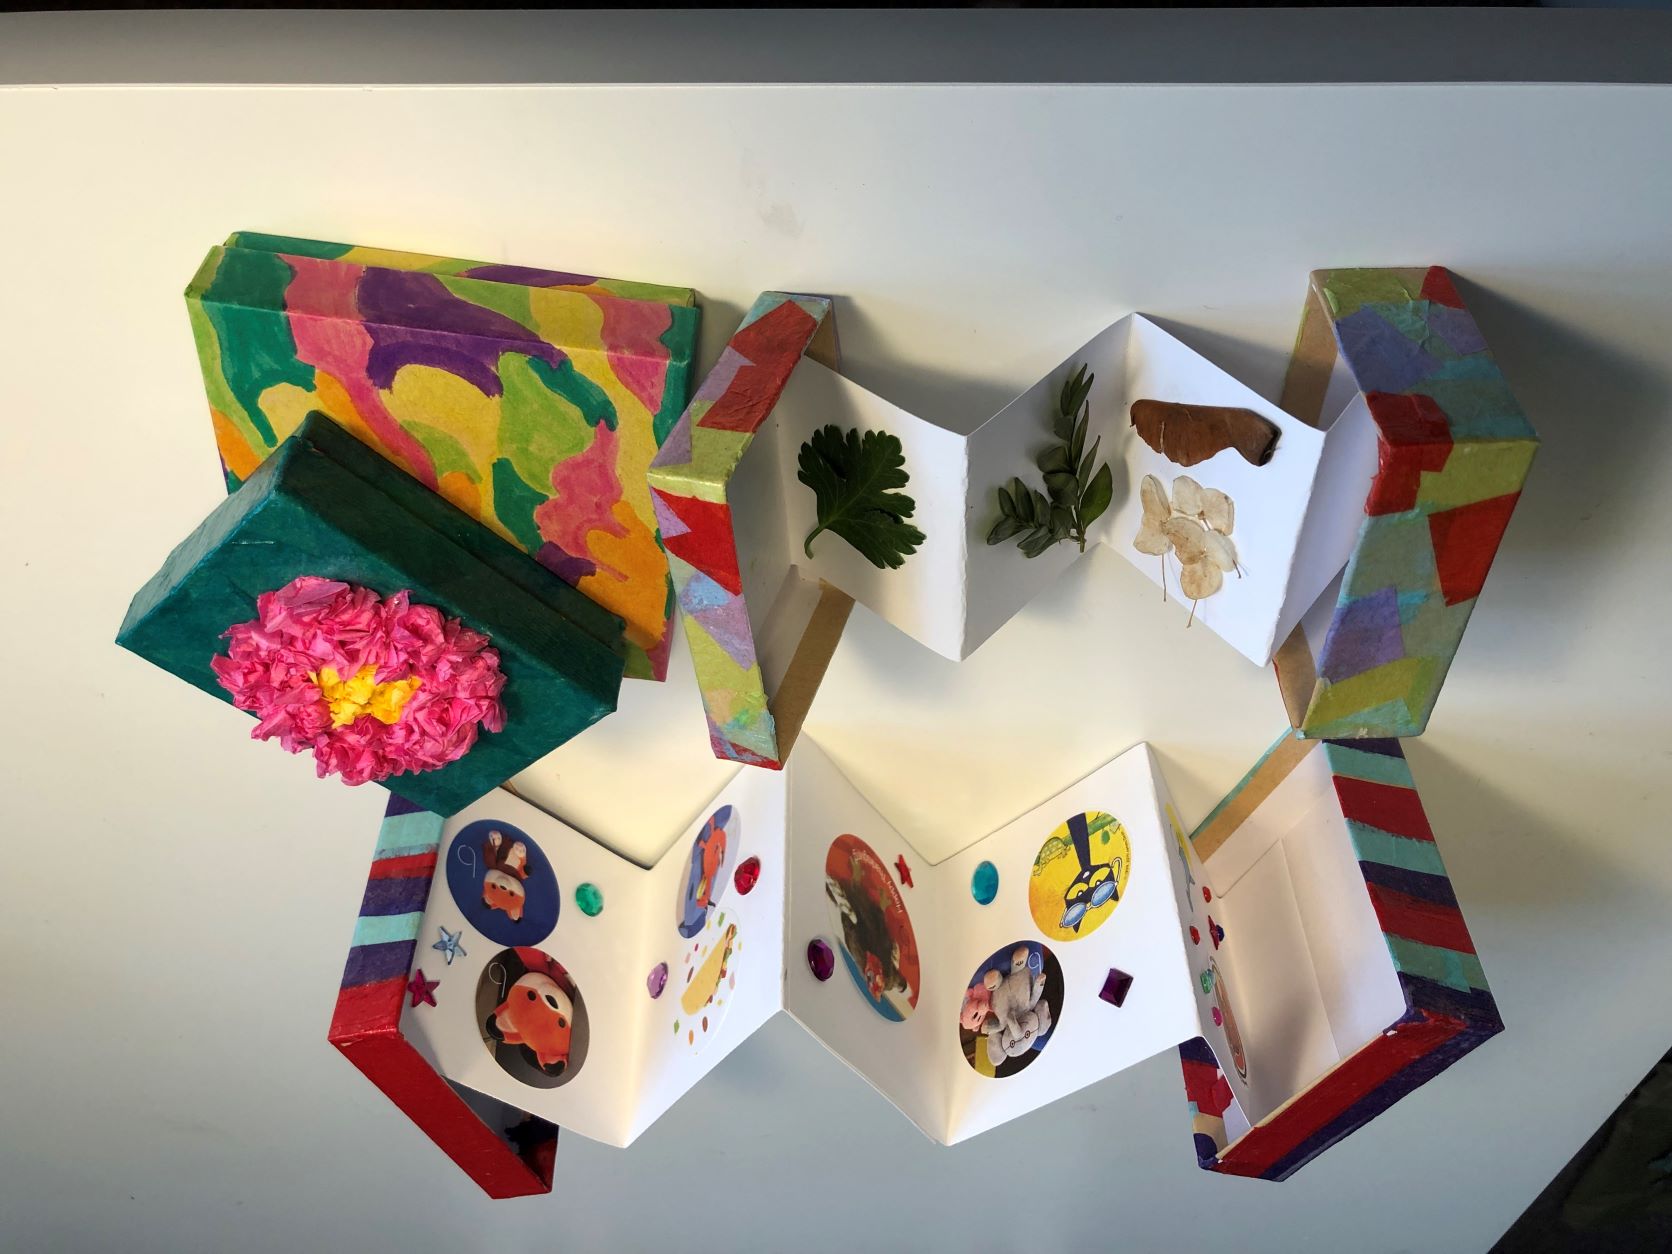
Grades K-2: Mini Collection Boxes
Decorate a box to hold your smallest treasures. Register for the April/May Grades K-2 Take-and-Make Kit here.
Kit contains:
- 2 small boxes
- 1 sponge brush
- 1 container of Mod Podge
- Several sheets of tissue paper
- 4 strips of cardstock
You may also need:
- Scissors
- Ruler
- Pencil
Instructions:
- Cut or tear the tissue paper into small squares or strips.
- Separate the two halves of one of the boxes. Coat one small area with Mod Podge, then place tissue paper bits on top. Keep applying Mod Podge as you go.
- You can overlap the pieces as much as you like. You can either trim the edges, or wrap them on the inside of the box.
- Let dry completely (about an hour). Make sure to wash out your sponge brush while you wait.
- Add a second coat of Mod Podge to seal the tissue paper, and let dry again. (Mod Podge will dry clear, and provides some durability for your design.) (Again, wash the brush!)
- If Mod Podge turns out to be challenging or too messy, you can also decorate the box with any other craft supplies – paint, crayons, markers, stickers, etc. Just make sure the box will still close!
- Fold one of the strips of cardstock paper into an accordion fold. The folds should be a little smaller than the width of the box. You can use a ruler and pencil to help with this.
- Lay the two box halves open and side-by-side.
- Use the sponge and Mod Podge to glue the first and last folds into the insides of the two box halves. Make them as even as you can so the box will close. You can also use double-sided tape.
- Let dry.
- Now your box is ready to store and display a small treasure collection! Stickers are a ready-to-go choice, but you can also glue buttons, class photos, leaves or flowers into your box.
Show us what you created! Send us pictures at youthservices@balibrary.org.
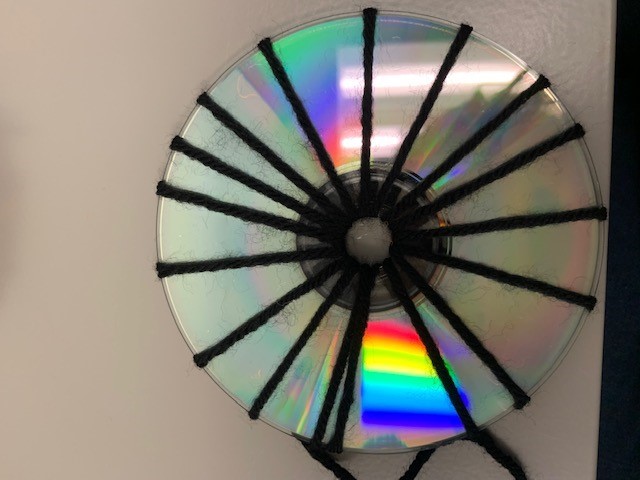
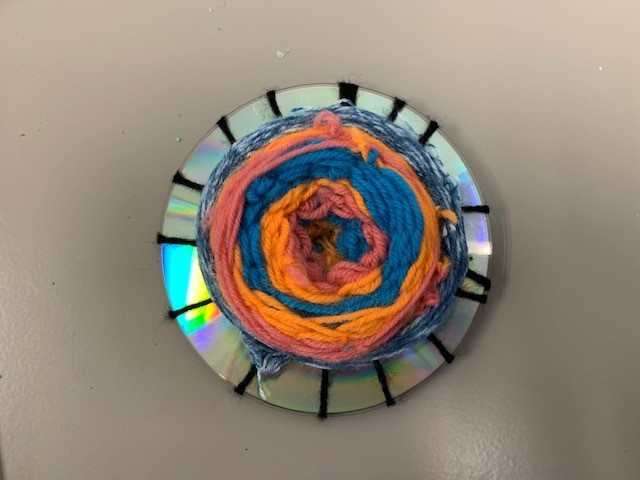
Grades 3-8: CD Weaving
Turn an old CD into a work of art with this simple weaving project. Register for the April/May Grades 3-8 Take-and-Make Kit here.
Your kit contains:
- 2 CDs
- 2 sewing needles
- Black yarn
- Rainbow ombre yarn (color will vary)
- Blue ombre yarn
- 3 small skeins of yarn
1. Pick out a yarn color for the spokes of your CD. You can use the black yarn or a different color.
2. Pull the yarn through the hole of the CD, leaving a small amount of yarn at the end. Secure the yarn by tying a knot to itself.
3. Pull the yarn tightly across the CD and back through the hole, creating a spoke that goes from the hole to the edge of the CD.
4. Continue to make spokes until you have an uneven When you are done creating your spokes, tie a knot to the label side.
5. Pick out your first color of yarn, cut a piece, and thread it through your needle. Attach the end of the yarn to one of the spokes on the printed side. Weave the needle and thread over and under through the spokes, pulling it taut as you go along.
6. Continue to add different colors of yarn to your CD, until you are done.
Show us what you created! Send us pictures at youthservices@balibrary.org.
 Youth Services Assistant Librarian Alyssa