
Bring home a fun new project! You can now register to pick up a Take-and-Make Kit from the Youth Services desk or through Parking Lot Pickup. Here are the instructions for each kit:
Toddlers and Preschoolers: Chenille Stick Weaving
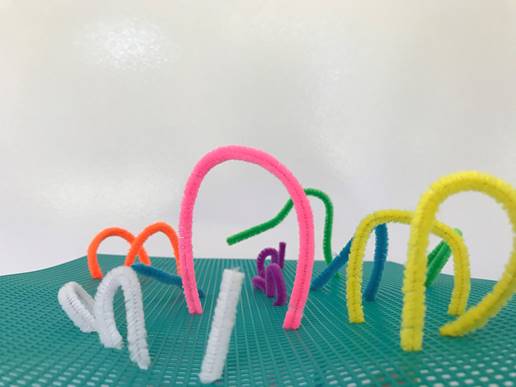
Young children work on fine motor skills and create a unique piece of three-dimensional art. Toddlers will want to master this new process. When you’re done, take it apart and make something new!
Inside the Toddler/PreK Box:
1 plastic canvas
10 chenille sticks
Bonus activity for older preschoolers - 1 craft paper bag w/ blunt plastic needle and yarn for simple sewing
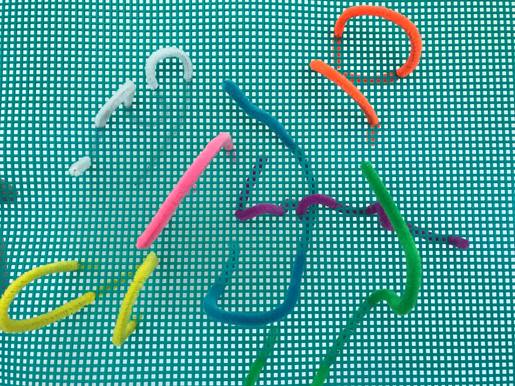
Chenille Stick Weaving:
1. Take hold of a chenille stick and push it through one of the small holes in the plastic mesh.
2. Pull it through from the other side – a little or a lot, it’s up to you!
3. Take the same end and weave it back through the plastic sheeting.
4. Do this several times with each stick.
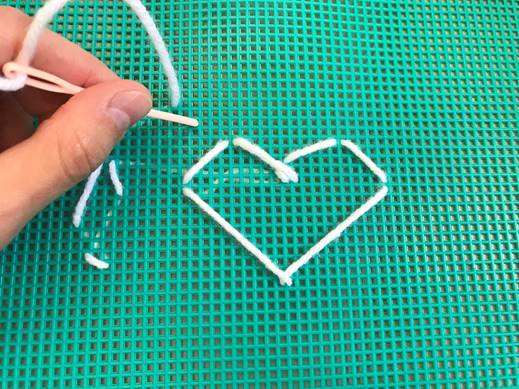
Simple Sewing (for older Preschoolers)
Preschoolers work on hand strength and fine motor skills, while exploring the basics of sewing.
1. Thread your plastic need with yarn.
2. Push the needle through one side of the plastic canvas and pull until the yarn is partially through.
3. Pull the needle through another hole, in the opposite direct.
4. Experiment with making lines and shapes, or simply enjoy pulling the needle through the mesh.
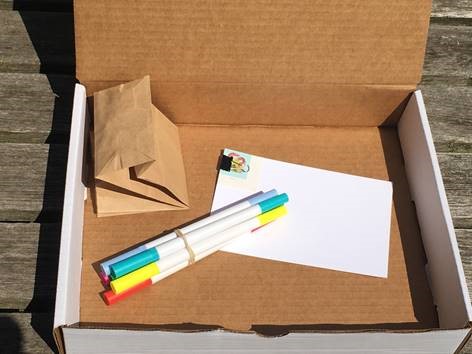
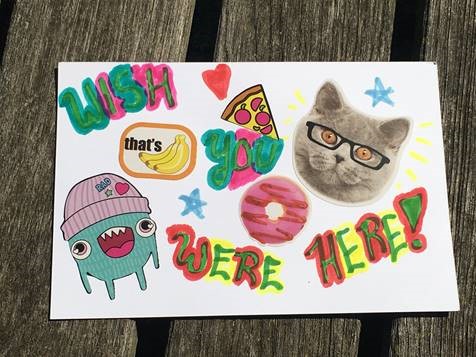
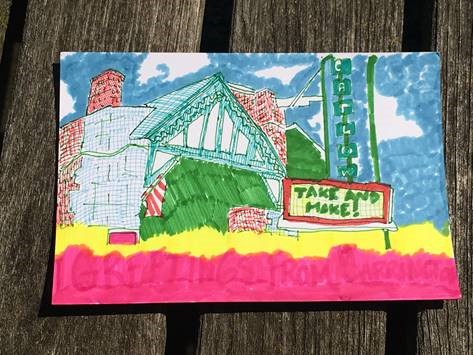
Grades K-2: Postcards
Let everyone know what a great summer you've had with a fun, personalized postcard!
Make a Postcard:
1. Take your postcard, stamp, markers, and sticker bag out of the box.
2. Decorate your card with stickers…
3. …or draw something cool with your markers (or both!)
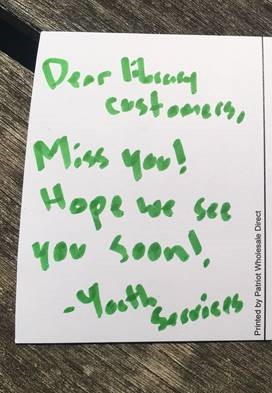
4. Write a nice message to someone you care about on the back…
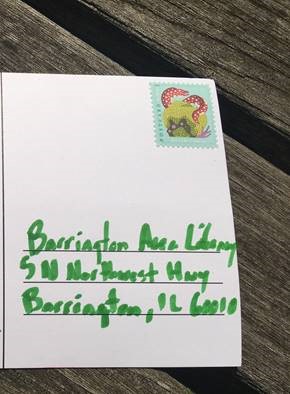
5. …and make sure you write down their address and stick on a stamp, too!
6. Now you can mail your postcard (make sure a grown up helps you with this part)!
Grades 3-8: Ombre Dip Dye
Lower fabric gradually into a dye bath to create a cool textile effect: gradual layers of lighter and darker color.
In addition to the Take-and-Make Kit, you will need:
A plastic tarp or large garbage bag
A plastic container for the dye, big enough to hold the entire bandana, but less than 12 inches wide on one side. (You could line the Take-and-Make box with a plastic bag and use that!)
A disposable plastic bag
Water - between 2 and 3 cups should do it
Paper towels to catch spills
Some stackable items - boxes, cans, etc. These should be around 4-6 inches high, about the same size & shape, and you might get dye on them! I went with 4 tissue boxes.
Ombre Dip Dye:
1. Lay out the tarp or large trash bag to protect your work surface. Doing this outside is a great idea!
2. Place your container on the tarp, then create two stacked towers around the container, around 18-20 inches tall. The dowel rod will sit on top of the stacks, and the bandana will hang into the container.
3. Use the binder clips to attach one side of the bandana to the dowel rod. Set aside.
4. Put on the gloves, then add water to the top line of the dye bottle. Shake, then pour into the container. Add some more water, until there's just enough liquid so the bandana will rest in the liquid. (This will depend on the size of your container.)
5. Carefully set the dowel rod on top of the stacks, making sure the bottom edge of the bandana is getting wet.
6. Wait about 3 minutes, then carefully add 2-3 more bottles of water to the container (to dilute the dye). Holding the dowel rod in one hand, carefully remove the topmost blocks from the stack, and rest the dowel rod on the lower levels. Once again, make sure the fabric is hanging in the liquid.
7. Wait another 3 minutes. Continue in this way, diluting the dye bath and lowering the rod, until there are just a few inches of fabric not dyed.
8. Get the plastic bag ready, laying it open next to the dye bath. Carefully raise the dowel rod, allowing the drips to fall into the bath for a few moments, and then gently wring out the fabric with your gloved hand, making sure not to touch the topmost part of the bandana.
9. Place the bandana in the plastic bag, keeping the dowel rod at the top of the bag, and bring it to a sink.
10. Leaving the dowel rod attached, carefully rinse out the bandana, allowing the water to move from the top to bottom. Keep rinsing until the liquid runs clear.
11. Remove the dowel rod and wash the bandana in your washing machine, alone, on cold settings. You can dry it in the dryer, or let it air dry.
 Youth Services Assistant Librarian Alyssa