Bring home a fun new project! You can now register to pick up a Take-and-Make Kit from the Youth Services desk or through Parking Lot Pickup. Here are the instructions for each kit:
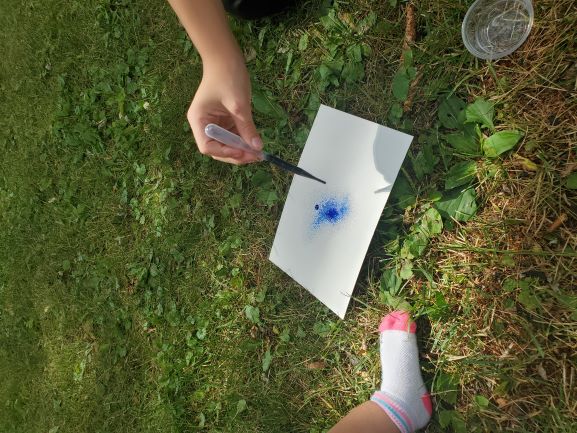
Toddlers and Preschoolers: Spray and Drip Painting
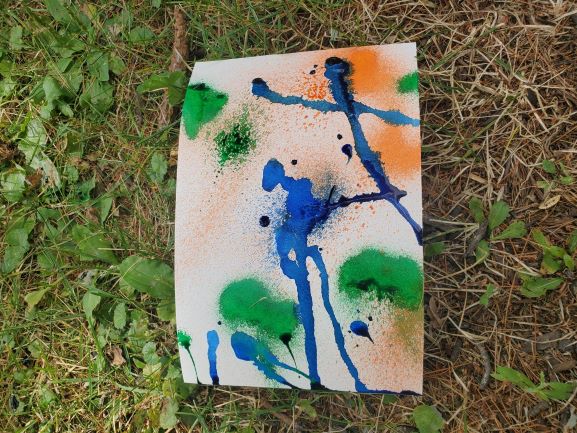
Materials provided for Spray and Drip Painting:
● Watercolor paper (3)
● Spray bottles filled with liquid watercolor paint (3)
● Pipettes (3)
● Empty plastic containers (3)
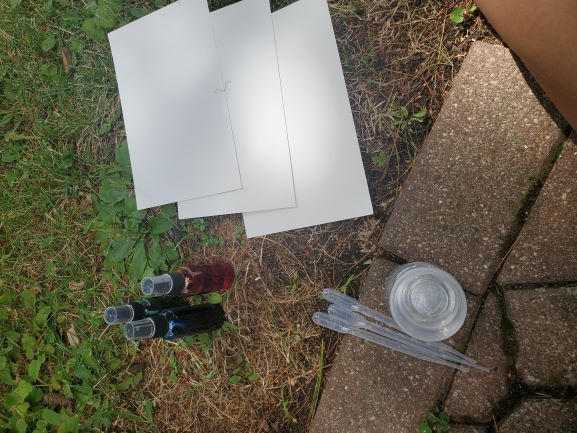
Spray (Bottle) Painting: help strengthen grip and control while having fun spray painting with a
spray bottle!
Directions:
● Arrange the watercolor paper in an area that you envision best for this activity- We
highly recommend somewhere outdoors! (Outside on the grass, thumbtacked to a tree,
clipped to an art easel).
● Provide your child with the prefilled squirt bottles and let them go to town!
● You will need to allow this to dry. We recommend leaving it in grass and placing rocks
around the edges to avoid it blowing away.
Drip Painting: Using pipettes is a great way to strengthen fine motor skills and help get little
hands ready for writing.
Directions:
● To use the pipettes, pour some of the liquid paint (found in the squirt bottles) into the
plastic cups.
● Squeeze pipette, place squeezed pipette in paint cup, release finger grip to suck up paint
● Squeeze pipette over paper to release paint.
Extras!
Looking to turn this into an educational activity?
- Add letters or numbers for your child to spray or drip on as you call them out. This
activity would be great for letter recognition, letter sounds, hand grip, fine motor
control, and following directions.
*Adding water to the liquid watercolor paint will give you more paint but less vibrant colors.
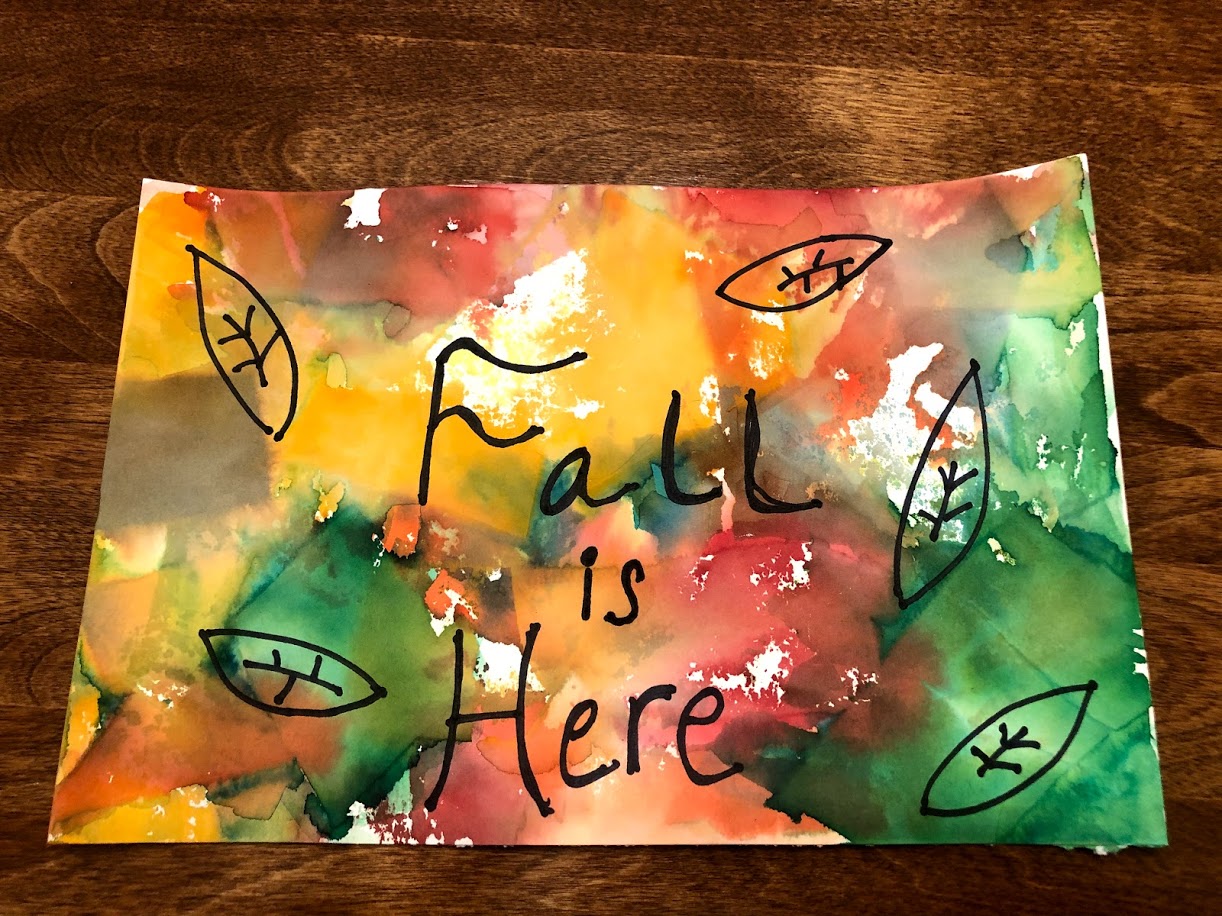
Grades K-2: Tissue Paper Painting
Things you will need in addition to the items in the kit:
-cup of water
-scissors
Directions:
1. Take the items out of the box.
2. Cut the colored tissue paper into smaller shapes. A variety of sizes and shapes will make your artwork more interesting!
3. Arrange your tissue paper shapes onto one of the white watercolor papers.
4. Use your paintbrush to apply water all over the tissue paper. Make sure to get everything nice and wet so the colors bleed through.
5. Wait for the paper to dry.
6. Remove the now dry tissue paper from the watercolor paper and discard.
7. Enjoy your watercolor masterpiece as is or...
8. Use the watercolor art as a background for more art with your black permanent marker!
Grades 3-8: Kindness Rocks
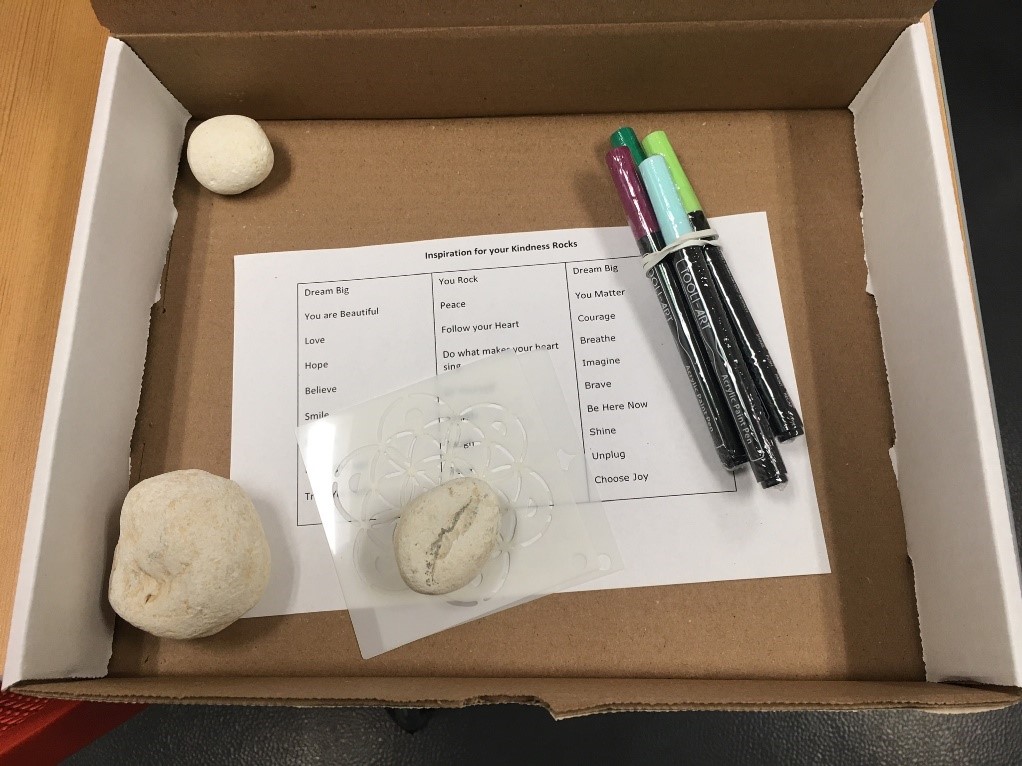
1. Take your rocks, markers, mandala stencils, and phrases out of the box.
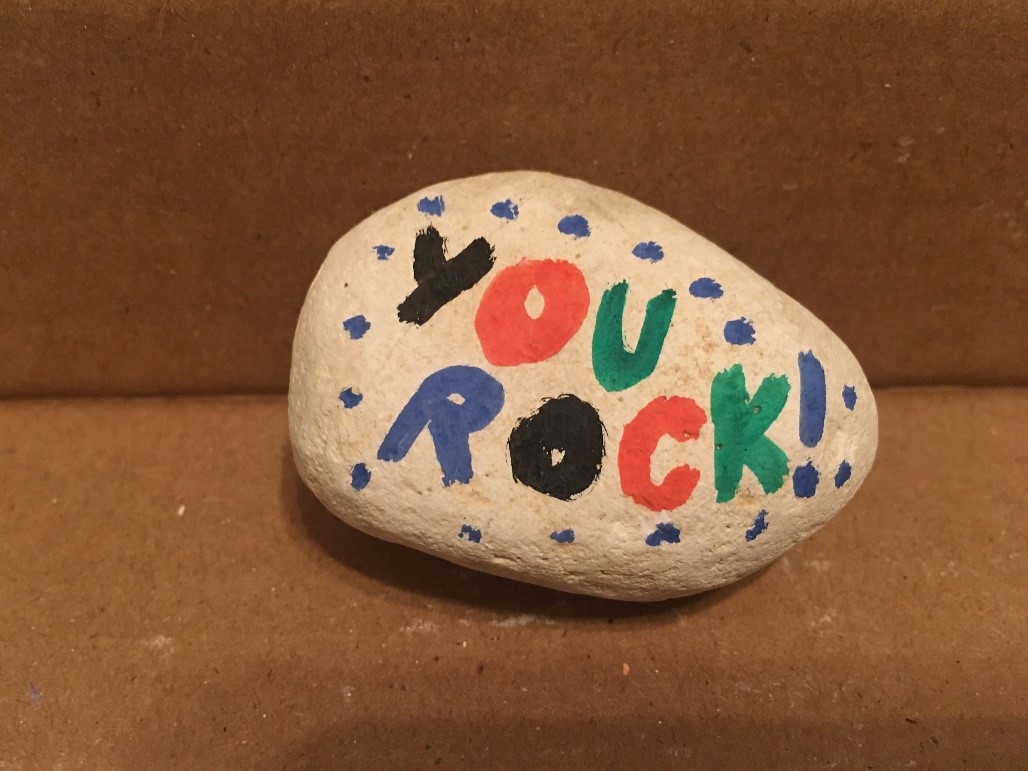
2. Take some inspiration from the phrases sheet and use the markers to write something nice to a loved one…
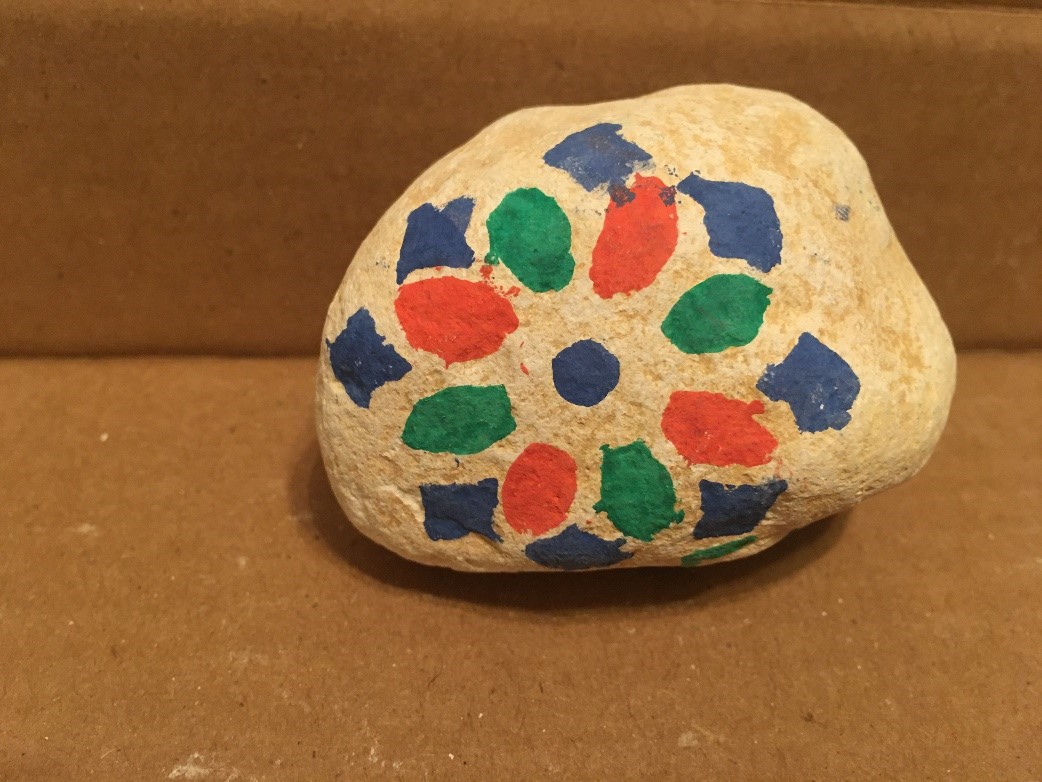
3. …use the mandala stencils to make a calming design…
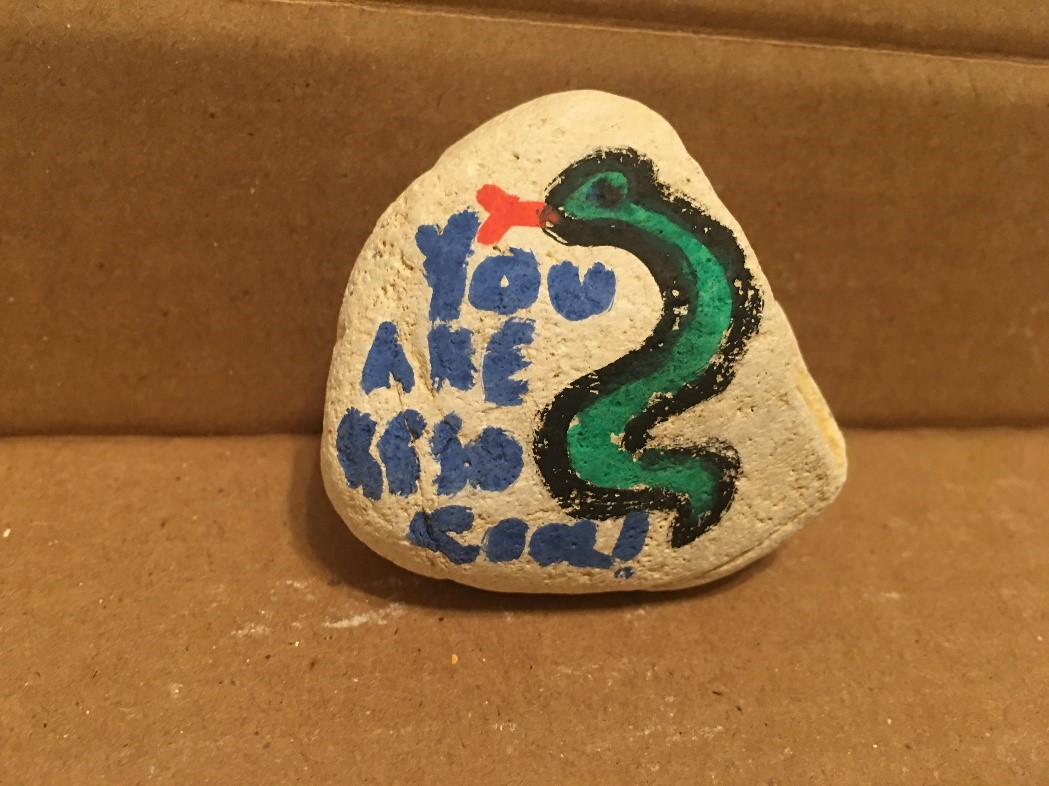
4. …or just draw something silly and sweet to give to a pal.
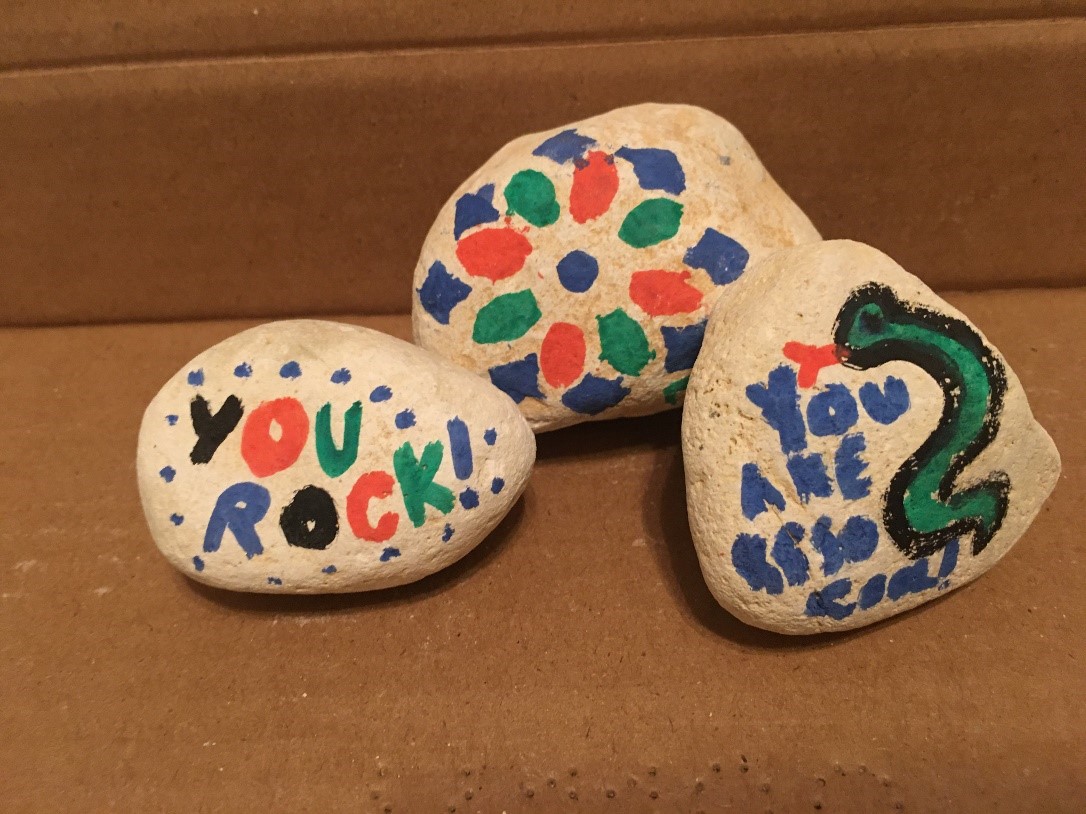
5. There’s only one rule for making kindness rocks: do it with kindness!
6. Once you’ve made a kindness rock, give it to someone you care about.
 Youth Services Assistant Librarian Alyssa