Bring home a fun new project! Sign up from our Library Calendar and pick up a kit at the Youth Services desk or through our Parking Lot Pickup service between April 12-23.
Toddler & PreK: Make a Puppet
Create a unique puppet of your own. Register for the April Toddler & PreK Take-and-Make Kit here.
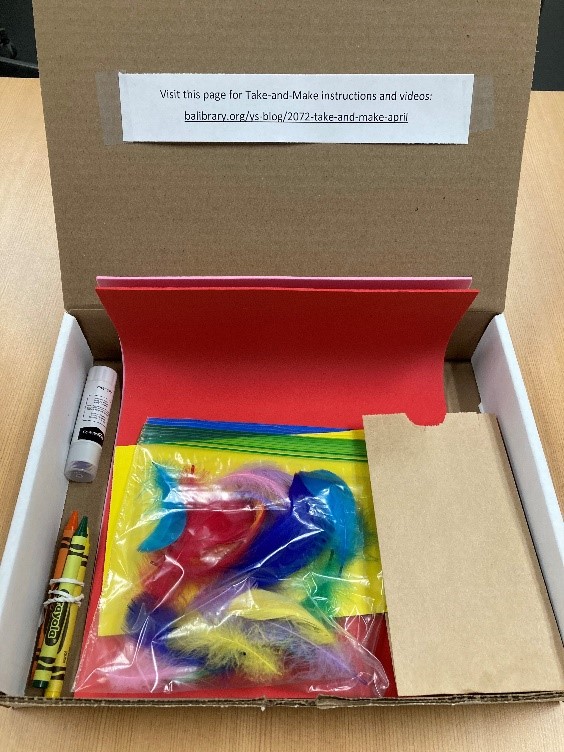
Your kit contains:
1 glue stick
1 bag of feathers
1 brown bag filled with 4 googly eyes
2 foam sheets
2 colored goody bags
3 or 4 crayons
Not included: Scissors
Instructions:
1. Lay a colored goody bag on its smooth side. Keep the bottom flap facing up. (Point the opening toward you).
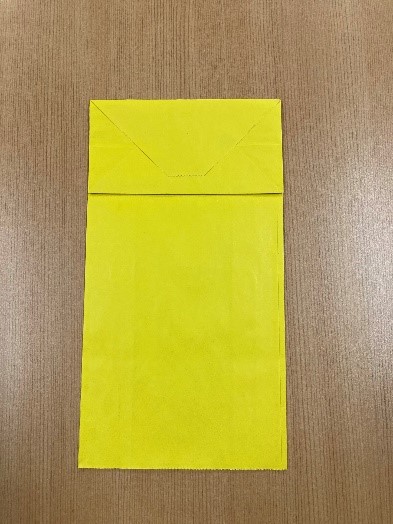
2. The flap will be the mouth of the puppet. Have your child draw or decorate the puppet as they please.
Scissors are not provided in your kit. However, please feel free to utilize your own scissors. If appropriate, have your child cut out shapes or different designs. You may also choose to cut out different shapes and designs for your child if they are unable to do so themselves.

3. Have your child use the glue stick to glue the googly eyes, feathers and foam shapes to their puppet.
4. Once the puppet has dried, your child may use their puppet! Have them slide their hand into the opening and curl their fingers up and under the flap. They can extend and curl their fingers to make the puppet “talk.”
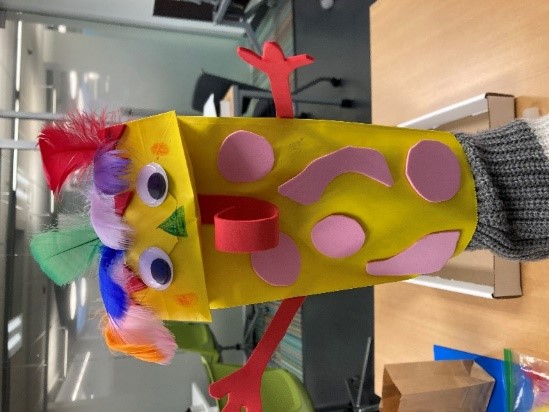
Optional talking points to consider: Use this activity as an opportunity to practice color recognition; ask your child to find the “blue feather”. Cut out different shapes from the foam paper and have your child identify the shapes. Have your child create patterns with the shapes you have cut out. Talk about different body parts and have your child locate theirs as well as their puppets.
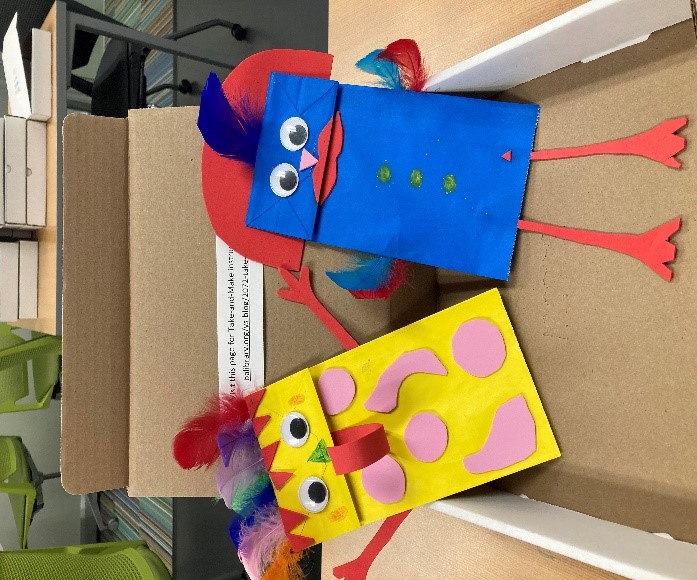
There are enough materials to make two puppets! (You may also use the brown bag that the googly eyes came in to create a third puppet!)
Show us what you created! Send us pictures at youthservices@balibrary.org.
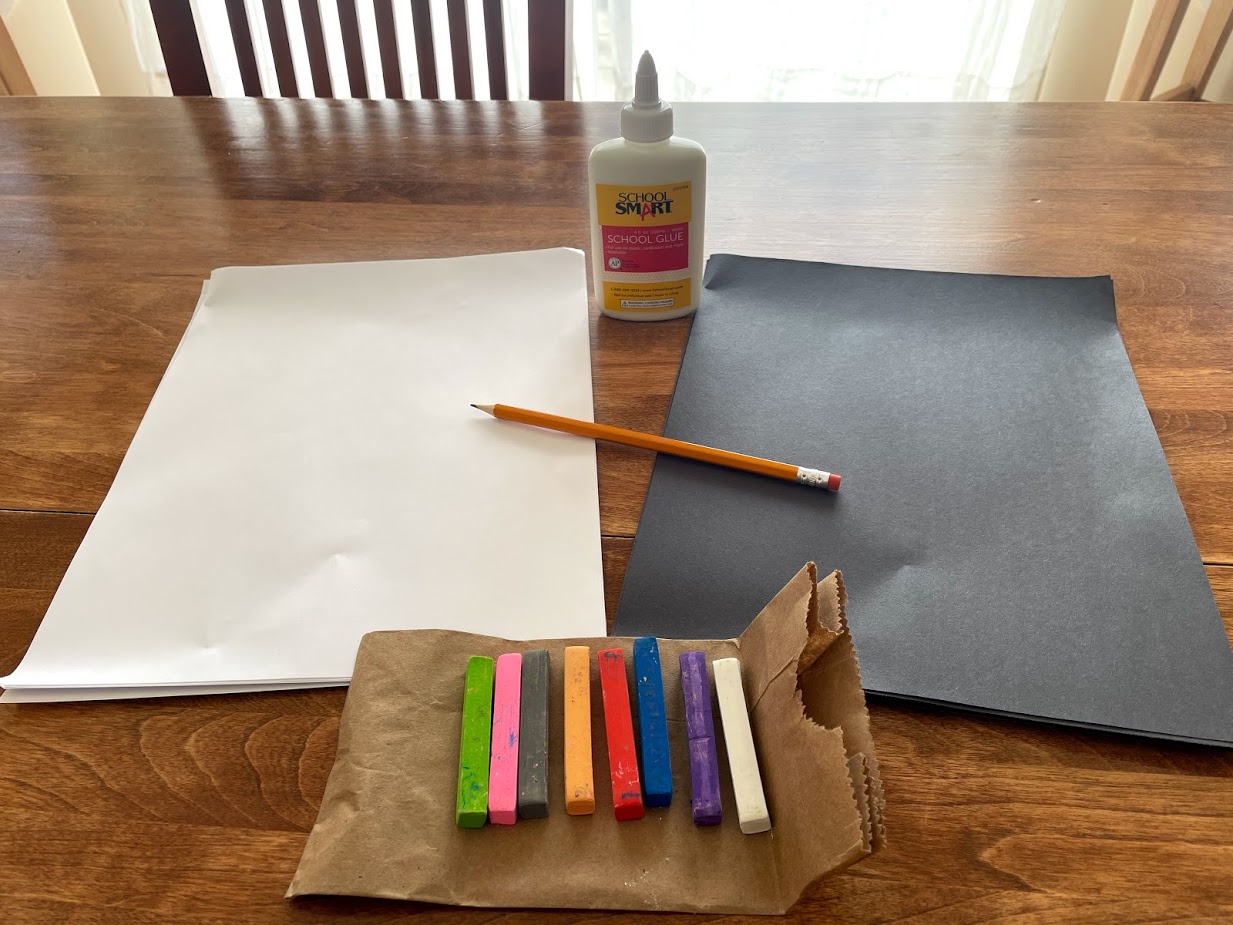
Grades K-2: Glue and Chalk Art
Experiment with glue and chalk pastels to create a colorful work of art. Register for the April Grades K-2 Take-and-Make Kit here.
Your Kit Contains:
5 sheets of white construction paper
5 sheets of black construction paper
1 pencil
1 bottle of school glue
1 bag of chalk pastels
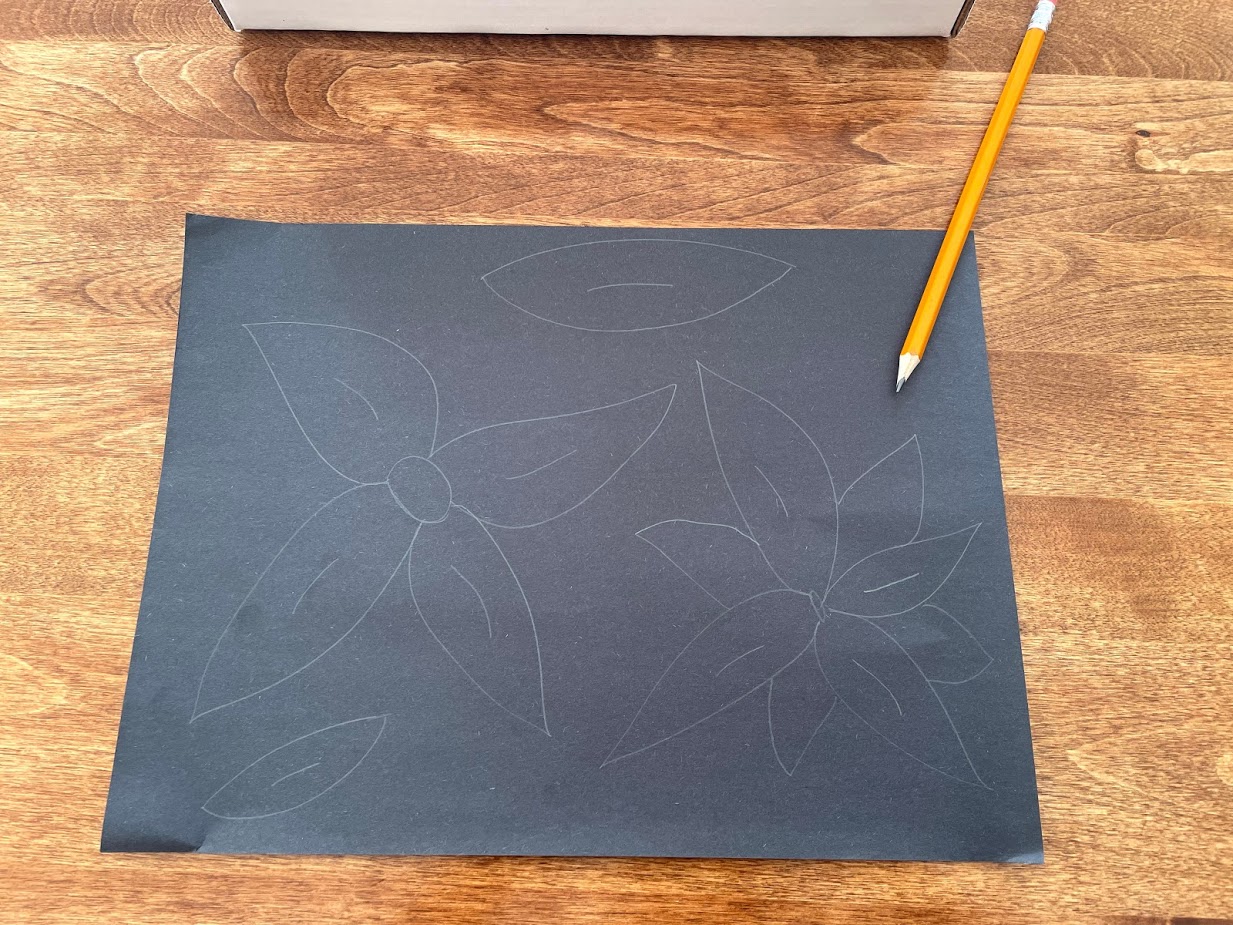
Instructions:
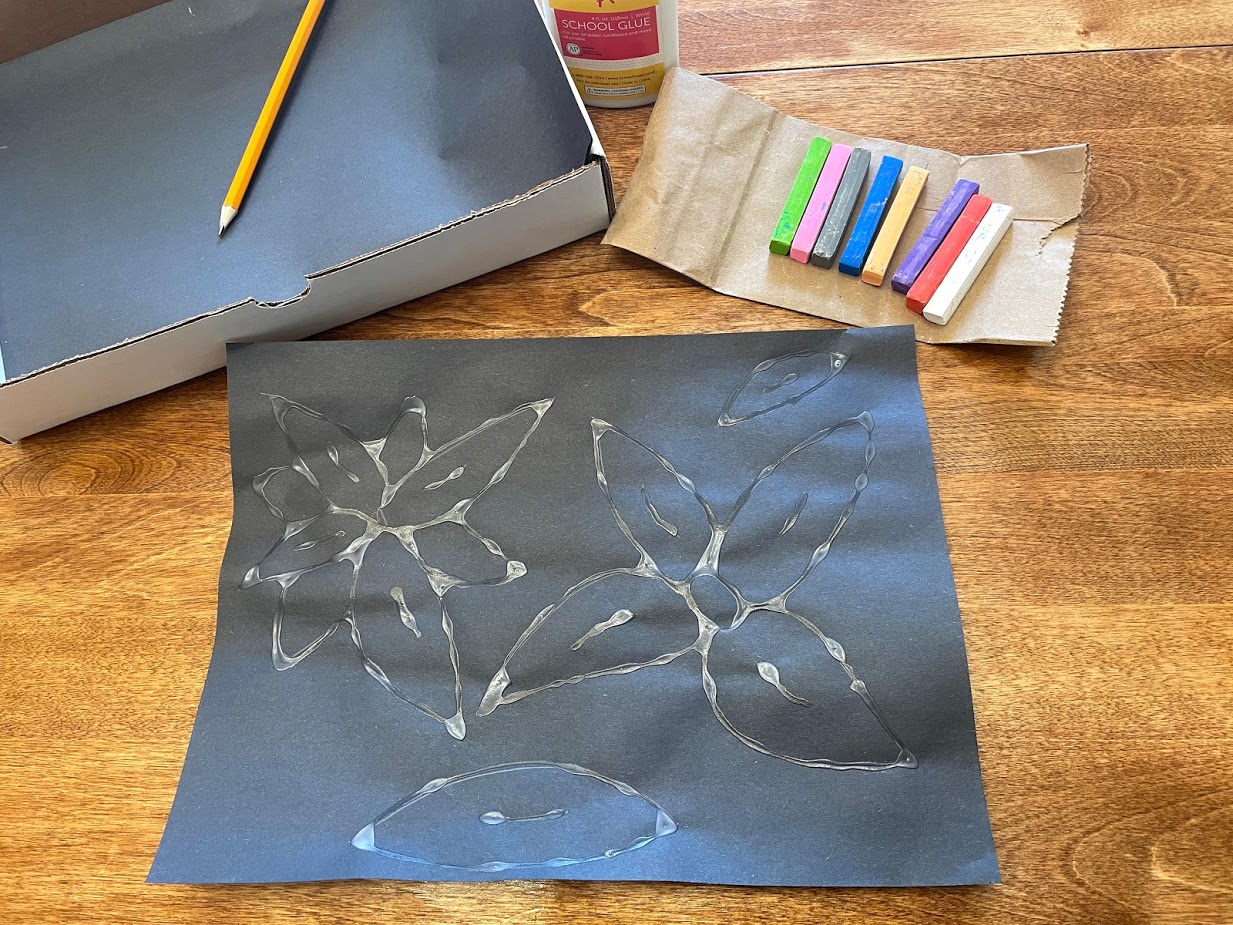
1. Open the box and empty out your supplies.
2. Select either a white or black piece of paper for your first creation.
3. Trace out your design with pencil – bold designs like flowers and leaves lend themselves nicely to this technique.
4. Trace your pencil lines in glue. Try not to touch the tip of the glue bottle directly to the paper. Instead just lay a continuous line of glue.
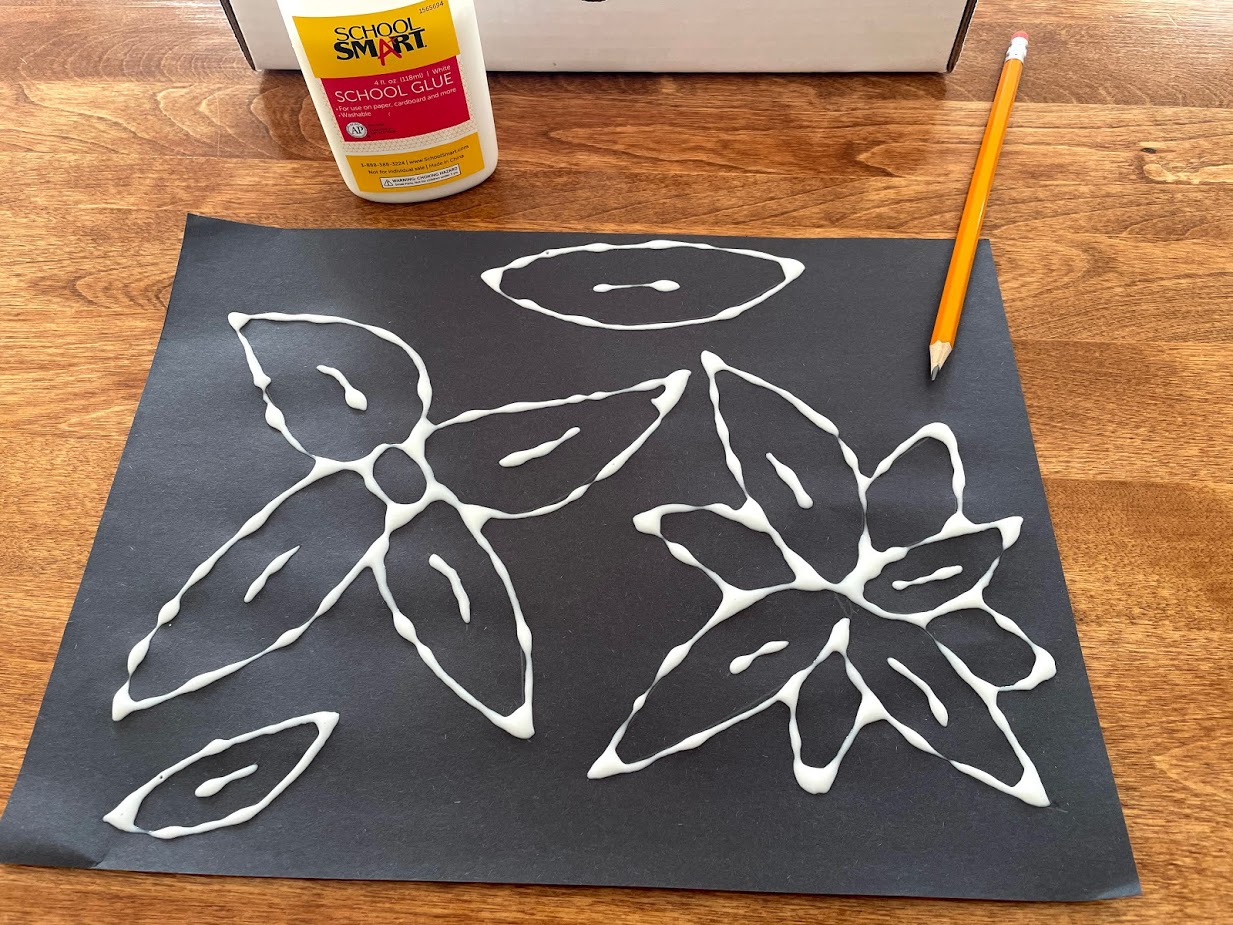
5. Wait for glue to completely dry. This will take time – be patient!
6. Time to add color! Use your chalk pastels to color both the inside and outside of your design. Use your fingertip to blend some of the colors together.
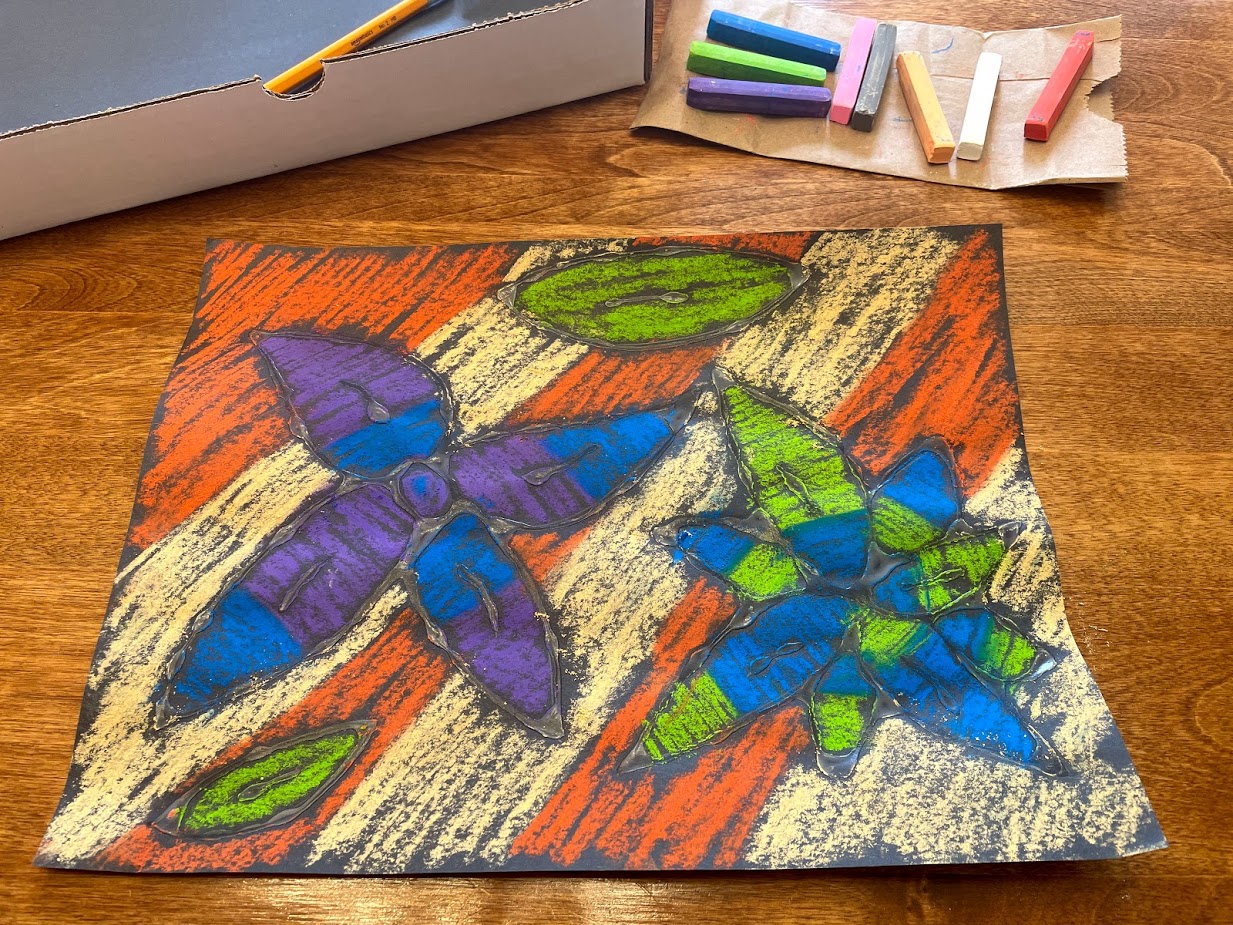
7. Enjoy your finished art piece!

Concepts to explore:
Positive and negative space – the inside of your design is the positive space and rest of the paper is negative space. How can you choose colors to show the differences between those two elements?
Warm and cool colors – colors like reds, oranges and yellows are warm, while blues, purples and greens are cool. How can you blend your pastels to create more warm or more cool shades?
Show us what you created! Send us pictures at youthservices@balibrary.org.
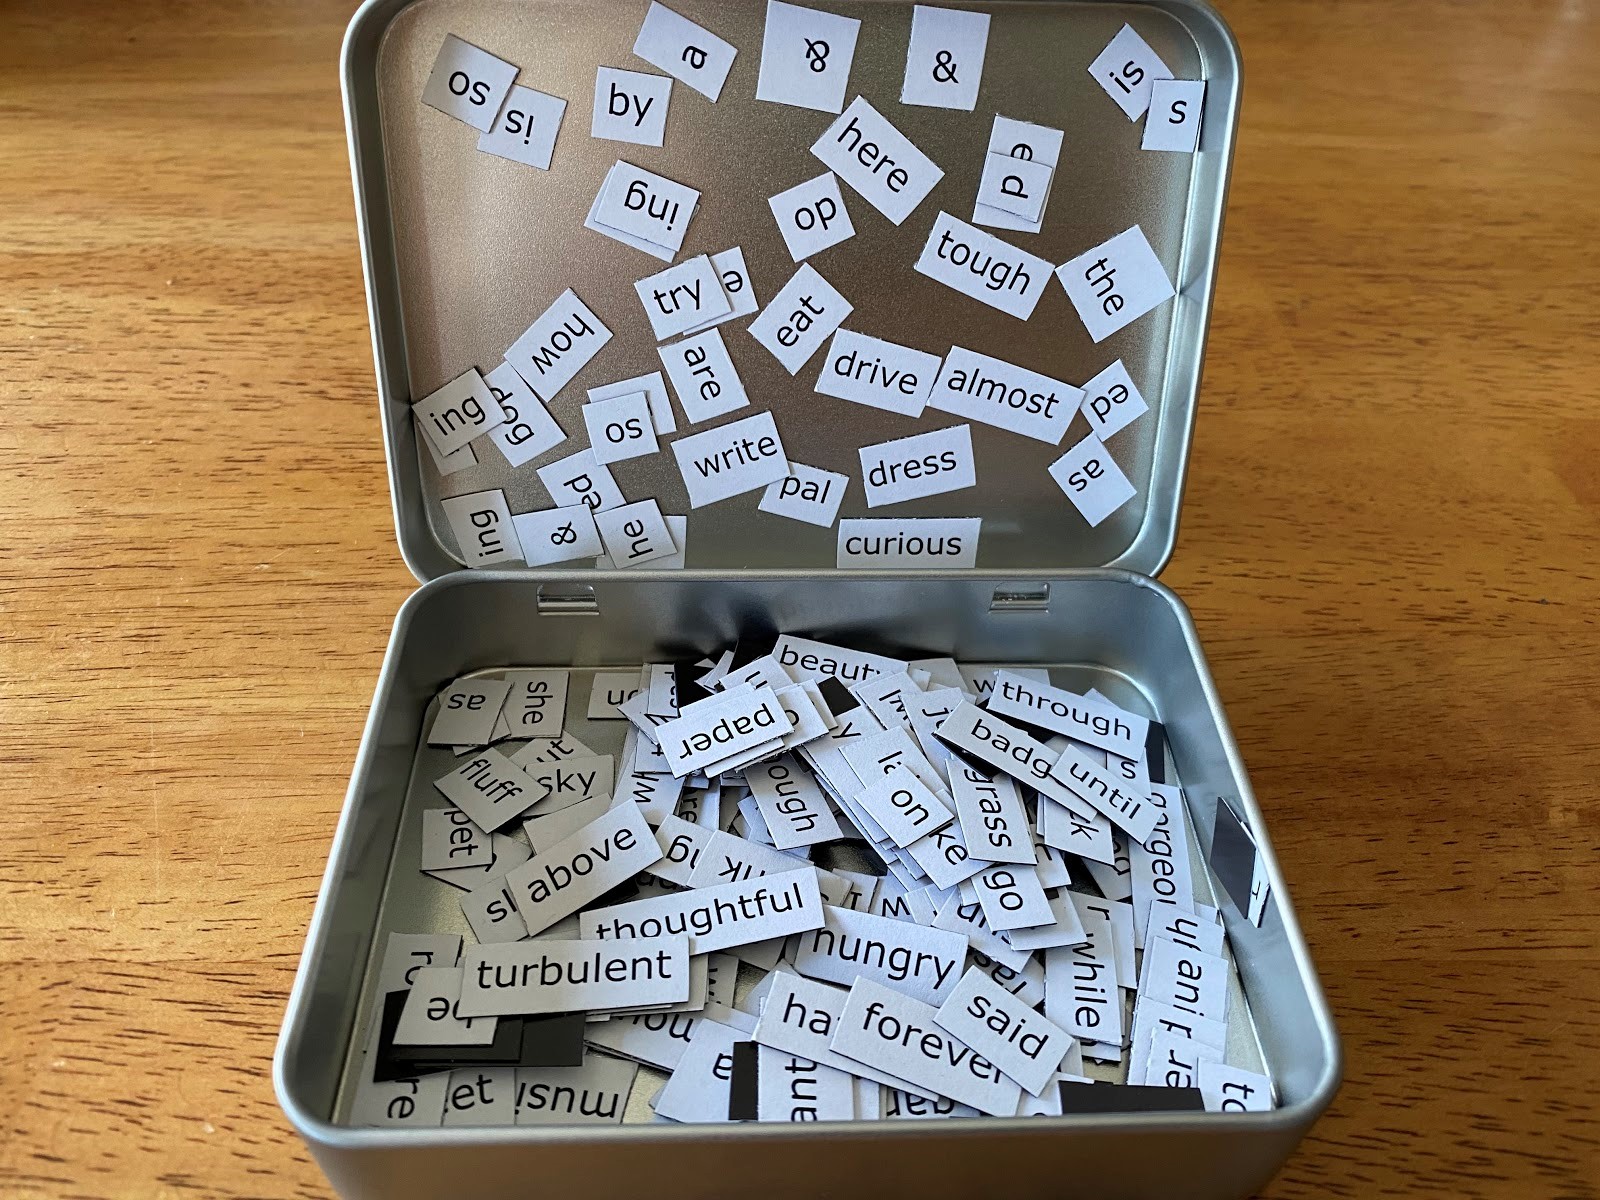
Grades 3-8: DIY Magnetic Poetry Kit
Create your own magnetic words set and use it to write poetry. Register for the April Grades 3-8 Take-and-Make Kit here.
Your kit contains:
- 1 8x10 magnetic adhesive sheet
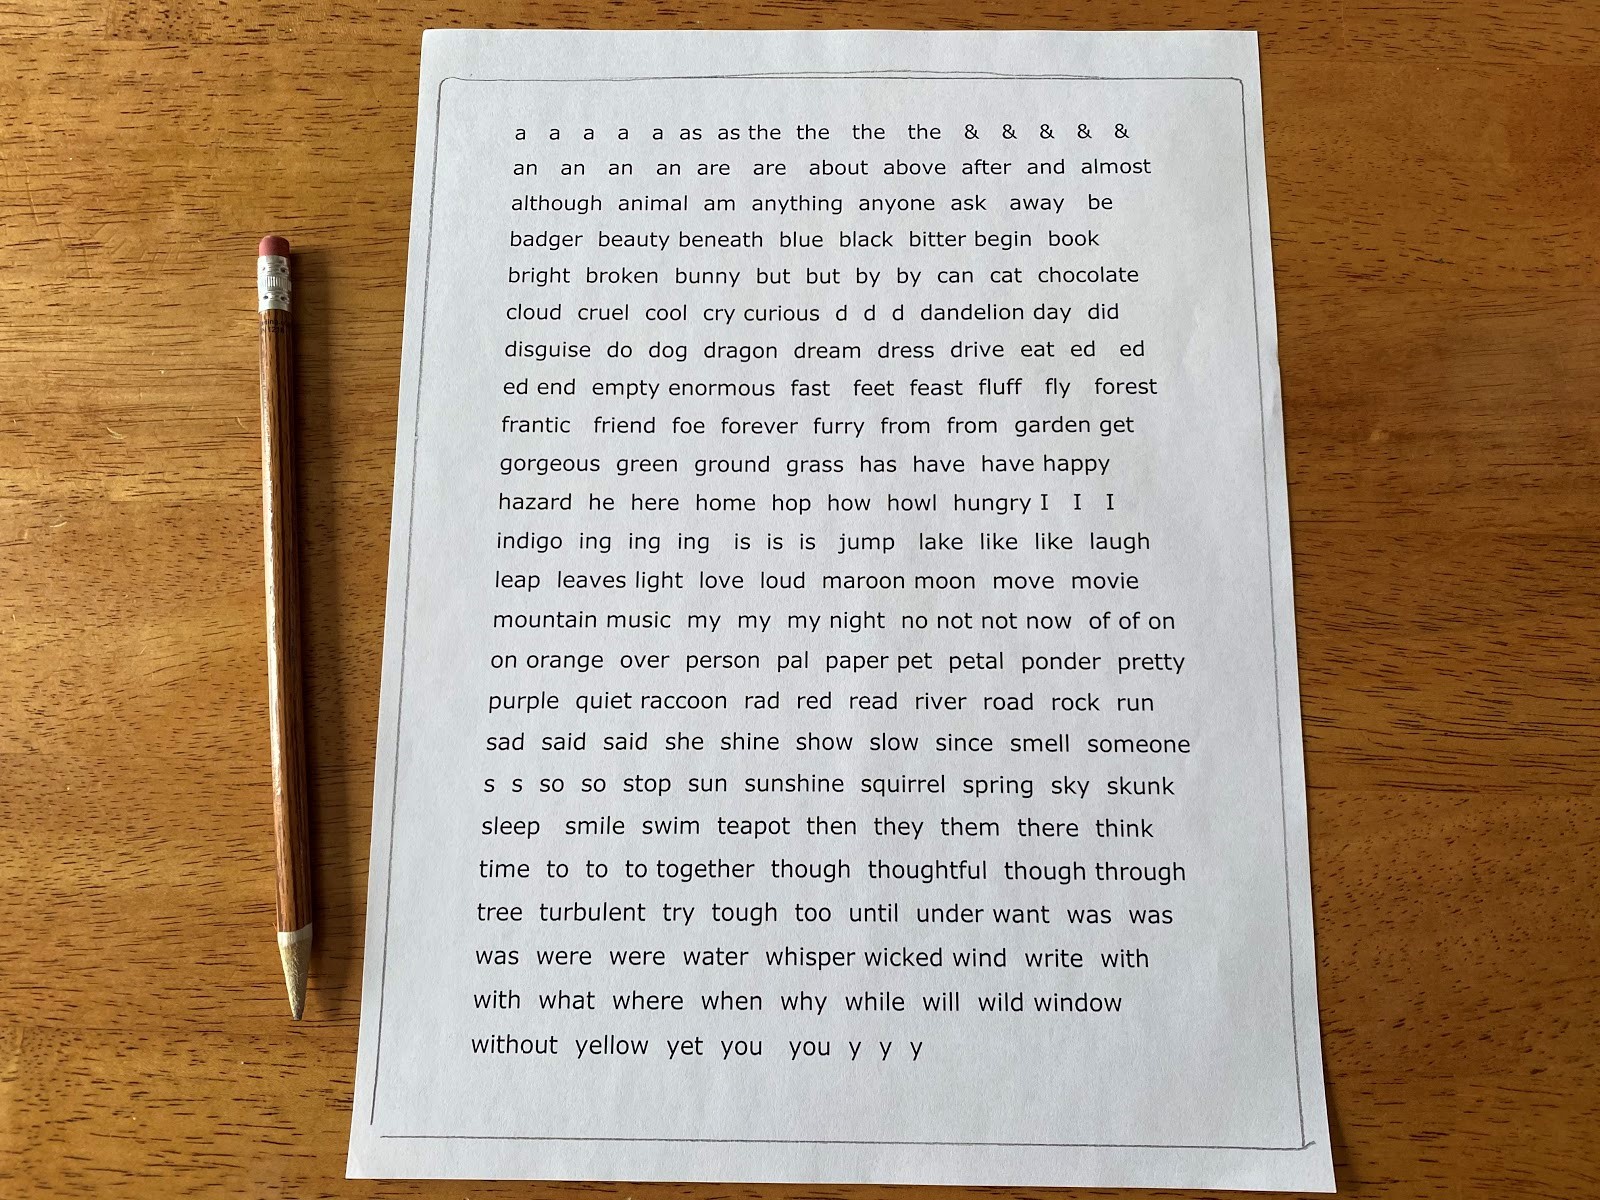
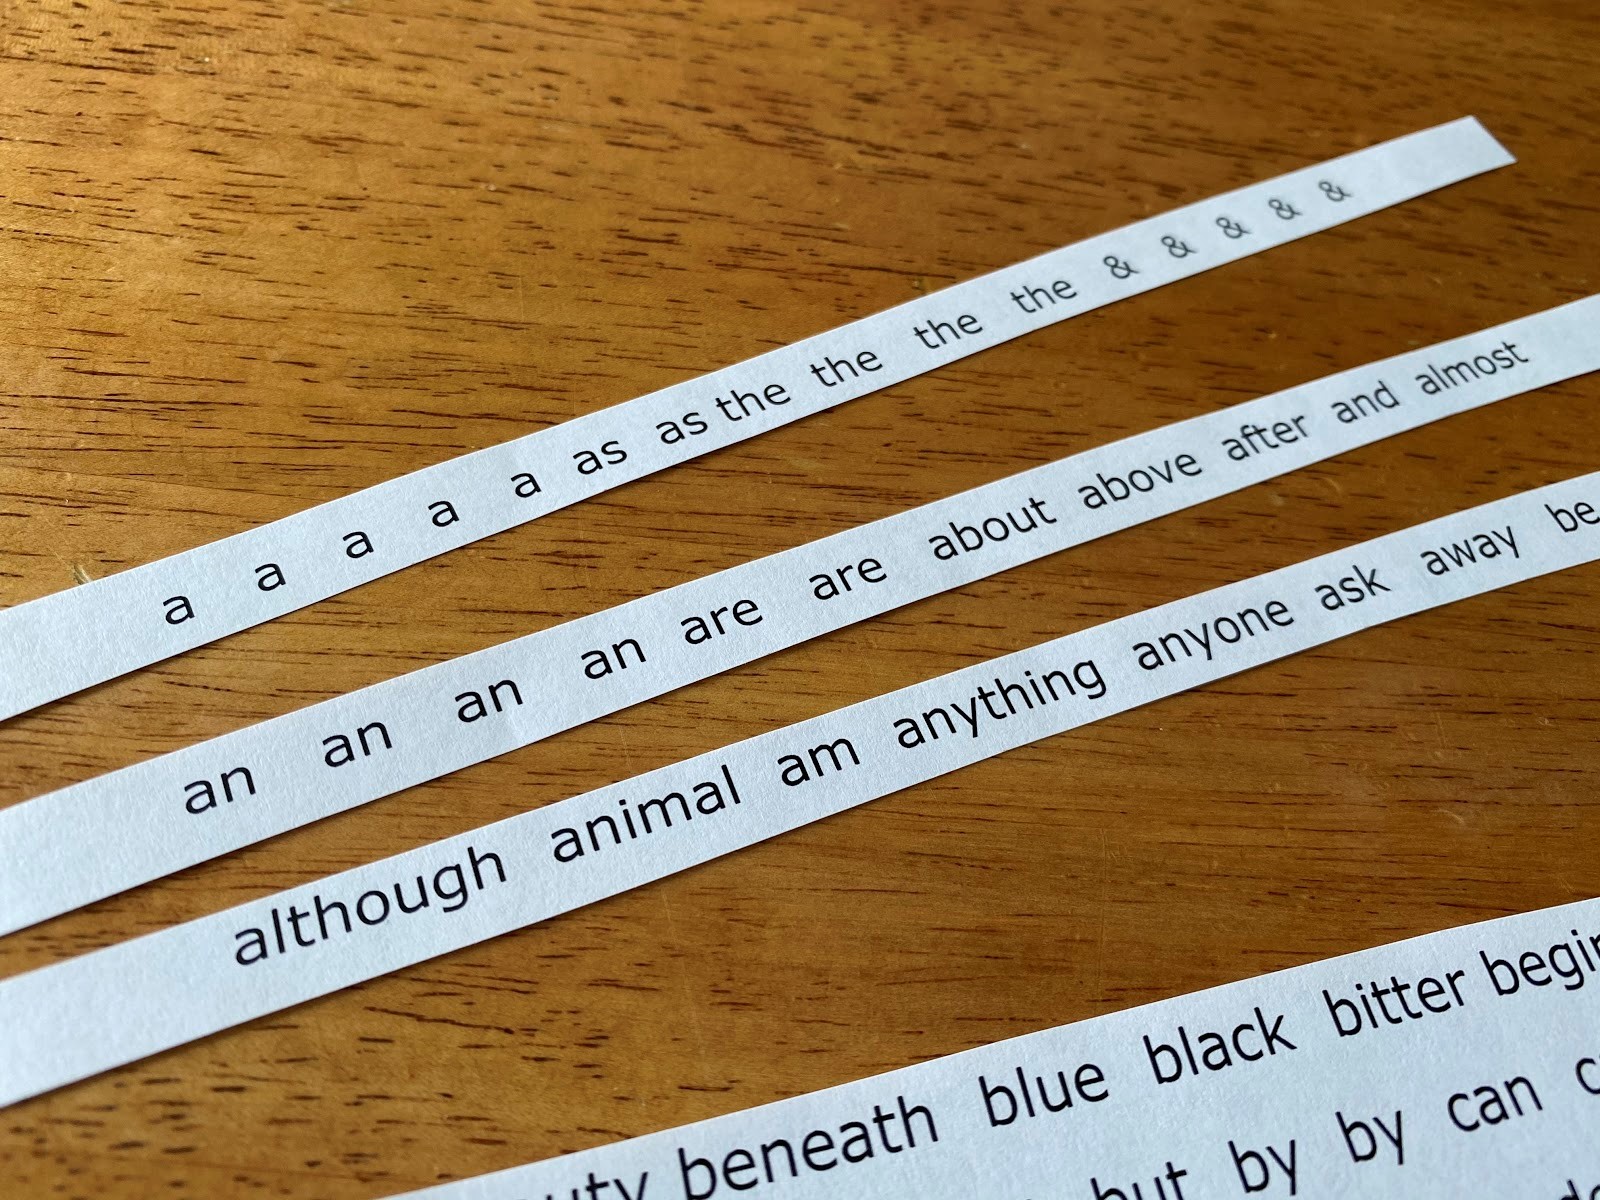
- 1 printed sheet of words
- 1 tin box
- Extra magnetic sheet/blank paper
You will also need:
- Scissors
- Pencil (for tracing)
- Pen
Instructions:
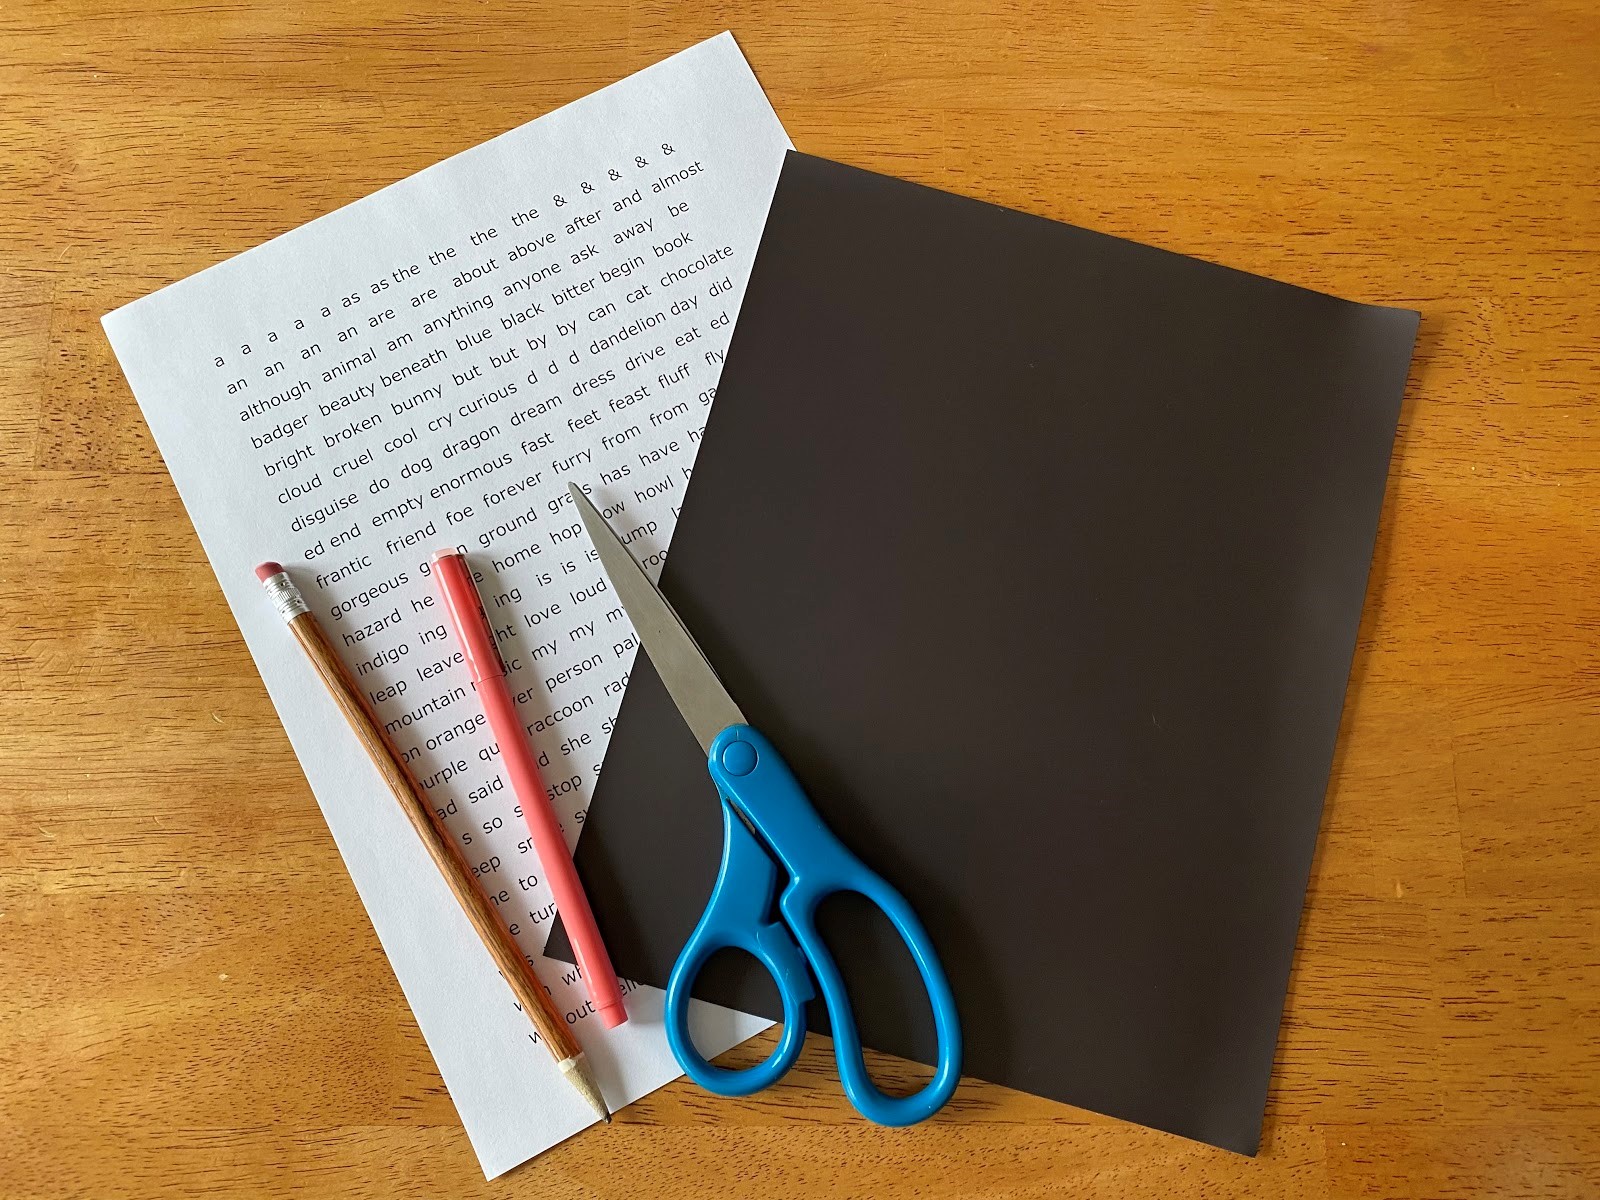
1. Lay the full sheet of paper with the words on it face up and lay your magnetic sheet on top. Trace the shape of the magnetic sheet onto the piece of paper, making sure that all of the words will fit onto the magnetic sheet. Cut the paper where you traced, just trimming the excess.

2. Once you’ve trimmed the sheet of words, carefully peel the cover off of the magnetic sheet, so that the adhesive is facing up.
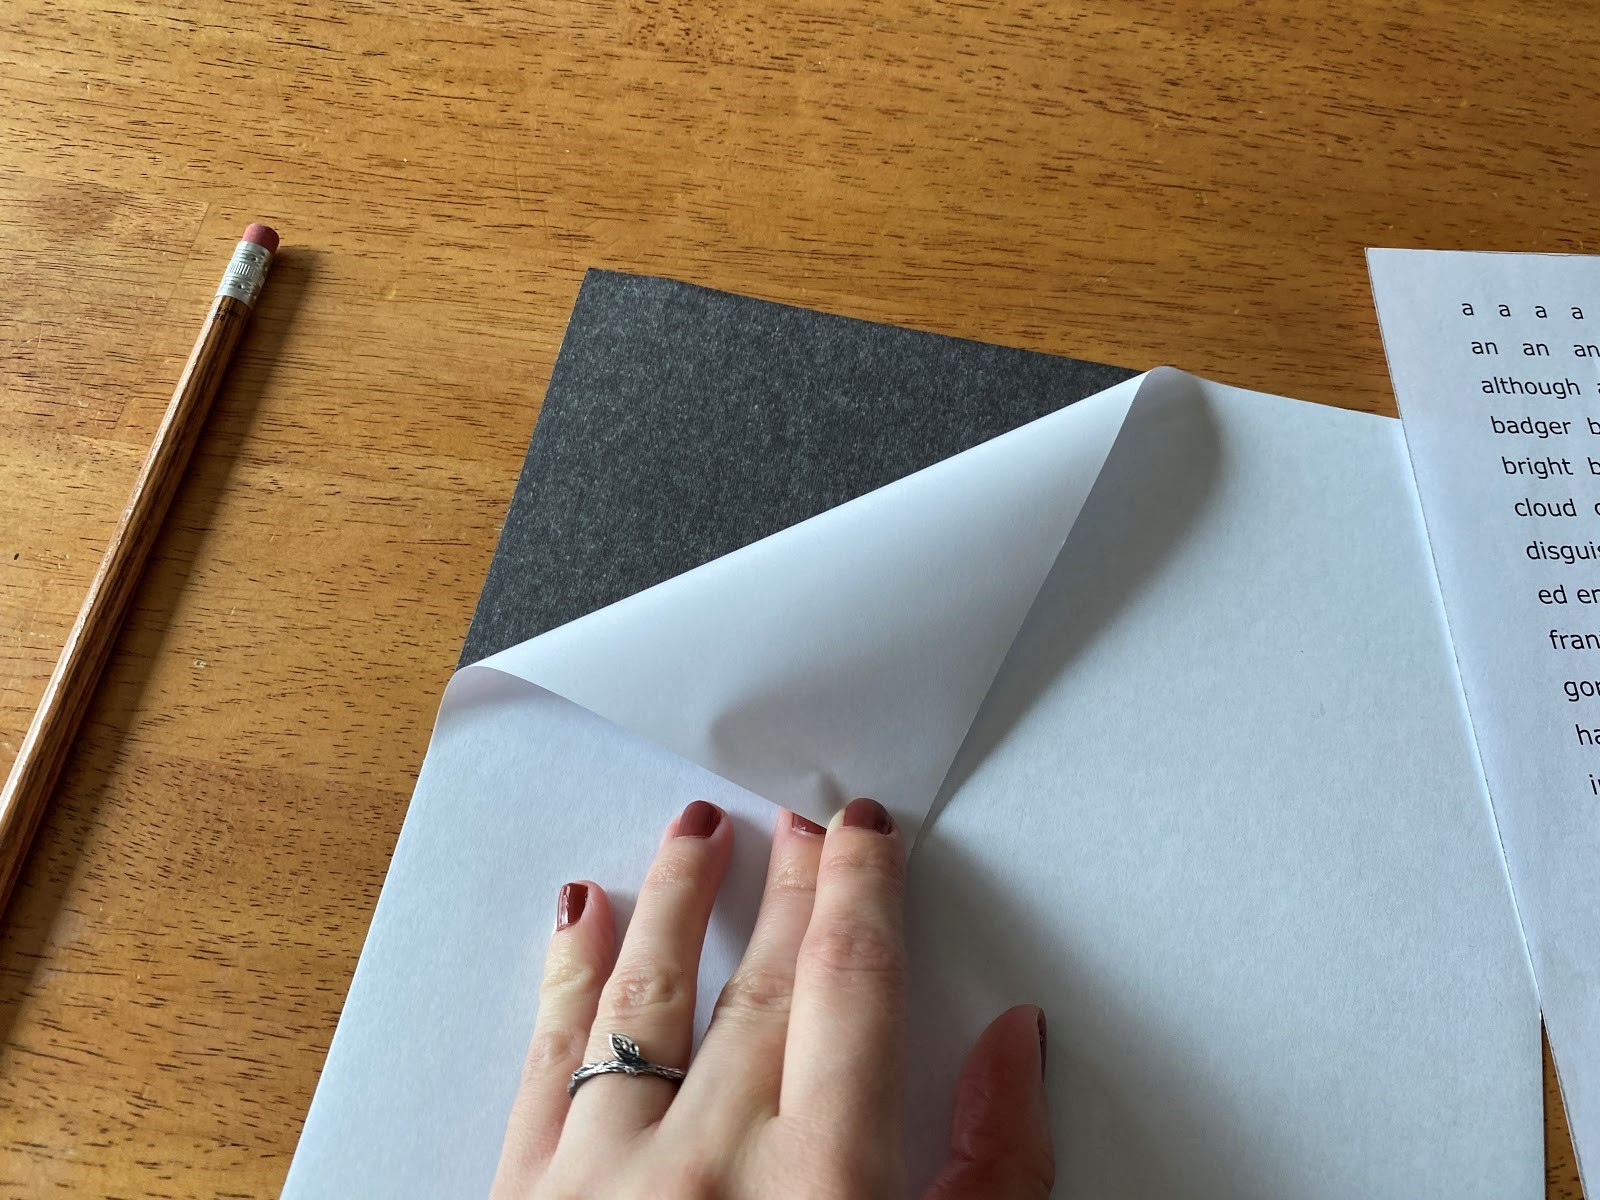
3. Place your sheet of words onto the adhesive very slowly, starting from the top, and working your way down, making the paper fit as smoothly as possible onto the magnetic sheet. Be careful not to stick it on all at once. This part is a little tricky, so feel free to ask a grown up for help!
4. Once your words are fully stuck to the adhesive, smooth it over with your fingers a few times to make sure it’s sticking really well.
5. Do you notice any blank spaces? Feel free to write your own words in those spaces, or trace some rectangular shapes to fill in words later. I recommend doing this part before you start cutting, to make the process a little easier.
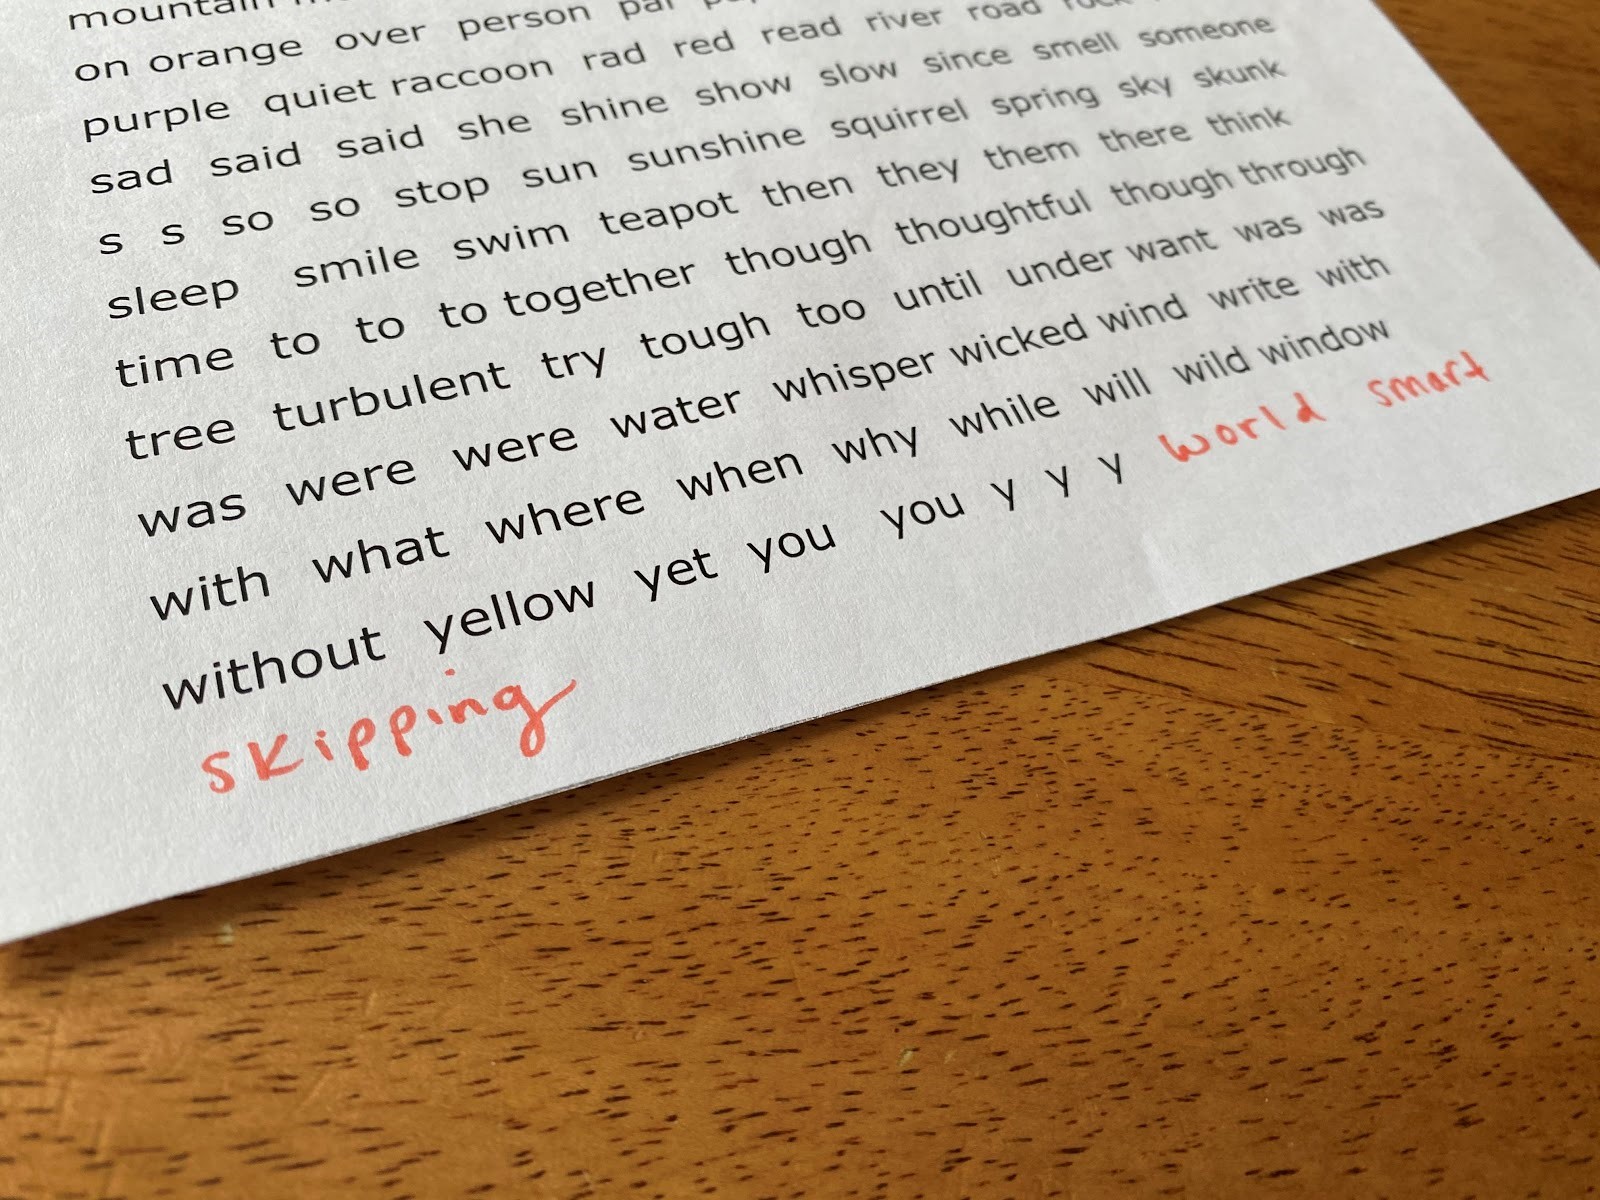
6. Now you’re ready to cut! Begin cutting your words out. I recommend cutting the page into strips, and then trimming the individual words from there. Place your words into your tin box as you cut them out.
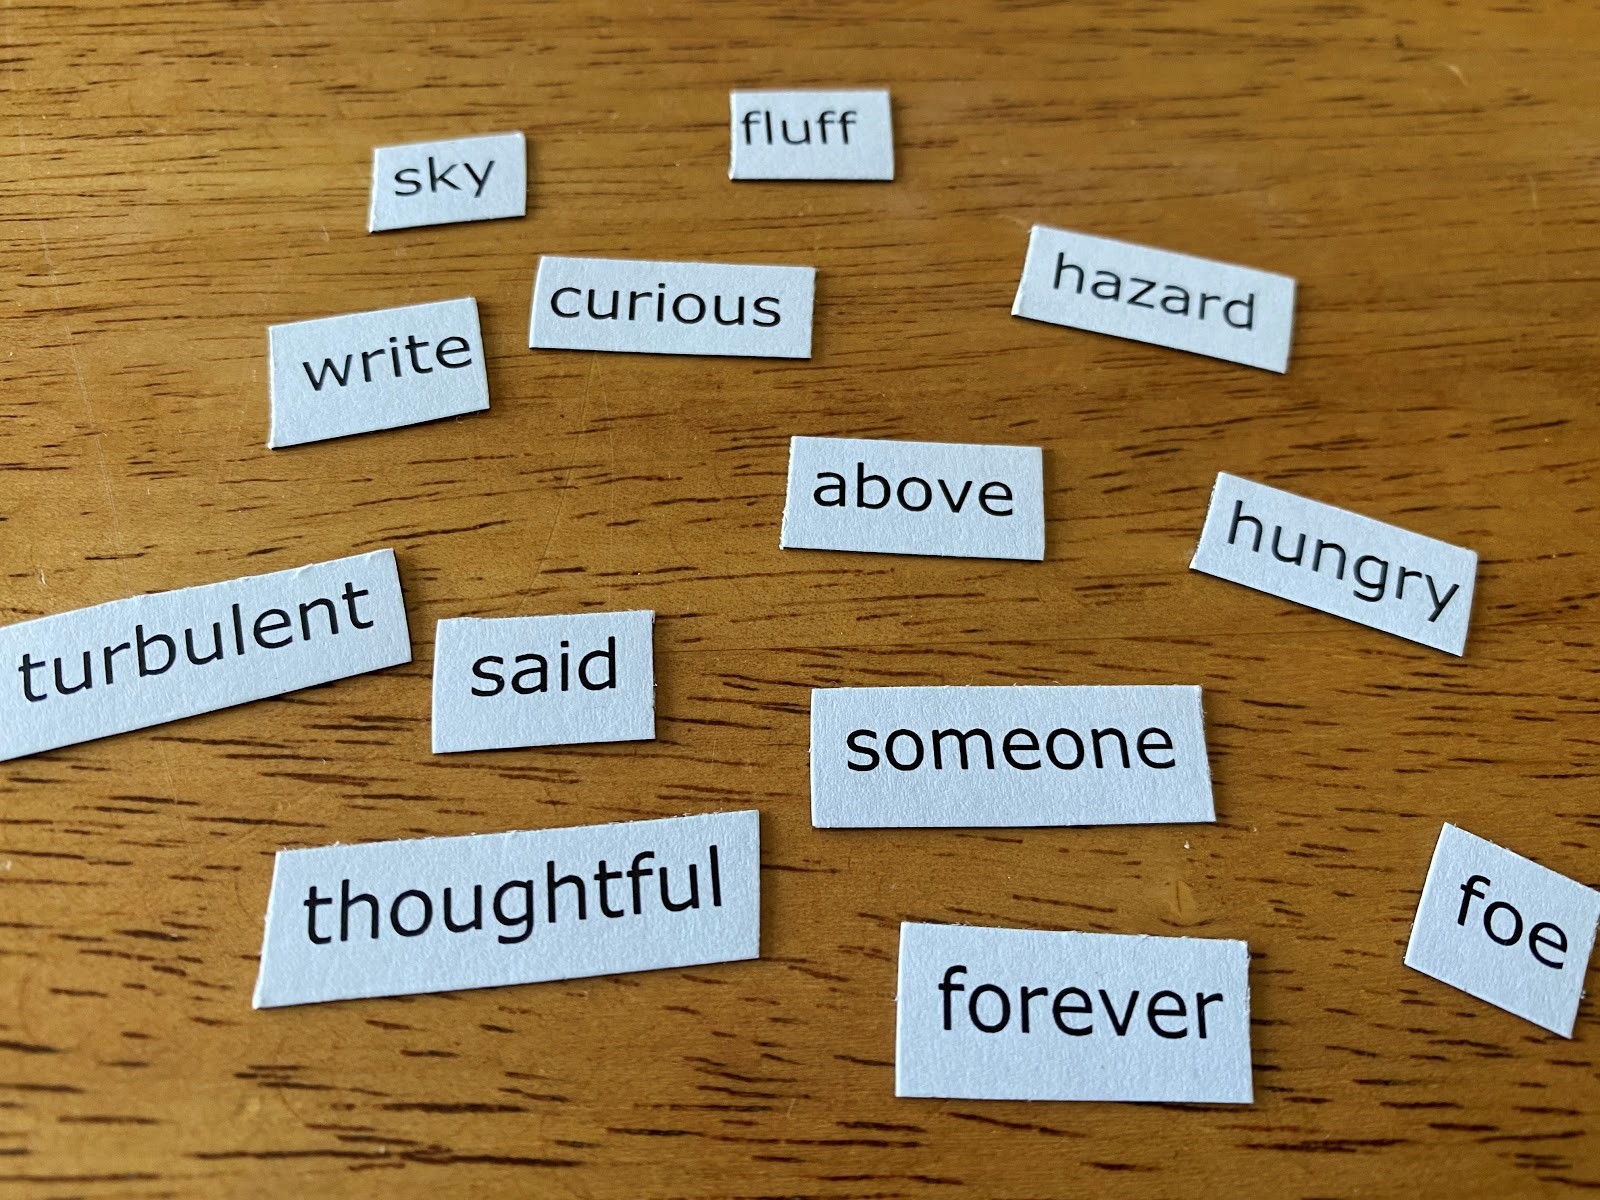
7. It’s time to get creative! Now you can use your words to write some poetry. Place them on your fridge, a magnetic board, a cookie sheet, or anything else you can find that is magnetic. Think of some more words you could add? You have been given an extra piece of magnet and blank paper to personalize your kits.
Some ideas for how to use your DIY Magnetic Poetry Kit:
- Check out a book on poetry to go along with your Take and Make Kit for inspiration!
- Write a poem with your family and/or friends. Take turns adding a word each until you’re satisfied.
- Make it into a game! Give each person participating a specific number of words (like 10 or 15). See what you all can come up with!
Show us what you created! Send us pictures at youthservices@balibrary.org.
 Youth Services Librarian Allison